
2nd Floor Renovation
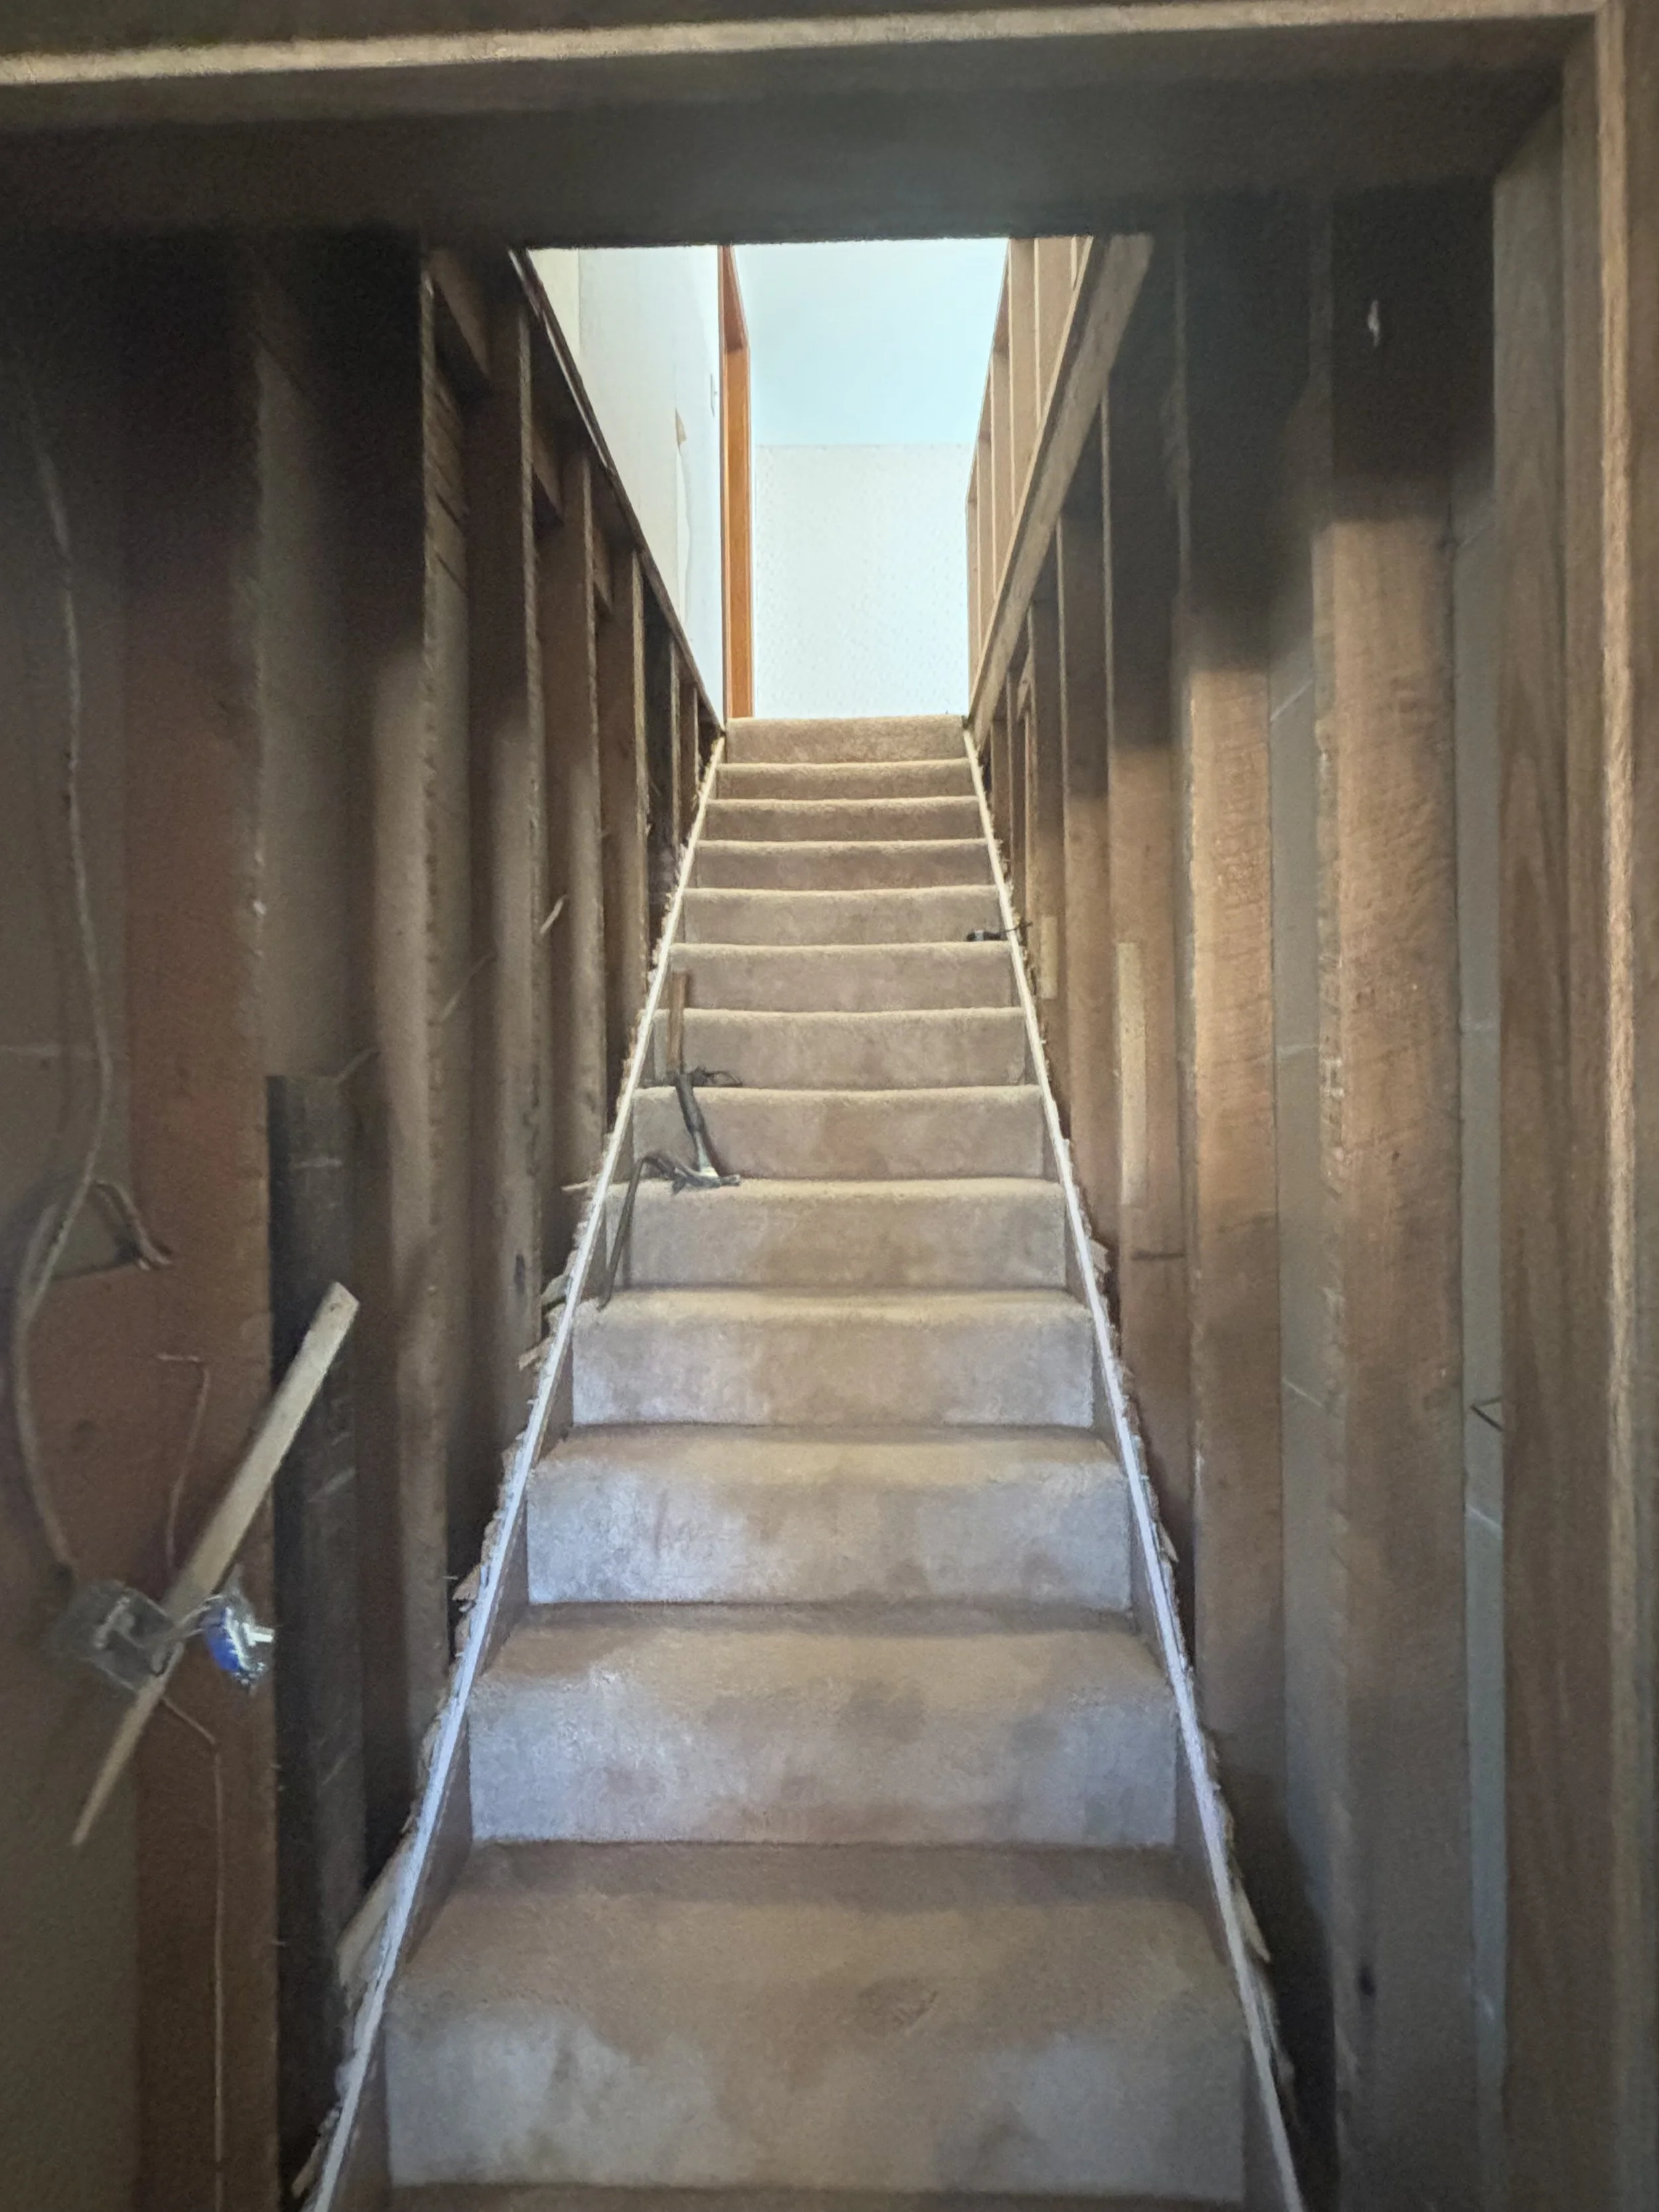
This was a big one. For context and clarity, this project began as a “let’s add a wall to our daughter’s room.” This is my home now, and it was my grandparents home for over 60 years prior. After about 1980, the upstairs was largely used for storage and was generally unused. The carpet was still in great shape, but the rooms didn’t fit with our needs. The most glaring need was a wall to separate the rooms. As you ascended the stairs, an open loft greeted you at the top with a large closet and a single light hanging over the stairwell. To the left was the only functional bedroom, and a “Hobbit room” was attached to this room as you walked through it. The layout needed changed dramatically to accommodate a girl and a boy. Also, the home had 2 bathrooms, both on the 1st floor.
Spoiler alert: almost a year later, the project was completed. Why? I was working full time and coaching in my “free time”. Anyhow, off we go!
On November 2, 2024, We finally removed all the dark wood paneling and plaster/lathe. The kids helped (kind of) and this is what we were left with. To my surprise and delight, I discovered that the 2nd floor joists were a full 12” to 18” ABOVE the first floor ceiling.
This was a pivotal discovery.
What I saw was boundless opportunity to install new lighting, run ethernet, and, as we’ll see, plumbing. At the time, remember, I was just going to redo the stairwell and add a wall that extended up to the ceiling to close off my daughter’s room. What transpired was something much bigger.
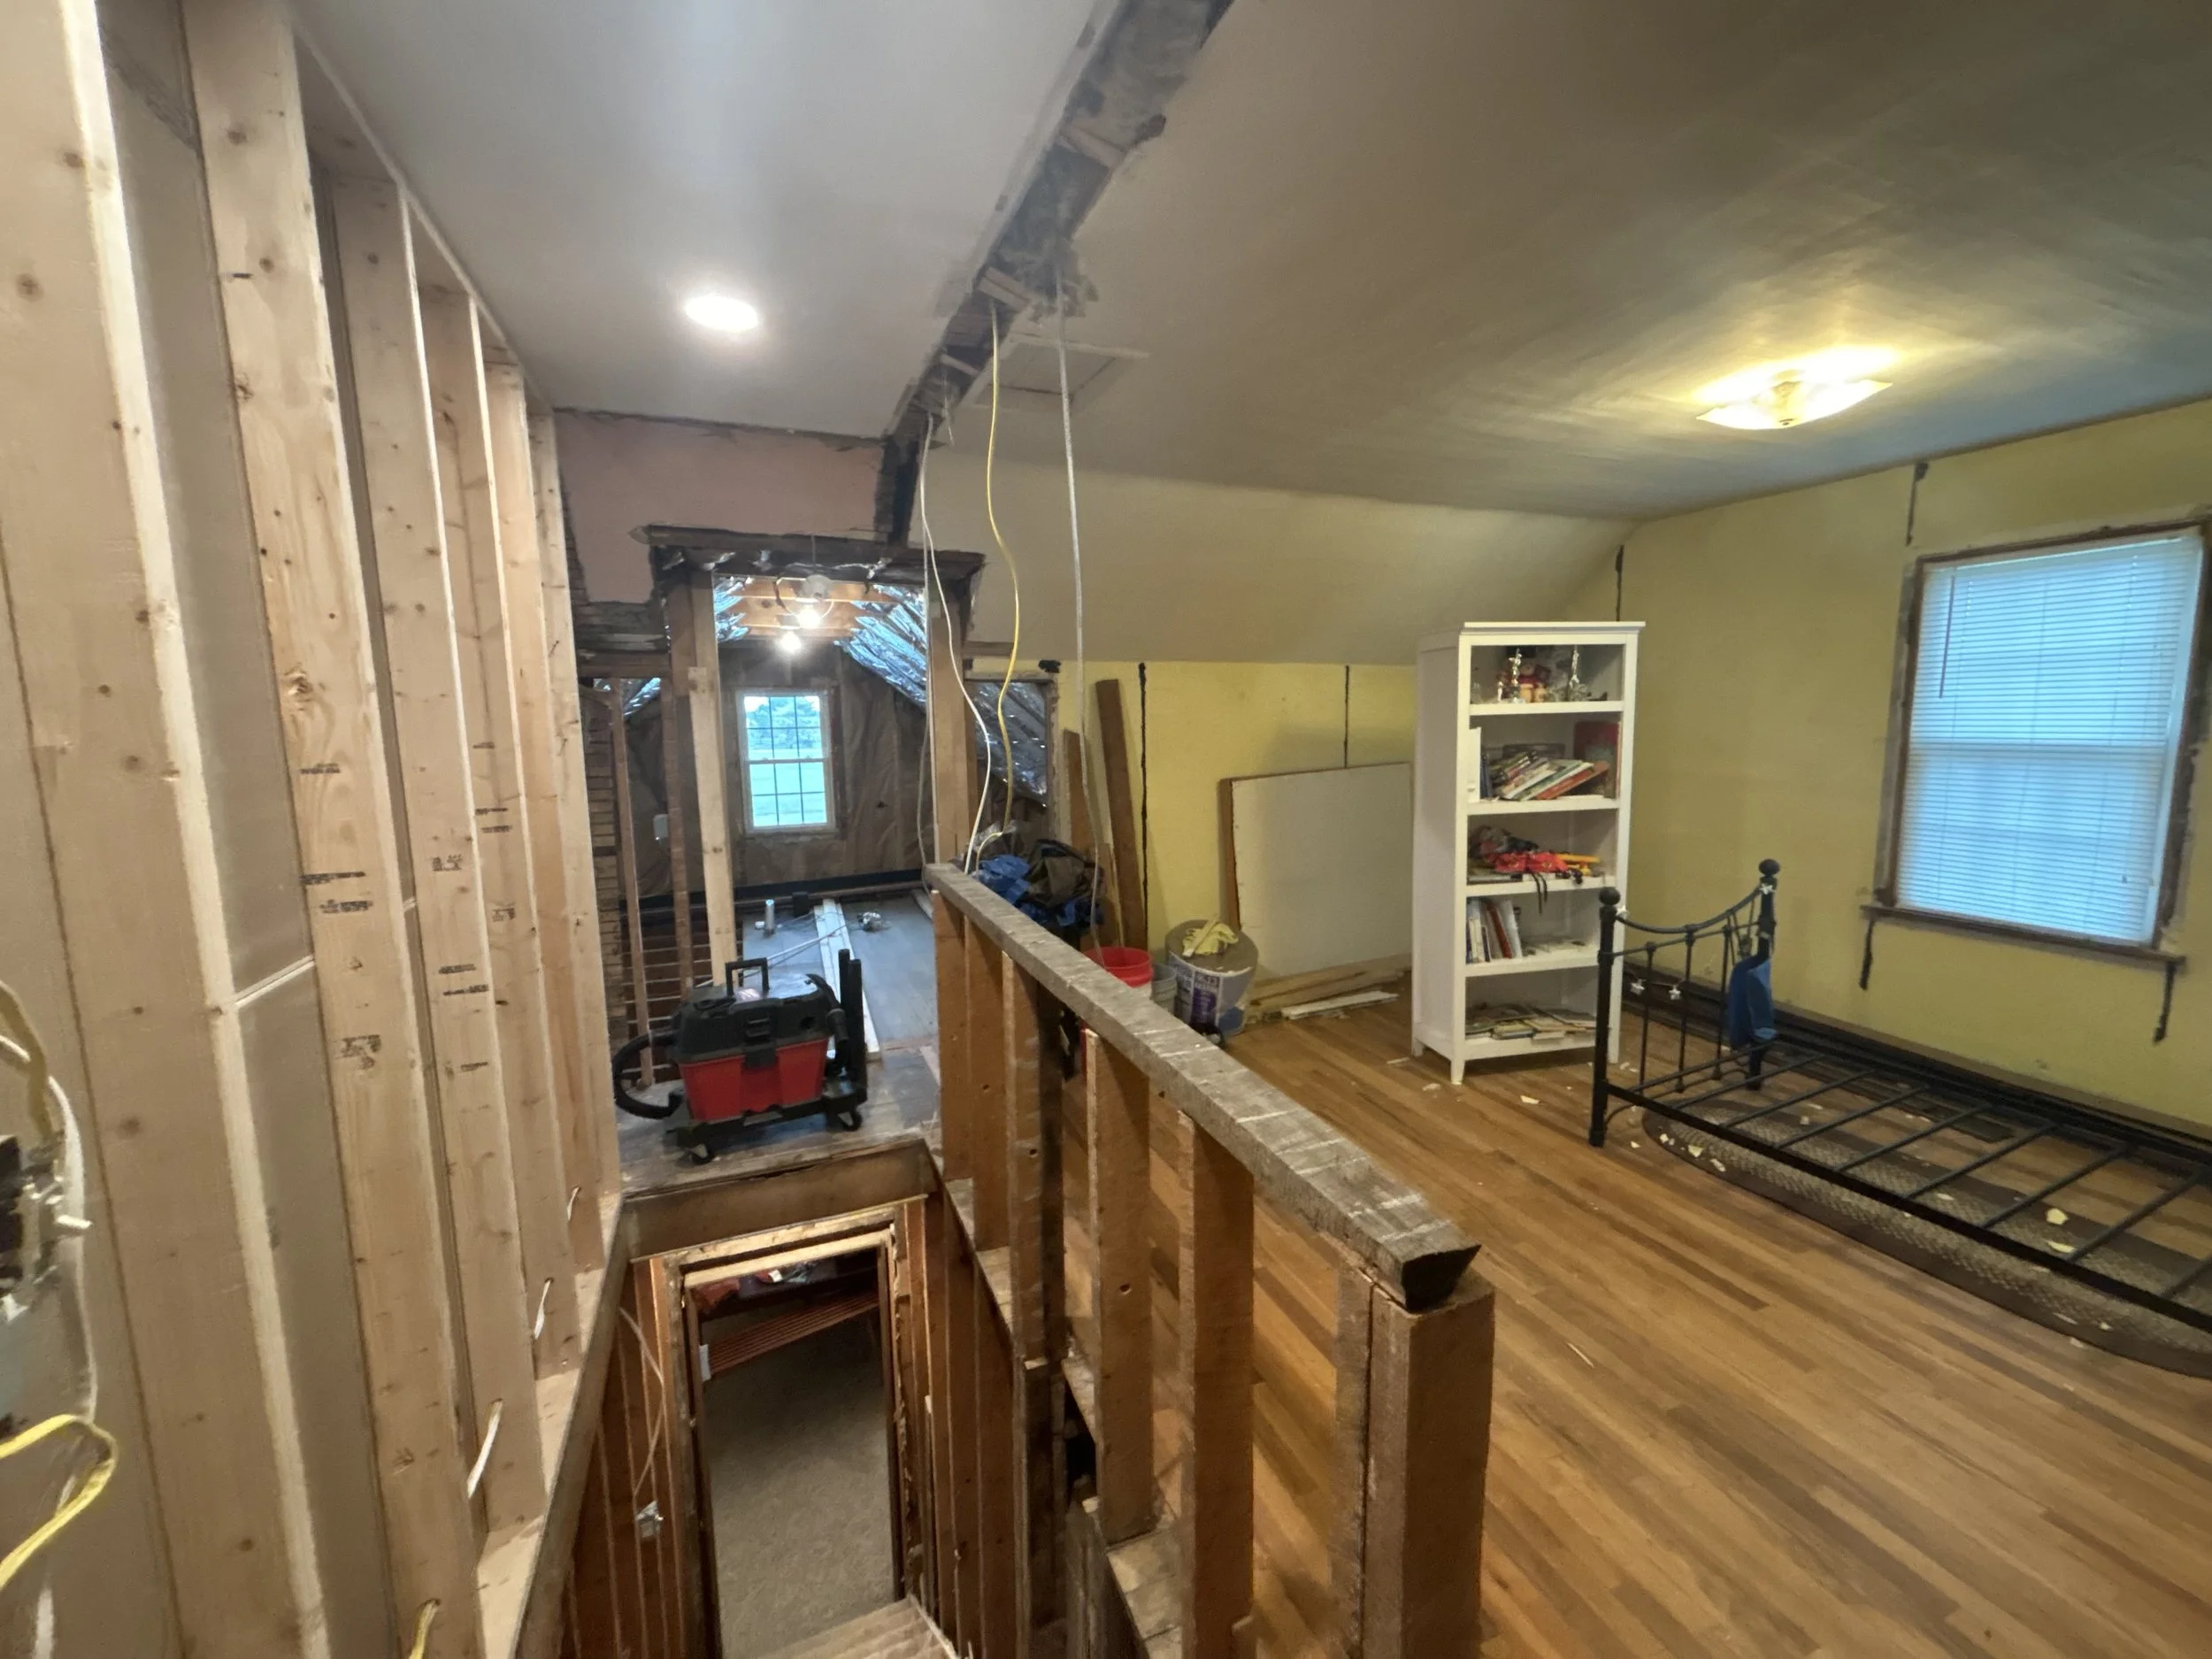
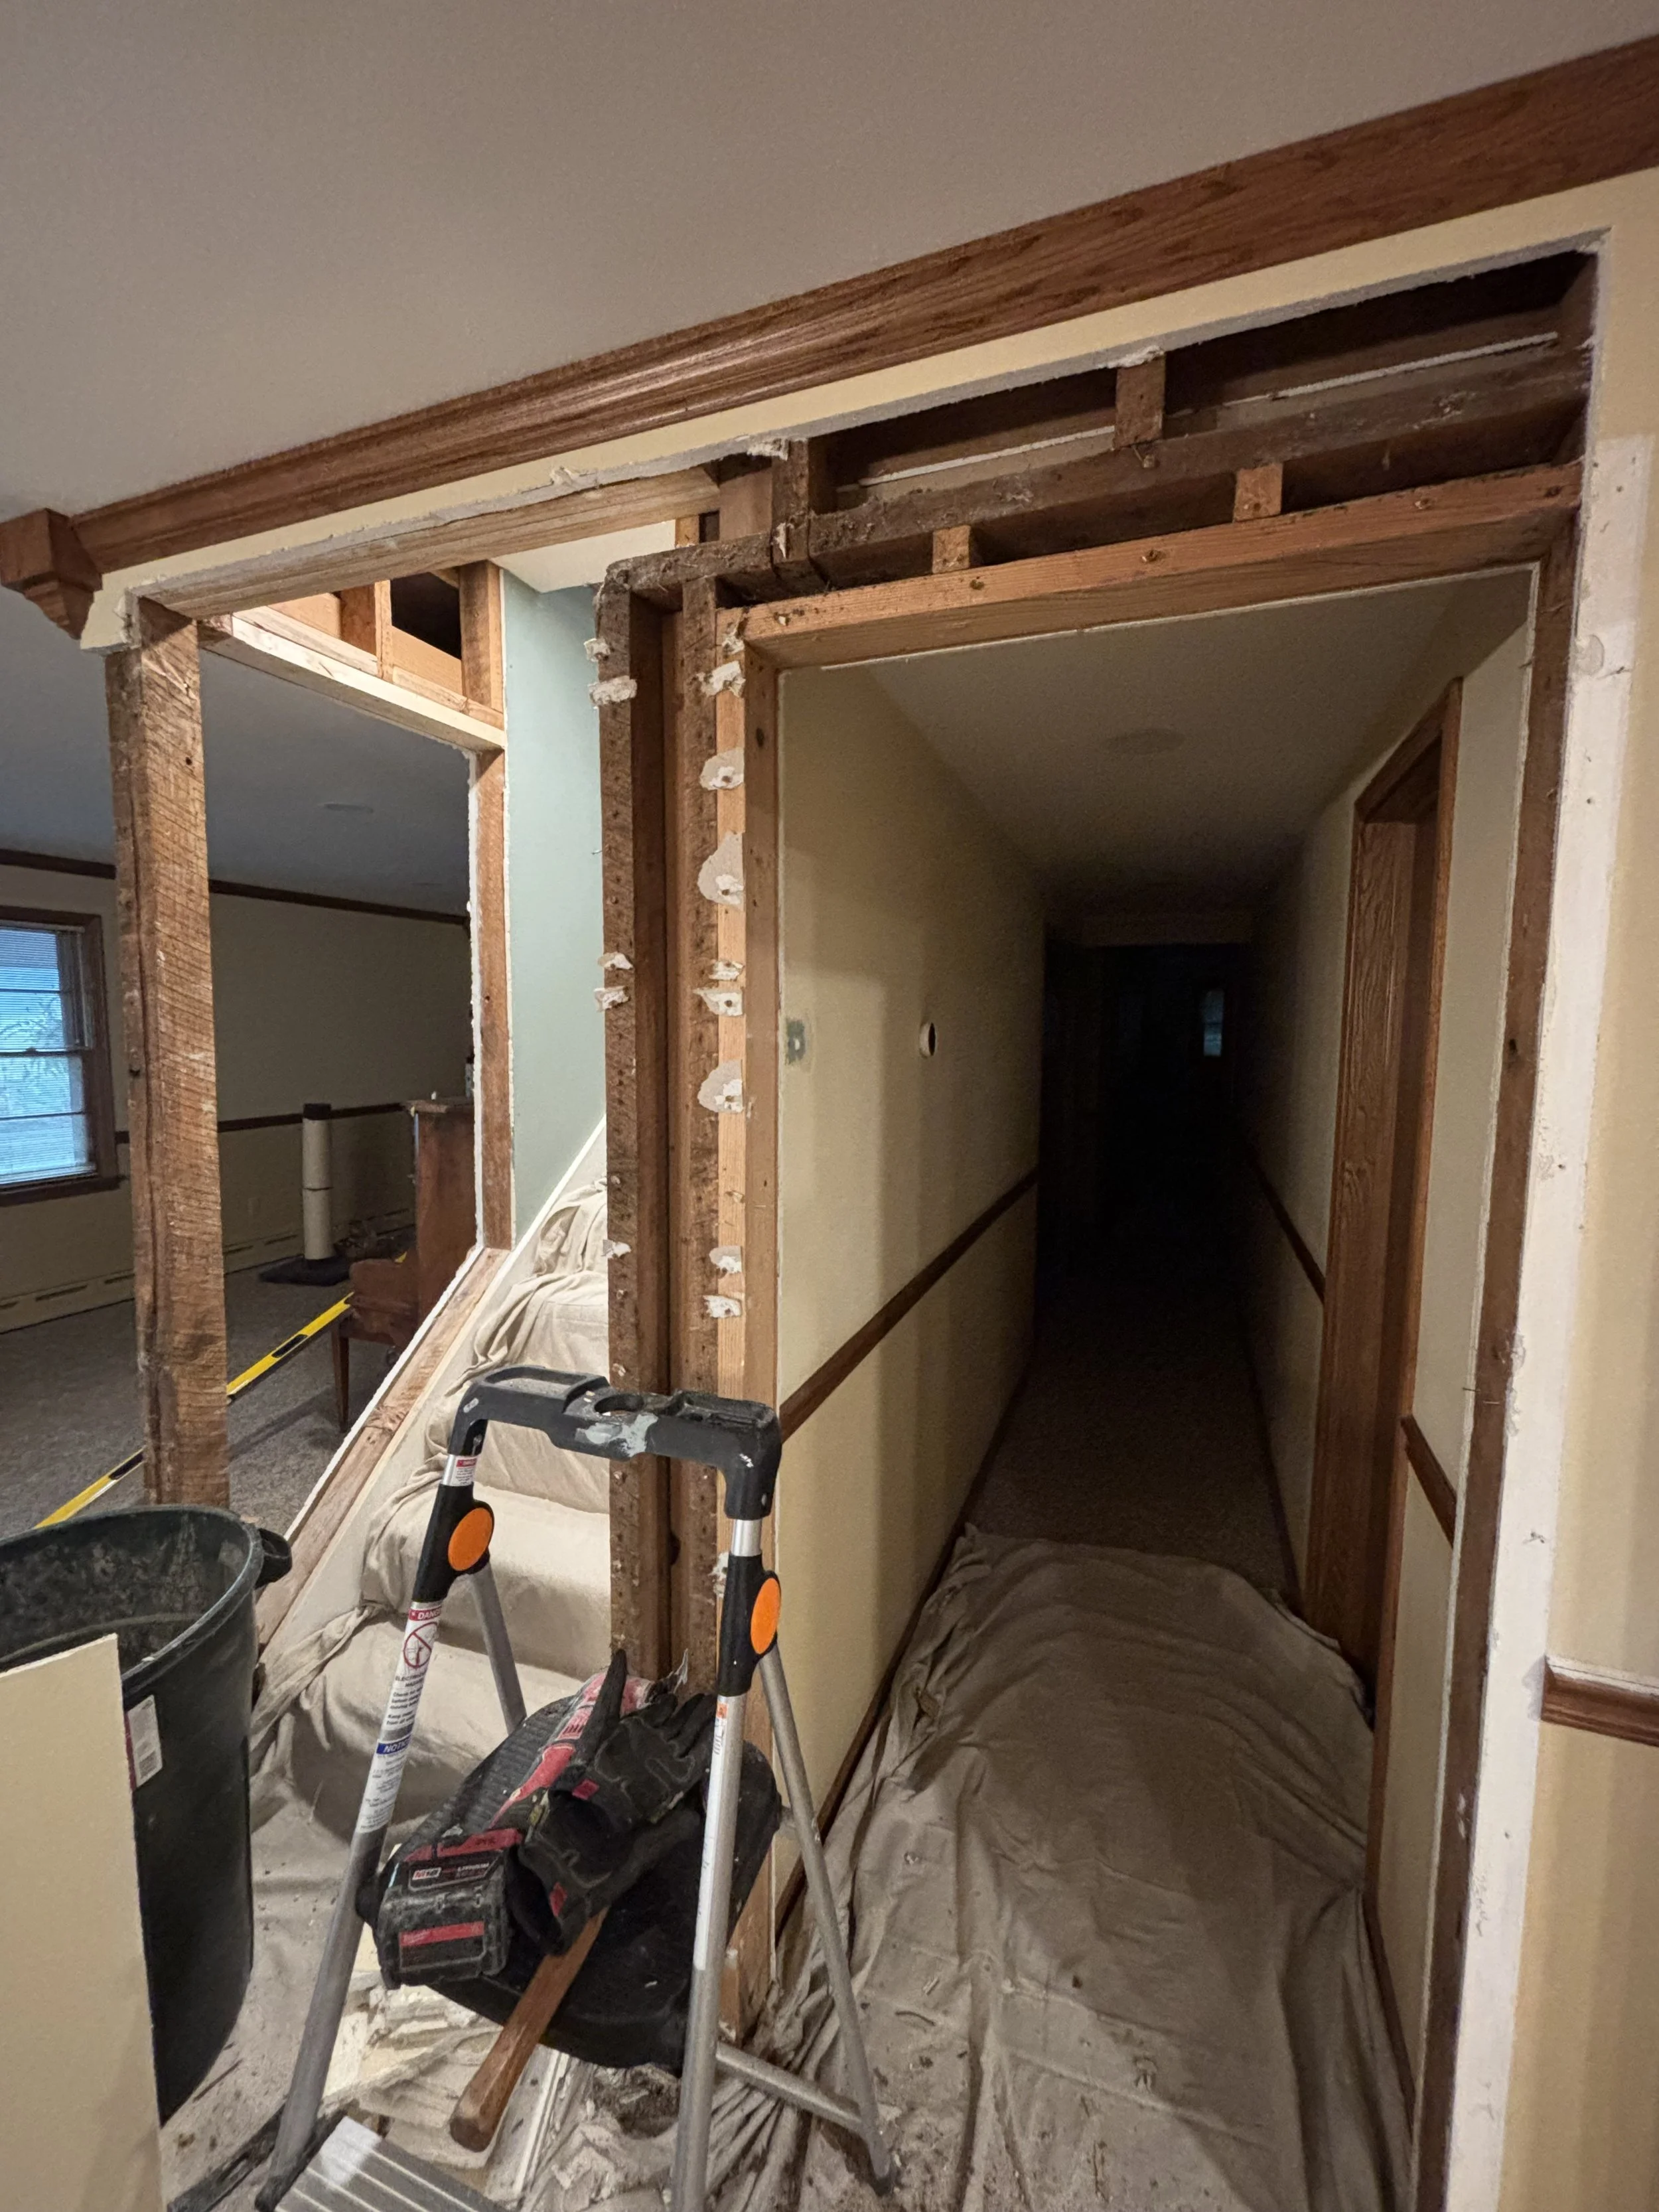
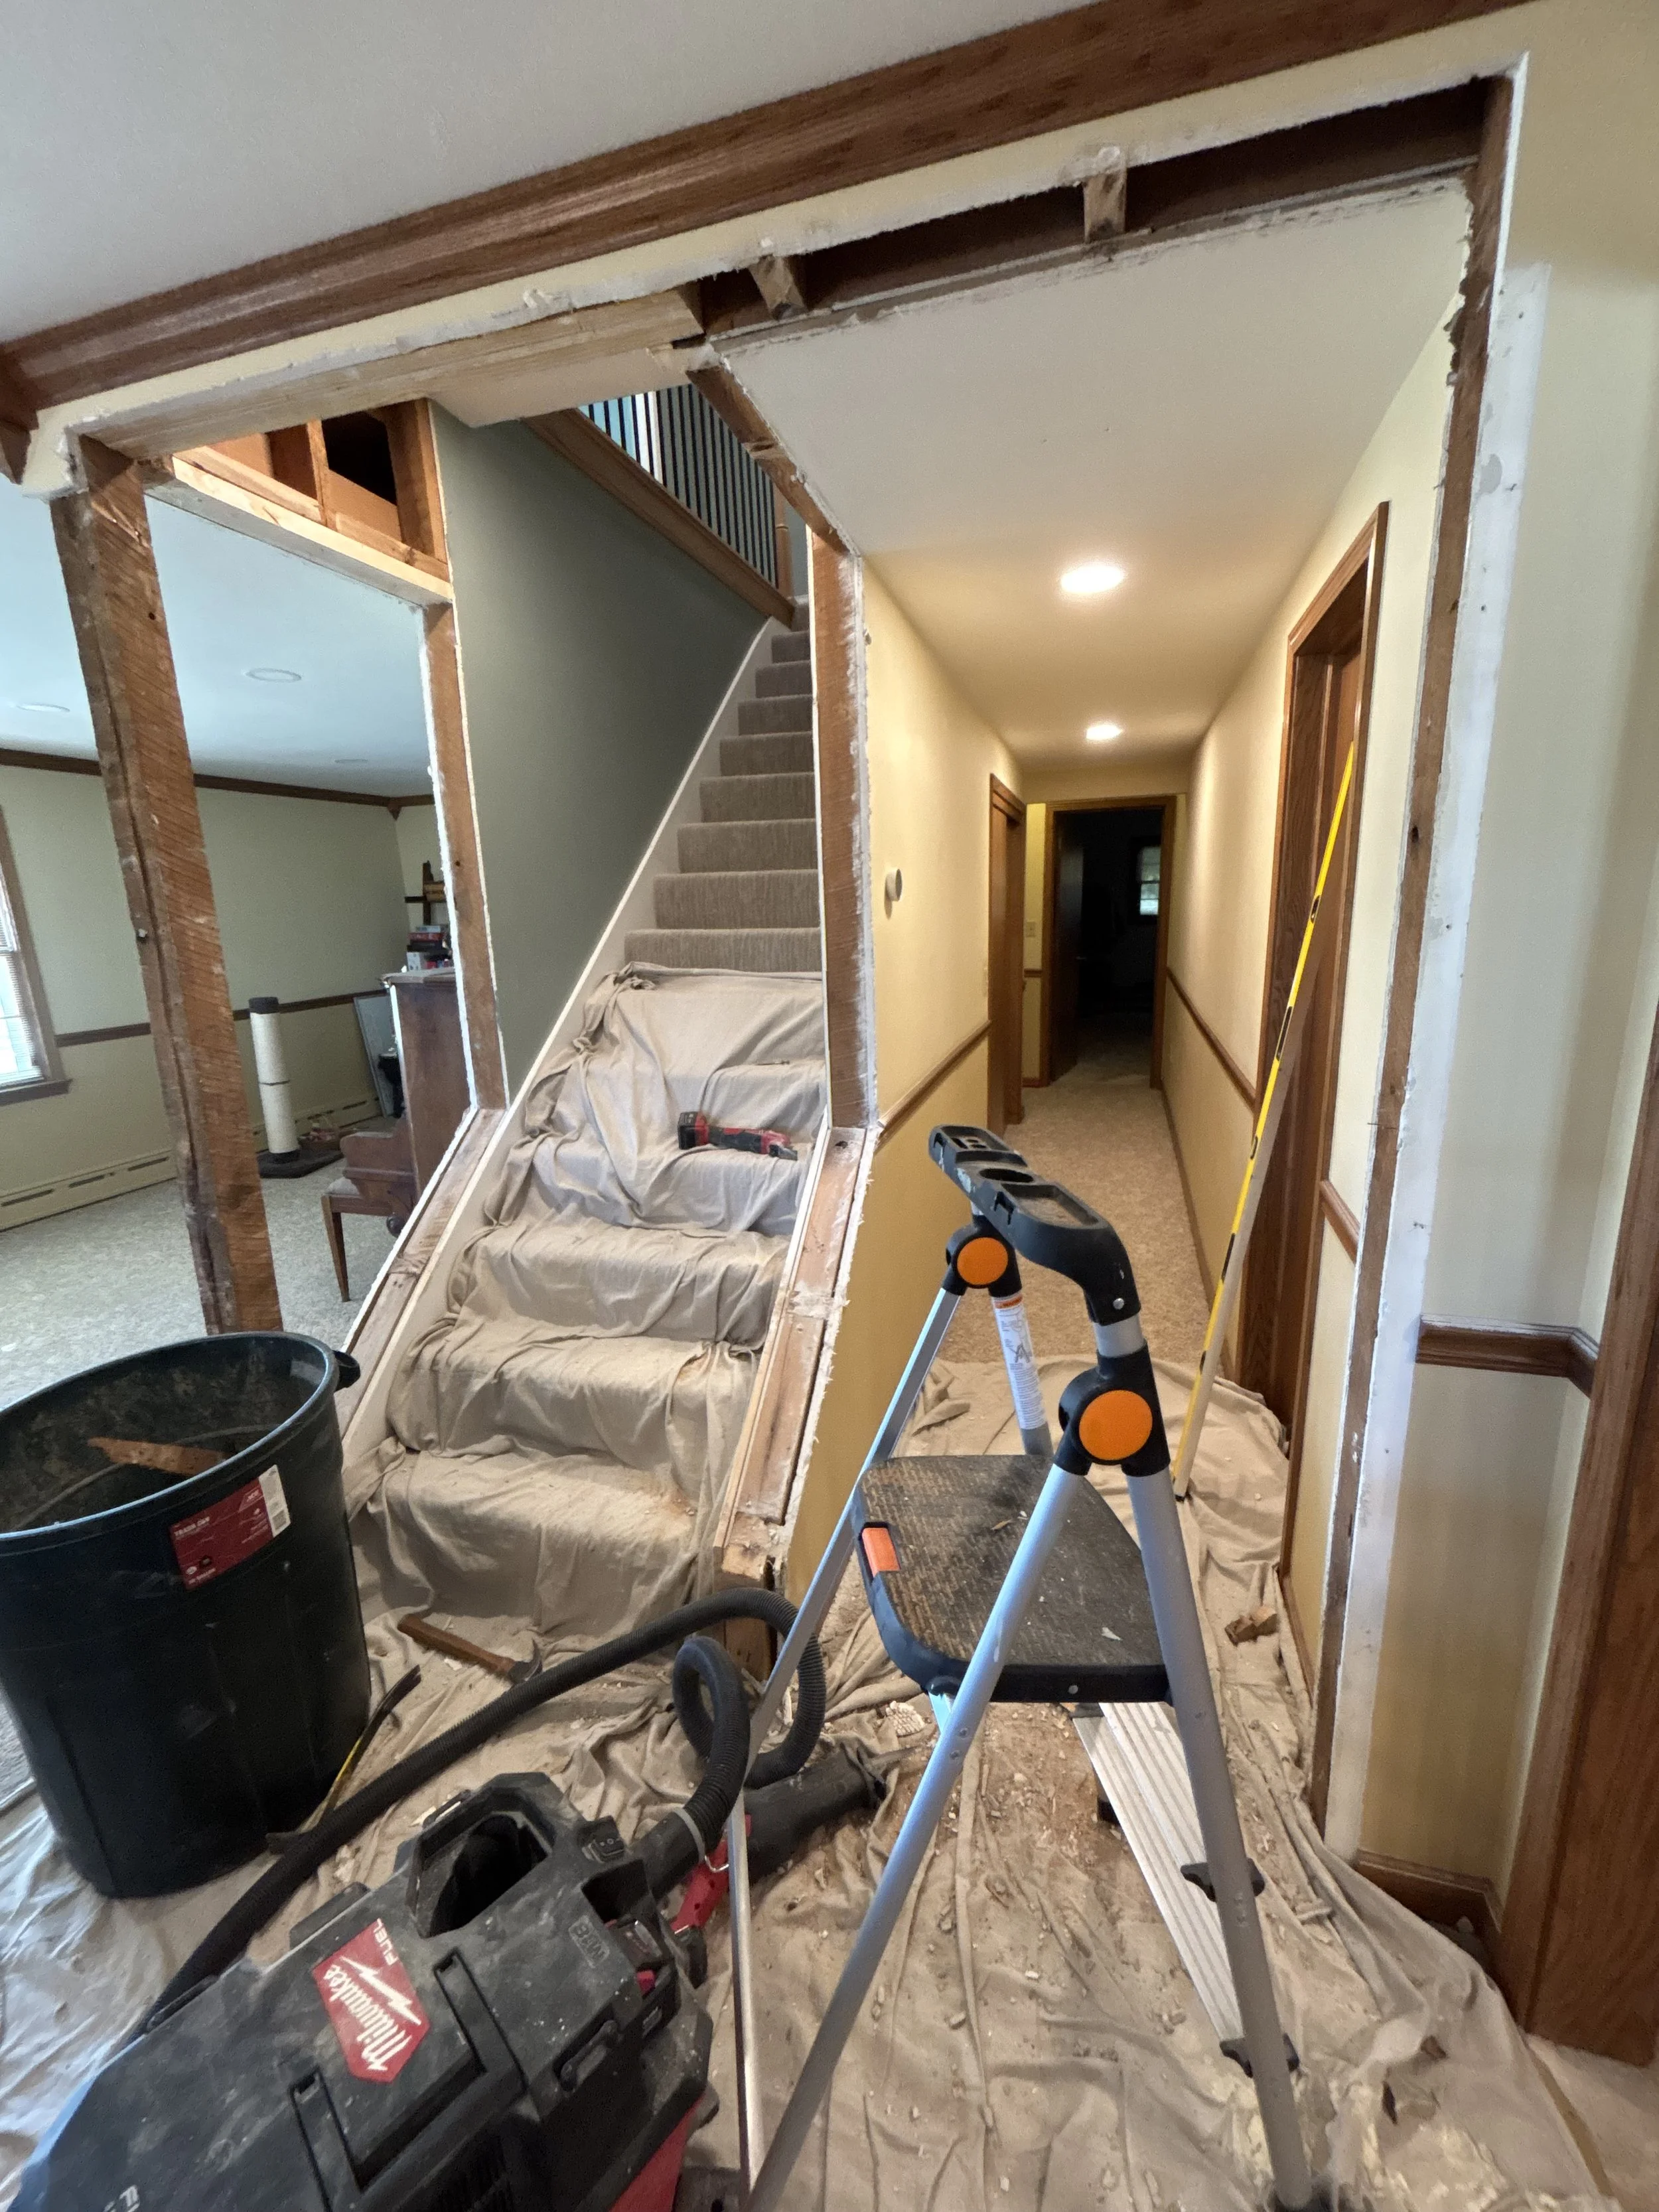
Fast forward three weeks, and you start to see the renovation taking shape. The wall is now installed along the left side of the above picture, and the existing wall was removed from the right side, essentially flipping the previous orientation. Above the stairs there was a pass-through closet that was removed to reveal an entry point into the far “hobbit room”. It got its name because the ceilings were about 6’3” and the previous entry into the room was the same height as the gable wall. You can kind of see the outline of the old entry on the right side of the new opening into the room. In order to make all this happen, I first needed to verify if the roof would allow for me to take out that existing wall (it did because the rafters ran parallel to it), and secondly I needed to cut a taller opening into this room. Luckily for me, the far room had a dormer-type roof that terminated into the gable wall. After a few bracing blocks installed, I was able to cut the roof rafters and reposition their load to run across and down the double studs of the new opening. So far so good.
Now, what to do with this new little room on the far end…Another play room? A bedroom?…Or maybe a bathroom?
A bathroom would be cool. We have two downstairs, but our kids are getting old enough to not want to share bathrooms during a school morning. Can it be done? Well, the difference in height from the downstairs ceiling and the joists was about 14”. I would have plenty of room for fall on my plumbing, but there’s no water lines or existing plumbing anywhere near here, so I’d need to run them down to the crawlspace in a very strategic location.
After talking with a plumber friend, he suggested tying into the existing downstairs bathroom. I balked at this idea because I eventually want to renovate both of those. What were my options? After sitting on the stairs contemplating my life choices, it hit me like you see in the movies. I slowly traced the path with my finger and grinned like a child. I could run the plumbing down along the already exposed stairwell! The answer was in front of me from the jump. With a renewed sense of purpose and 234,894 trips to the local Menards, I had the plumbing routed across the room, above the downstairs hall, down the stairwell, and into the crawlspace to meet up with the main trunk only 6’ from where it emerged into the space. Neat! Water lines were pretty straightforward, as I tied into our existing shower lines under the closest bathroom in the crawlspace.
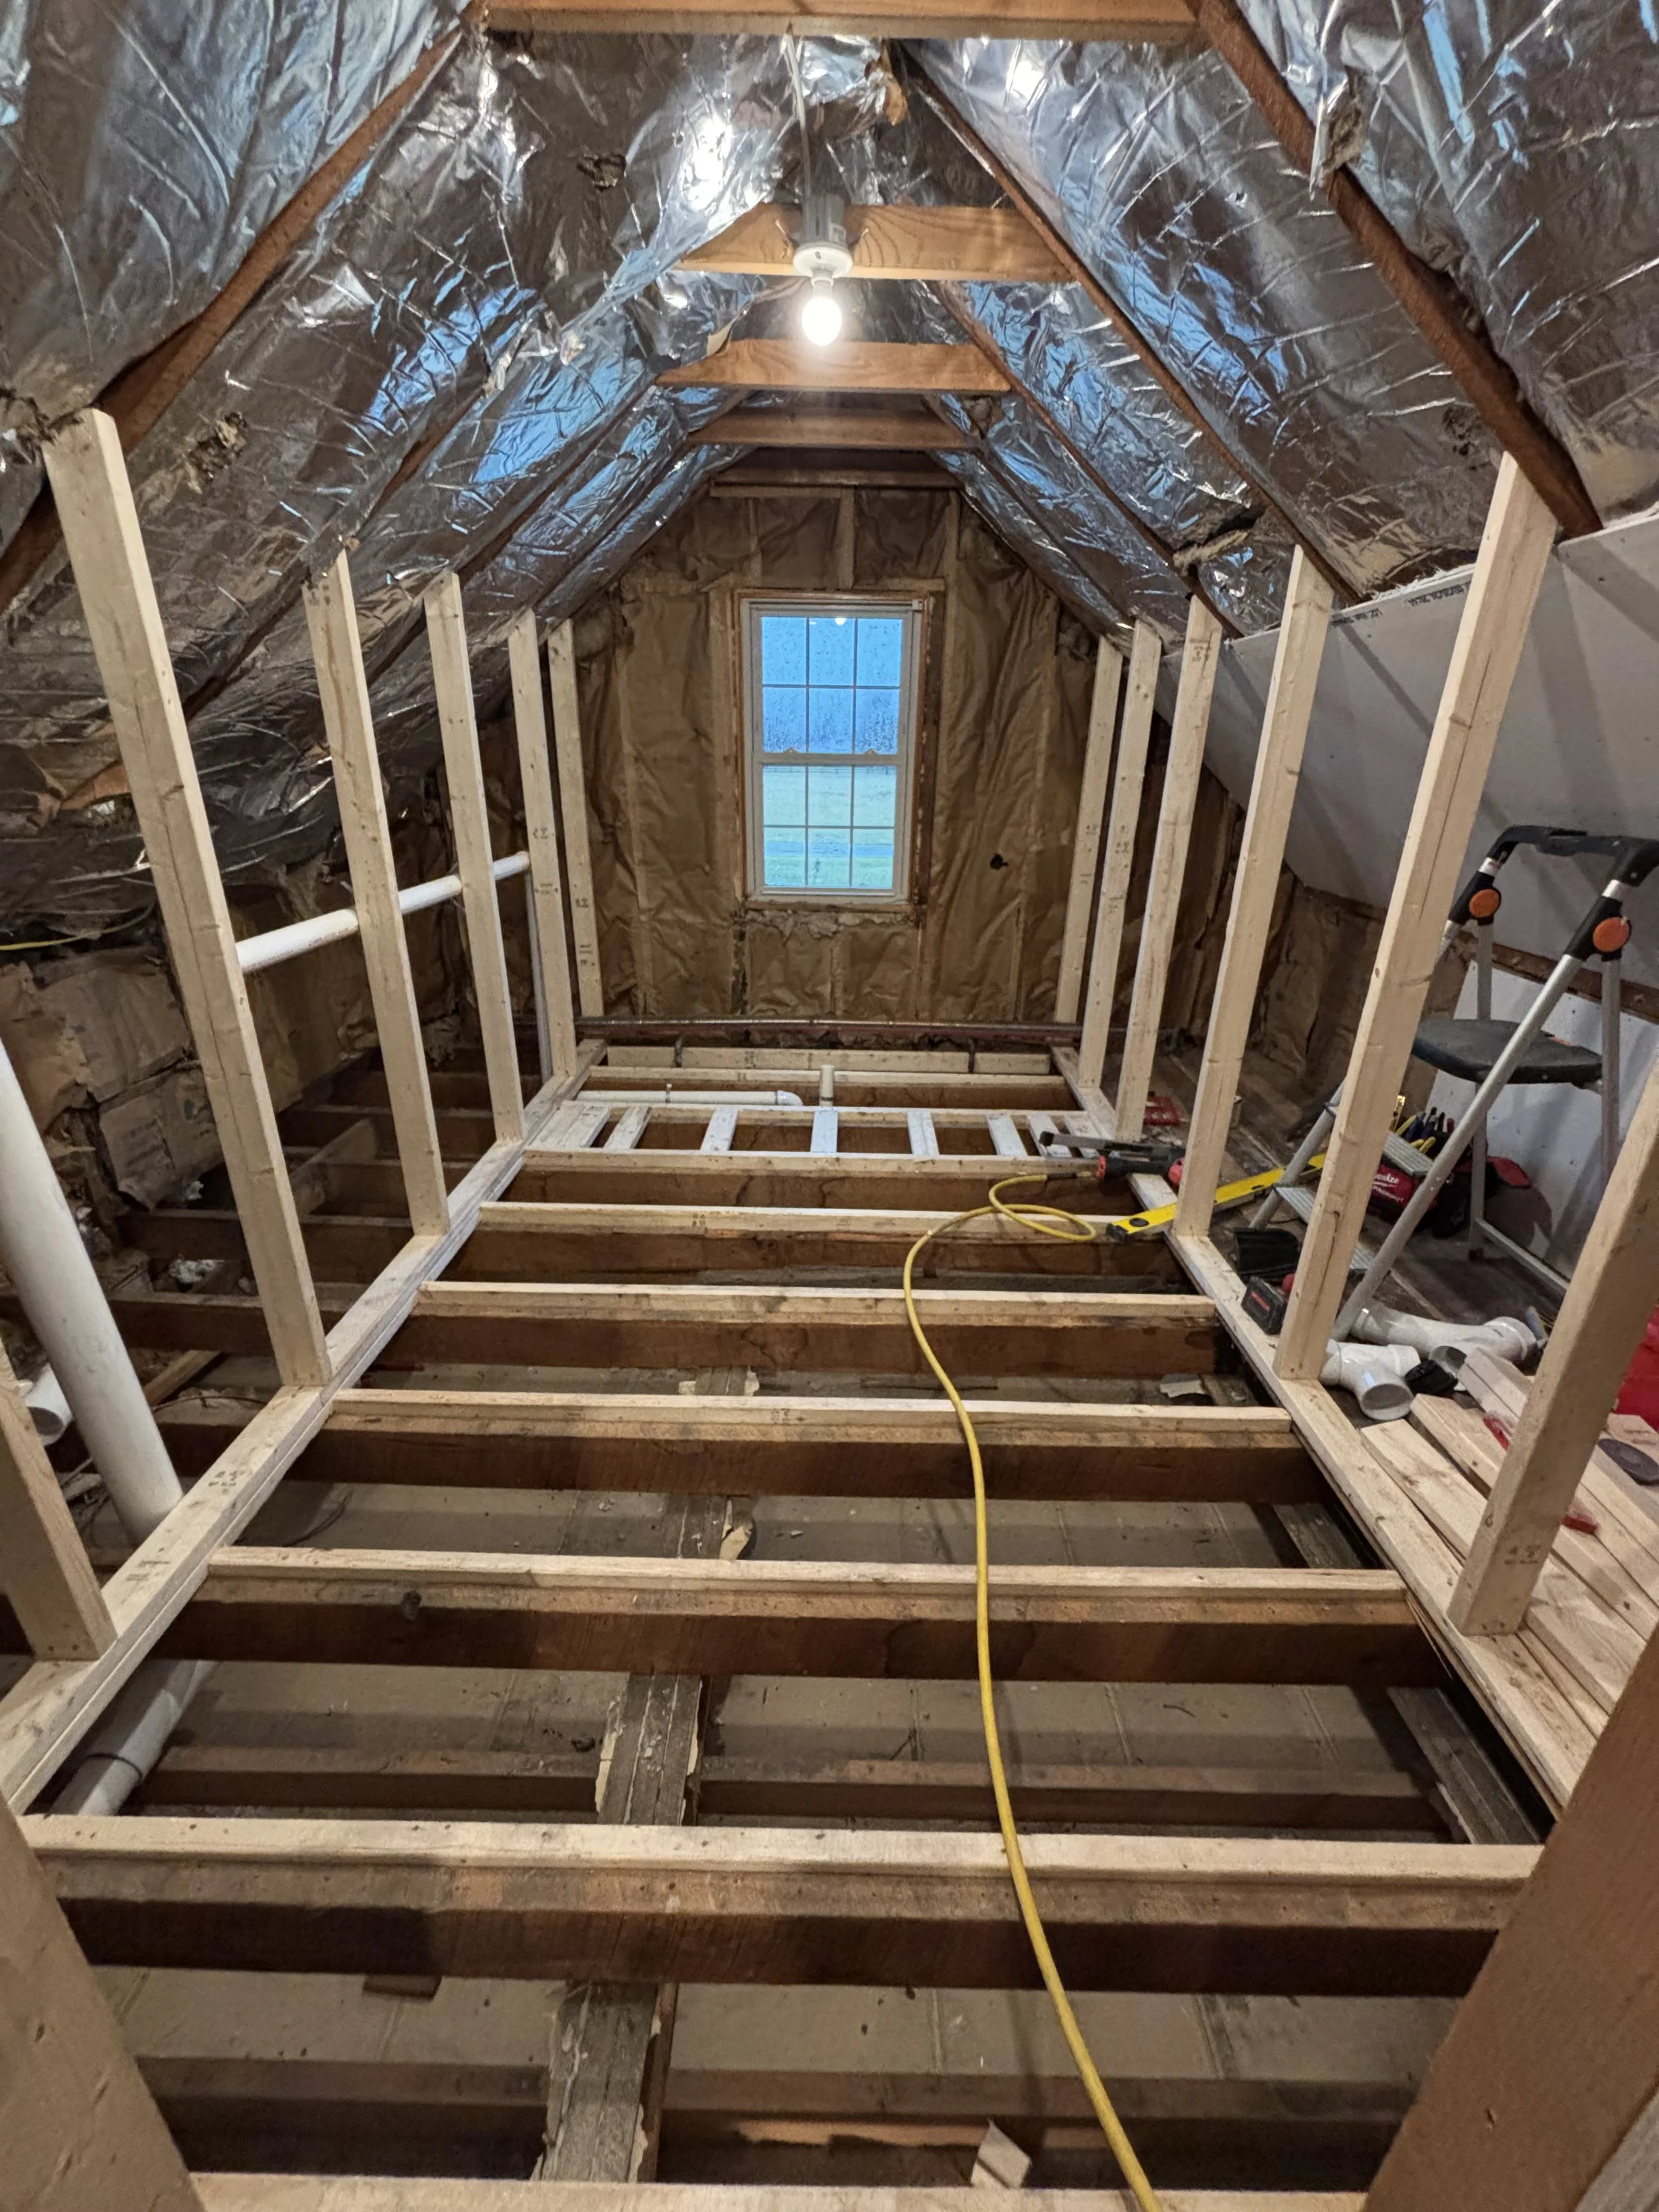

A bathroom was taking shape, but A LOT needed done to get this bathroom across the finish line. First, the floors in this room were about 1.75” out of level, so I sistered up new joists to level the floor. Also, the ceiling would need raised to be functional. I cut the collar ties and moved them up a bit for some head-height relief. YOU SHOULDN’T CUT COLLAR TIES, JORDAN! I landed the rafters onto a stud on each side that ran to the floor. It’s a small room, and it’ll be fine. The roof won’t cave in, I promise.
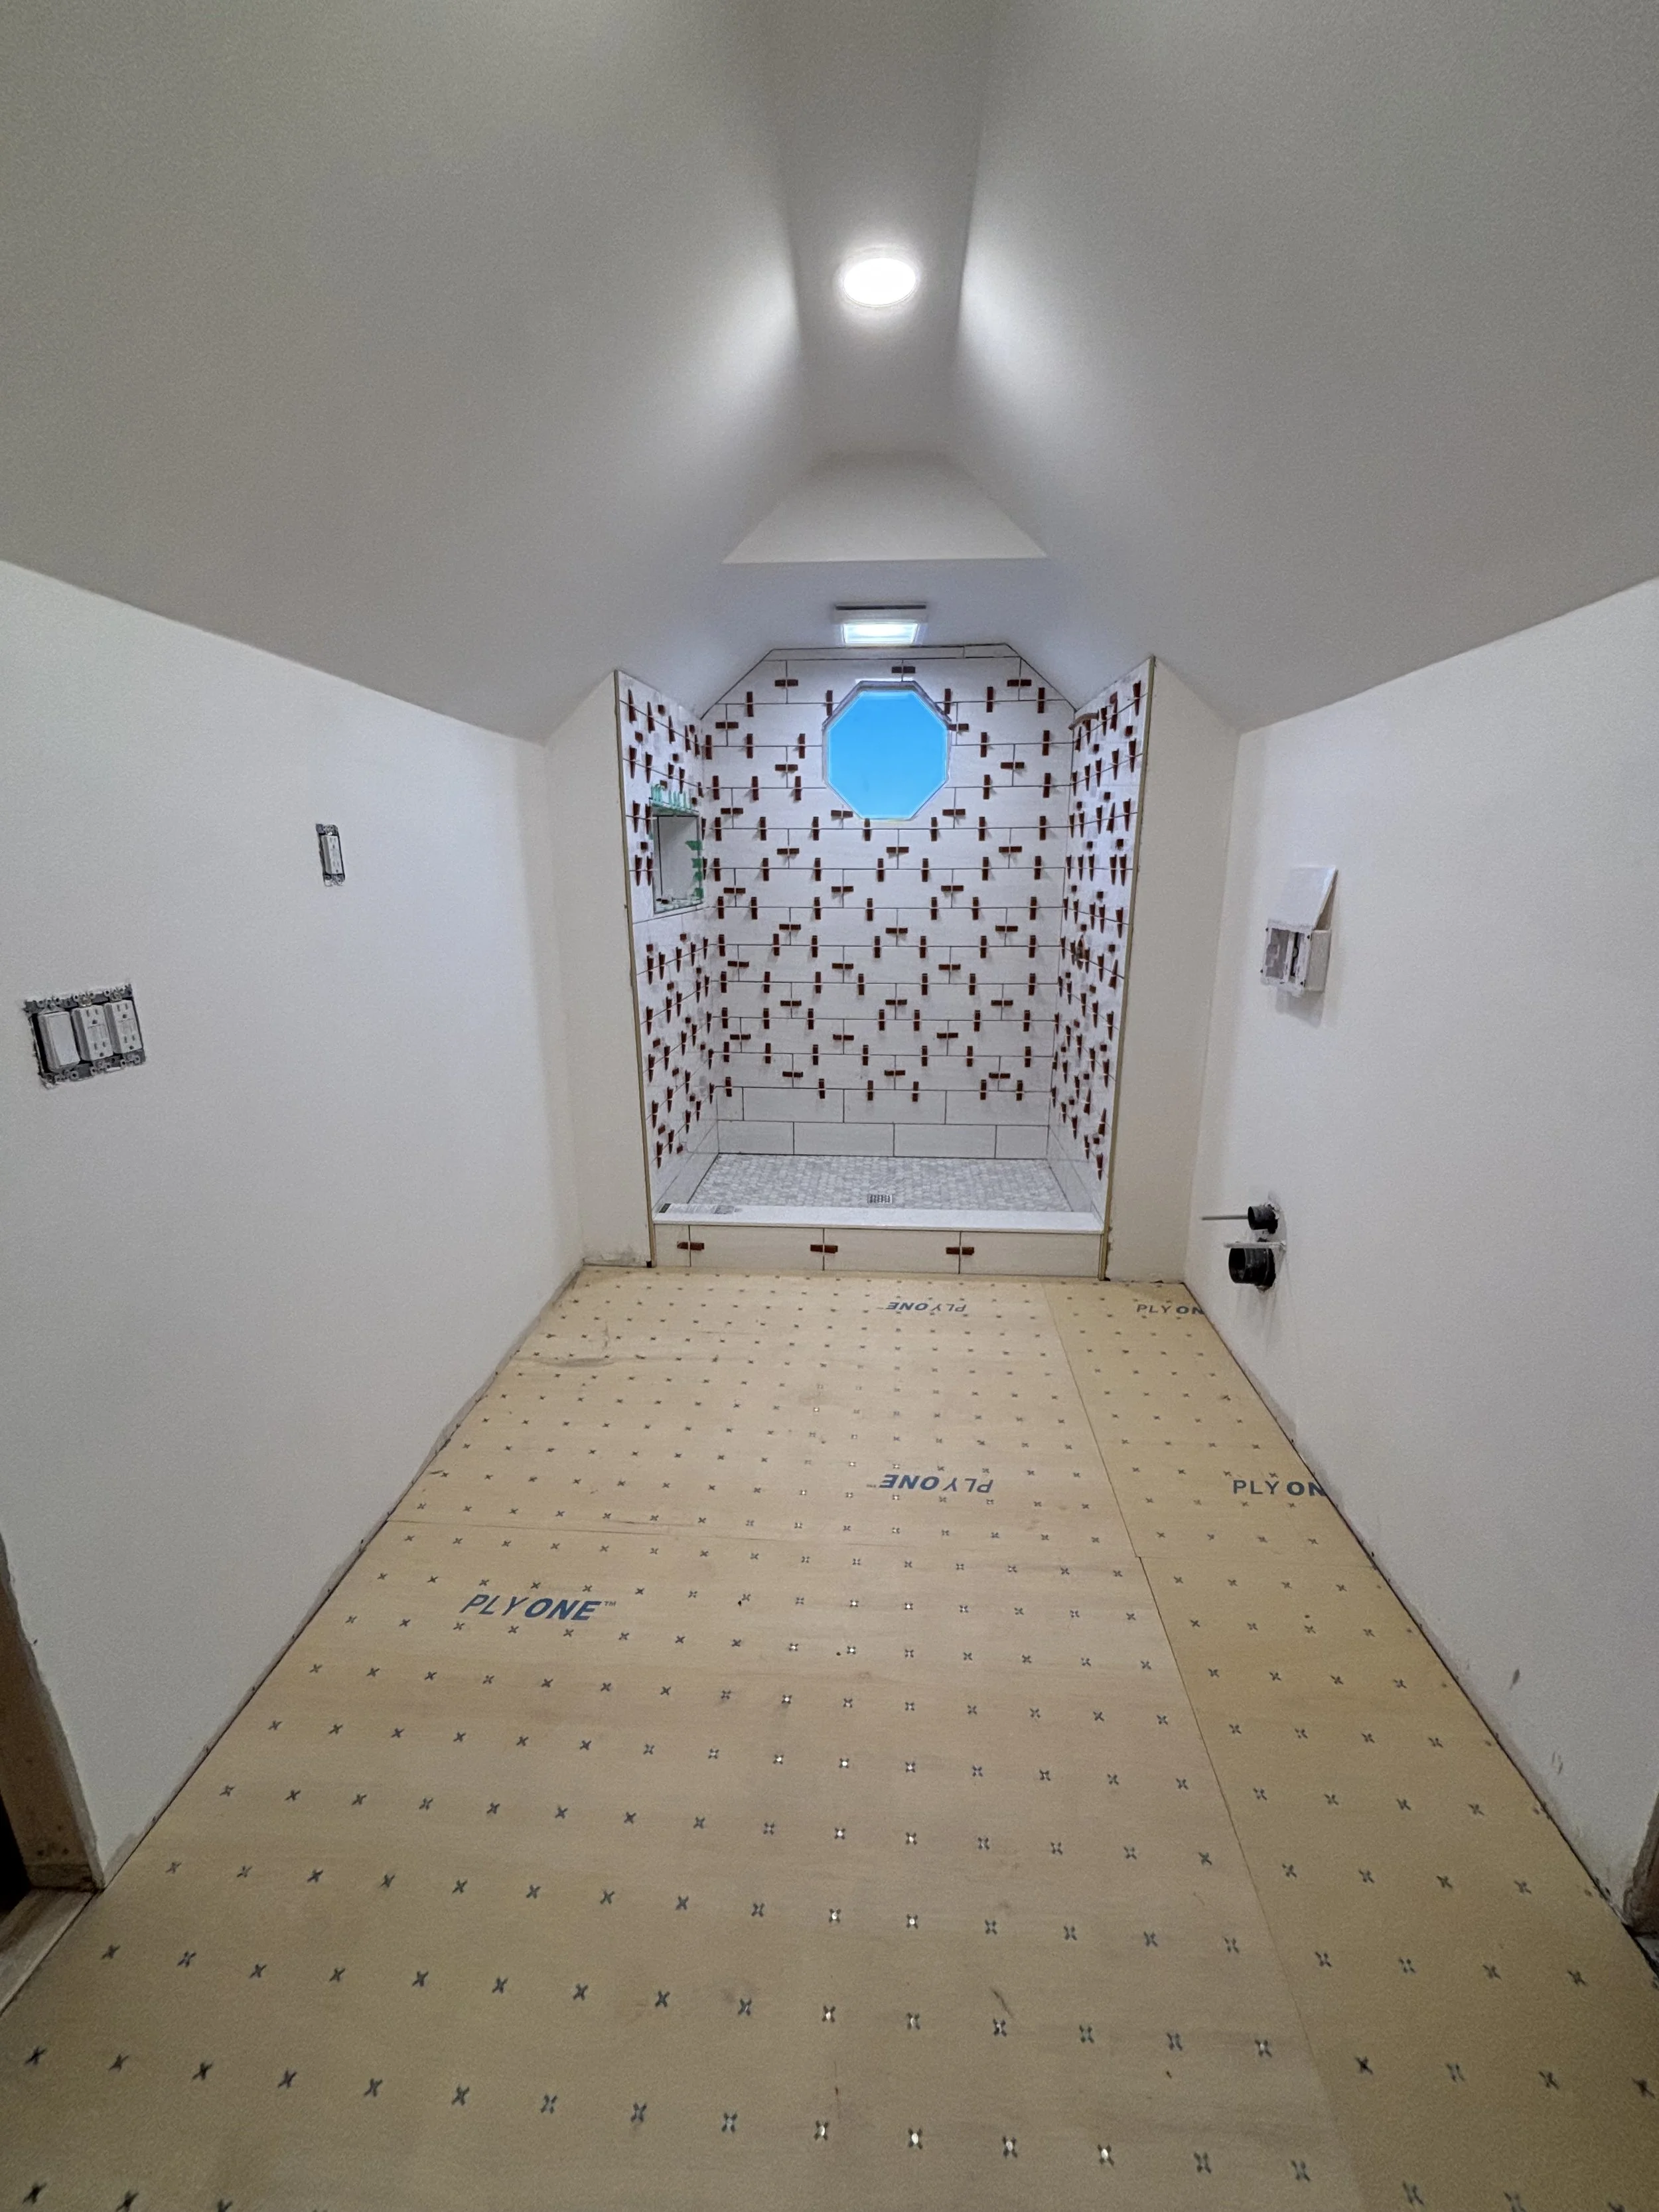
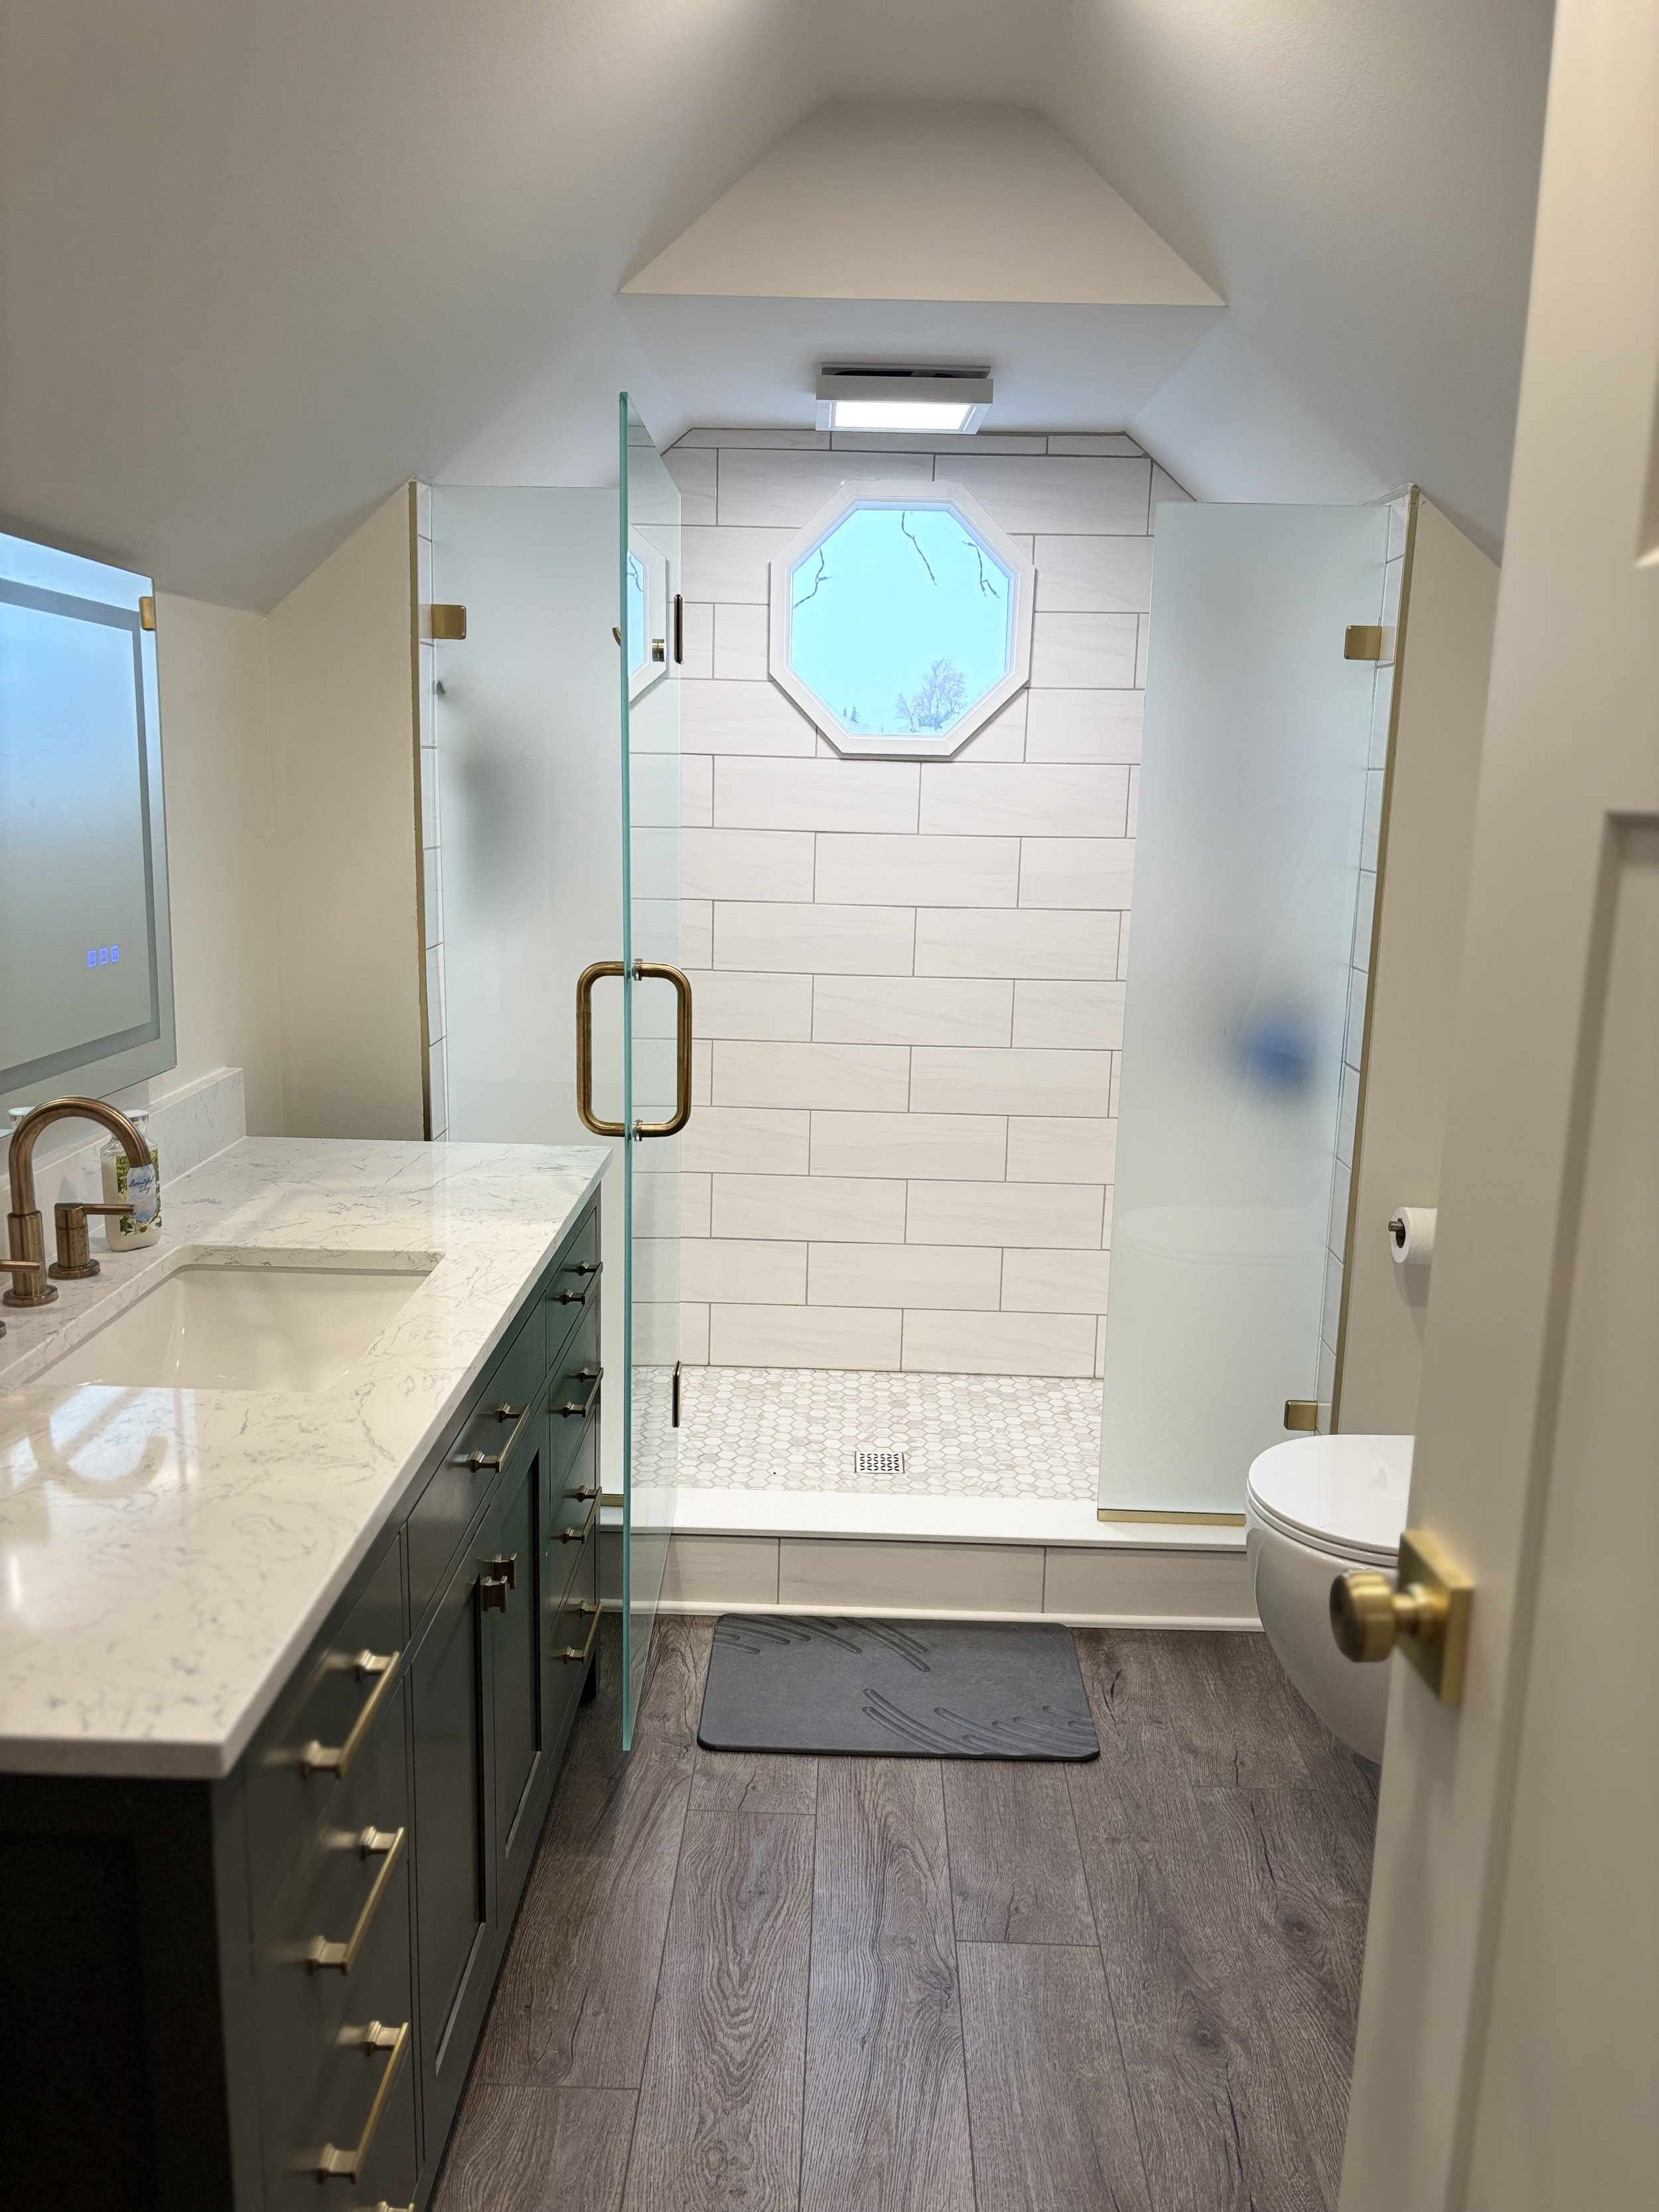
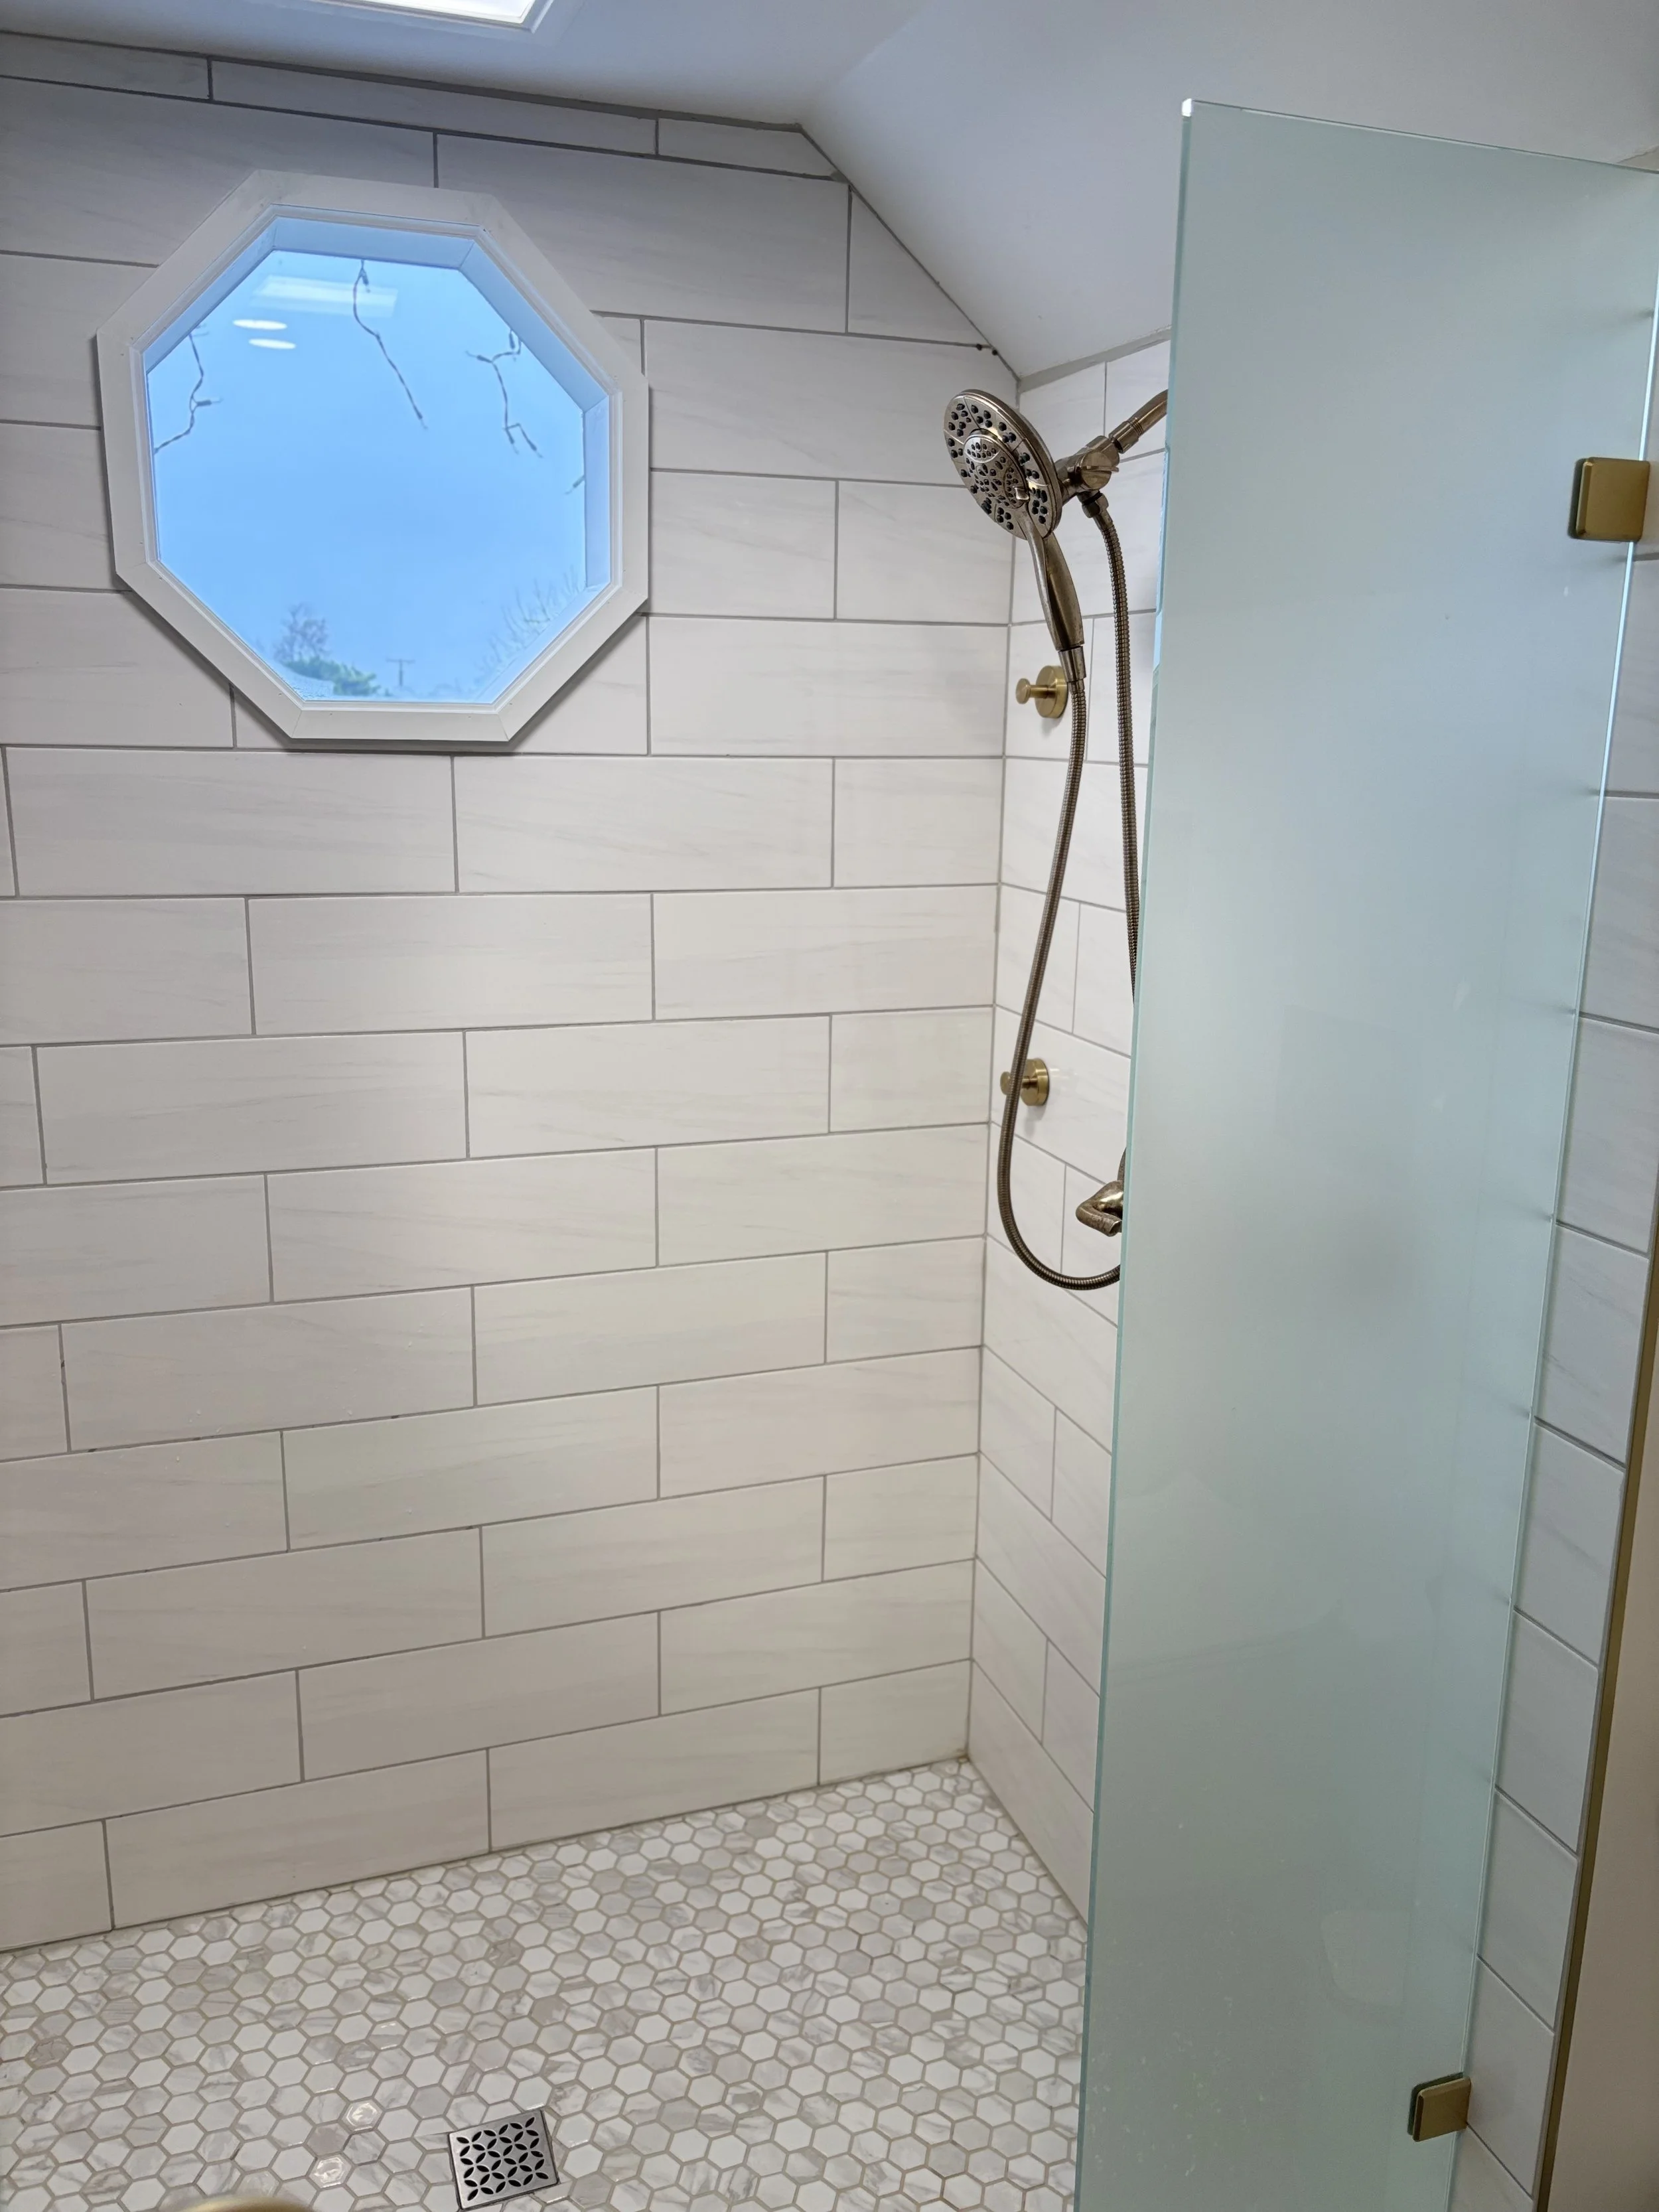
I wanted the shower along the back wall, but see that existing window there on the left? Yeah, that guy is not going to work in a shower. So, I needed to take it out and redo the siding. The entire upstairs would be too dark without that window, though. No matter, let’s just get an octagonal window and Bob’s your uncle. For those that don’t enjoy installing J mold for siding, you may not want to go with this shape of window. Golly was it fun. Regardless, the old window and leaky sill was removed, fresh blocking and sheathing was installed, the new window was installed, and the siding went up. But wait. We need to vent the shower. Where will that go? See where I left the ceiling lower? The vent goes into the top of the gable of the roof there, and it works like a dream.
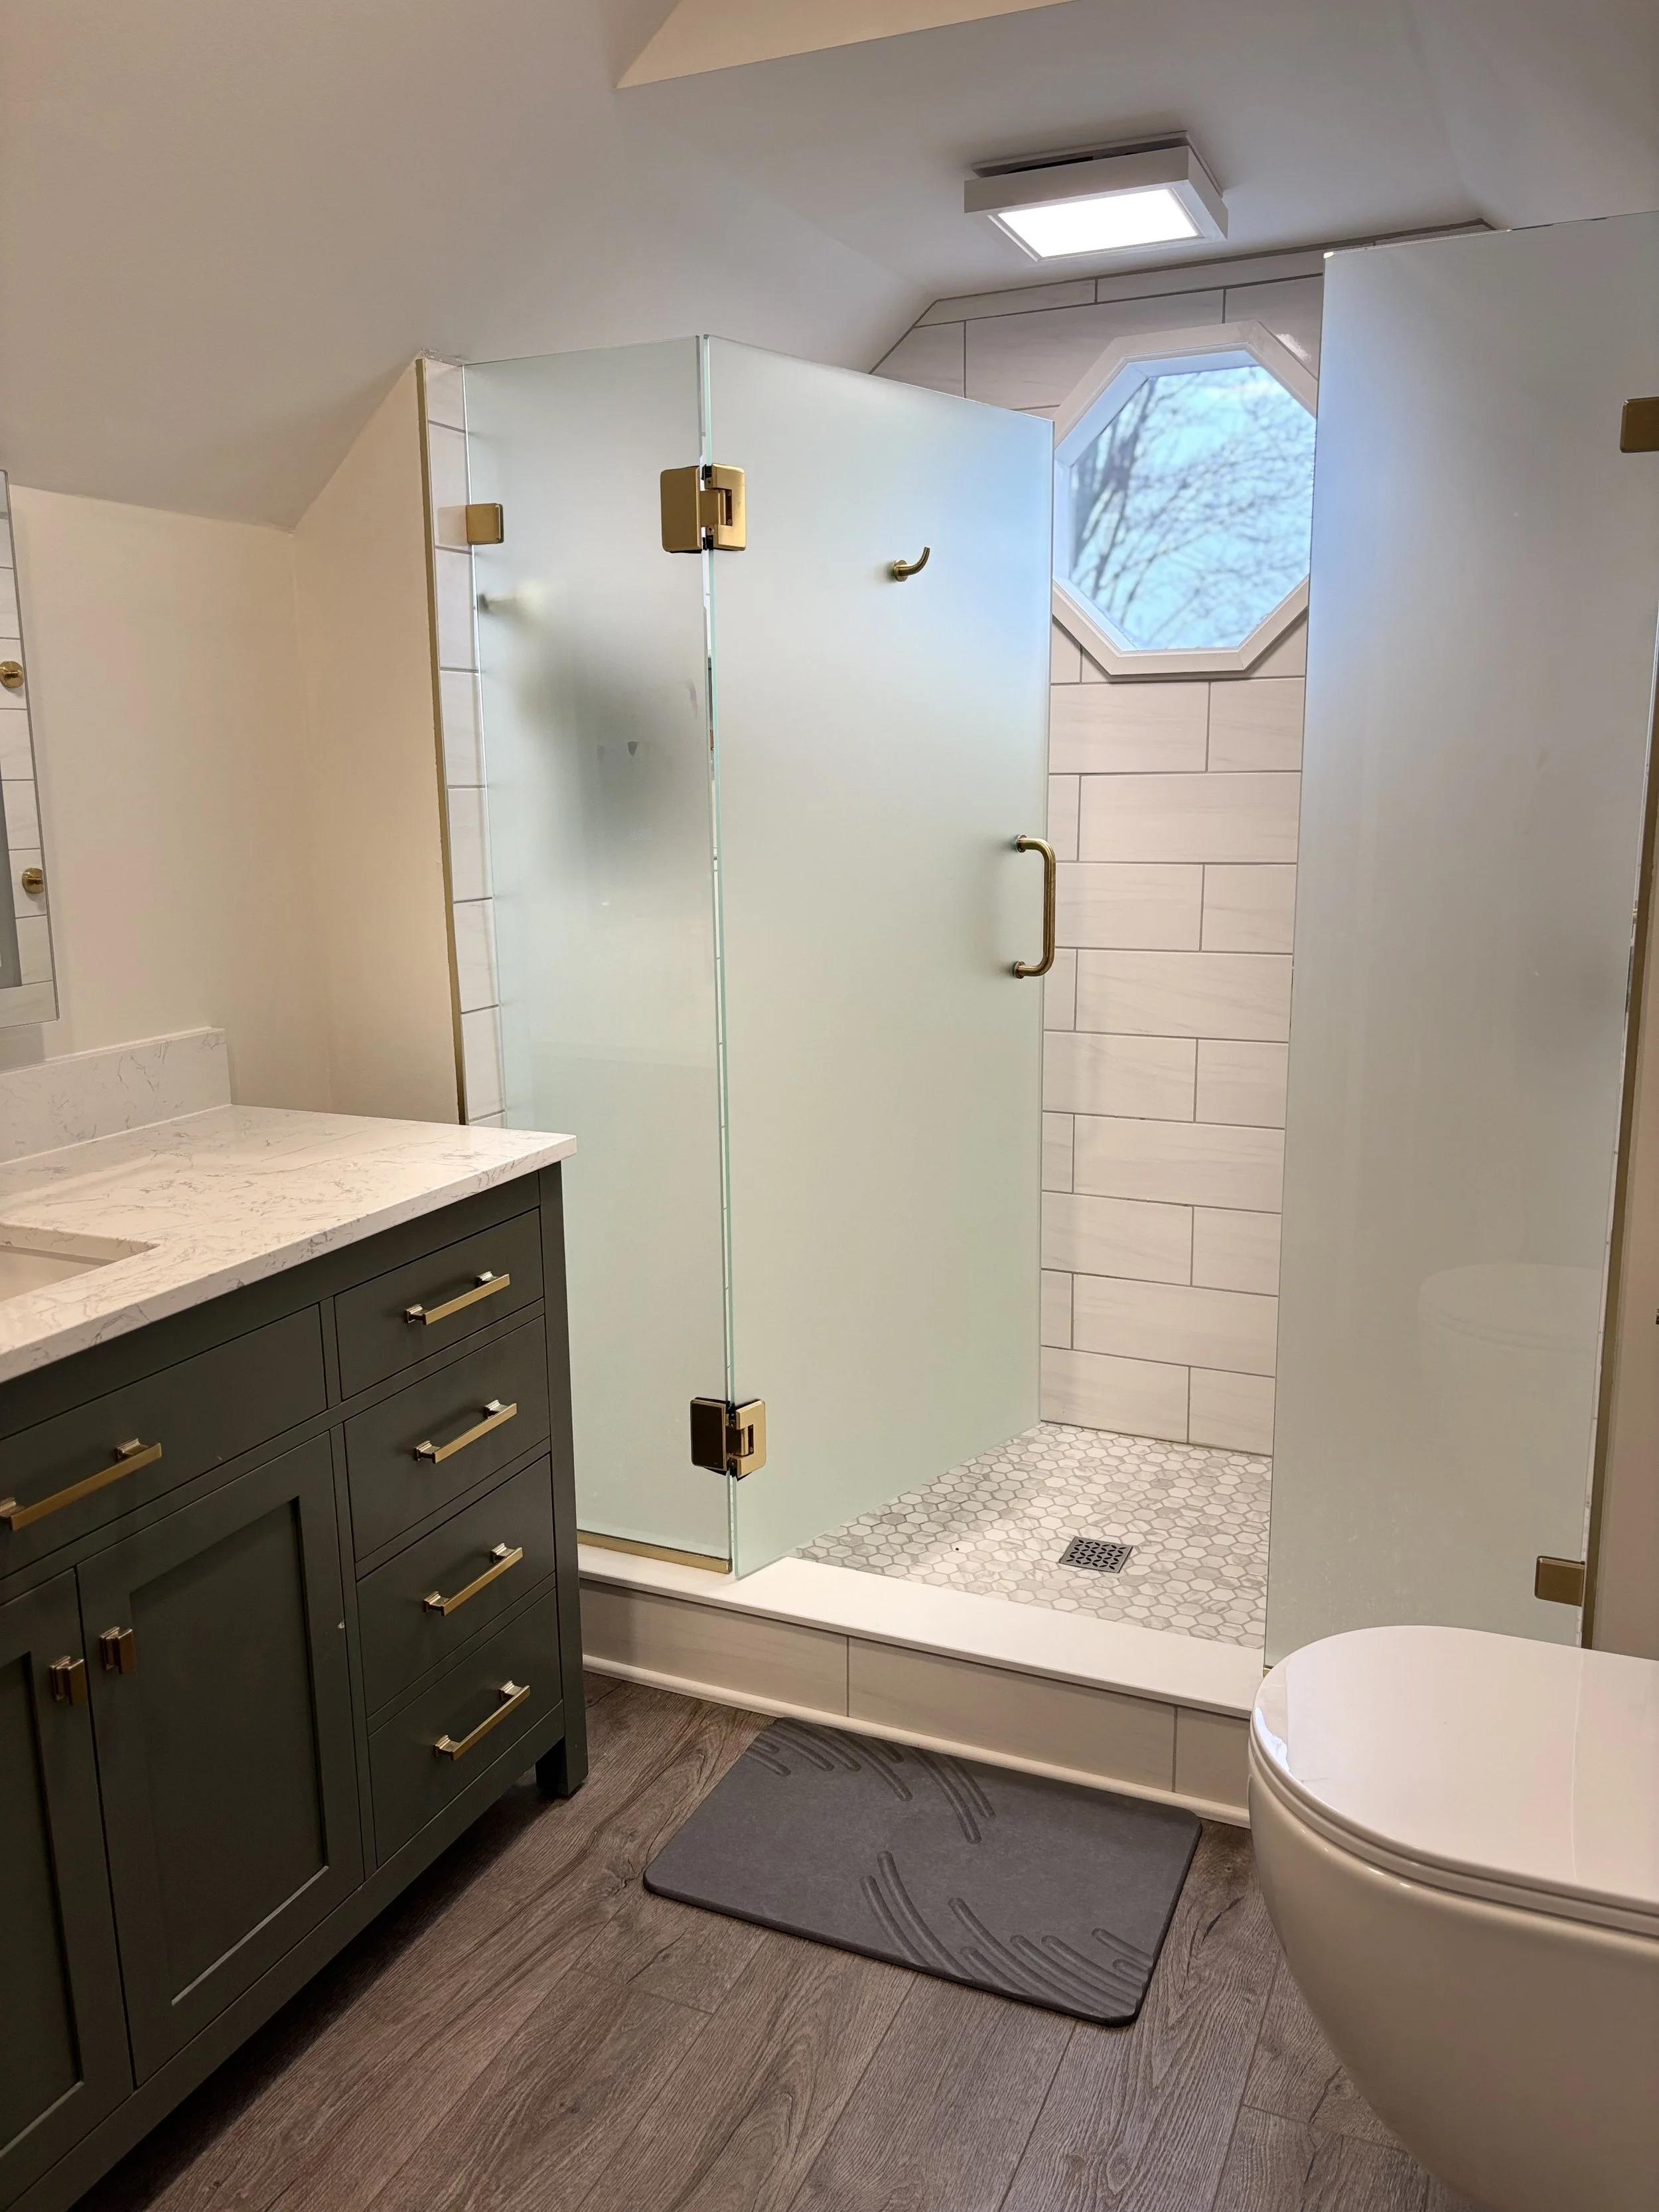
So, we have a shower-shaped area. Now what? I employed the Schluter waterproofing system as a base for custom tiling this bad boy. The shower is about 5’x3’, which doesn’t seem huge until you stand in it. It’s easily the largest shower in the house, and there are areas that don’t get wet when it’s on. I made a custom niche for bottles, and it’s deeper than most. I’m super glad I did, because you could put all 5 family members’ gear in that niche and still have room.
The glass door was another consideration that took some forethought. I did not want a top rail, and I wanted the door to swing both ways. After speaking with Lindi at Lakeview Glass, I landed on this 1/4” frosted 3-panel door system. Yes, the door is hinged on a piece of glass that’s only attached to the back wall and the ledge. Yes, it’s sturdier than it looks. That door is heavy, but it swings like a dream and doesn’t leak a drop on the floor even with a 1/4” gap on the bottom. It helps to slightly slope your ledge into the shower.
Behind each short wall is an access to the plumbing, should something do awry.
After much deliberation and hand-wringing, we decided on a wall-mounted floating toilet. For those with faint hearts, don’t install a floating toilet. The plumbing is wonky, and it has to be pretty dang perfect for it to not leak. Ask me how I know. After a round or two of brow-beating, the toilet was installed without leaking. The neat thing about the system, though, is its low profile and wall mounted flush mechanism. The kids love it. It’s also height adjustable, which I found out too late after I installed it. It’s about 2” too high. Anyhow, lesson learned.
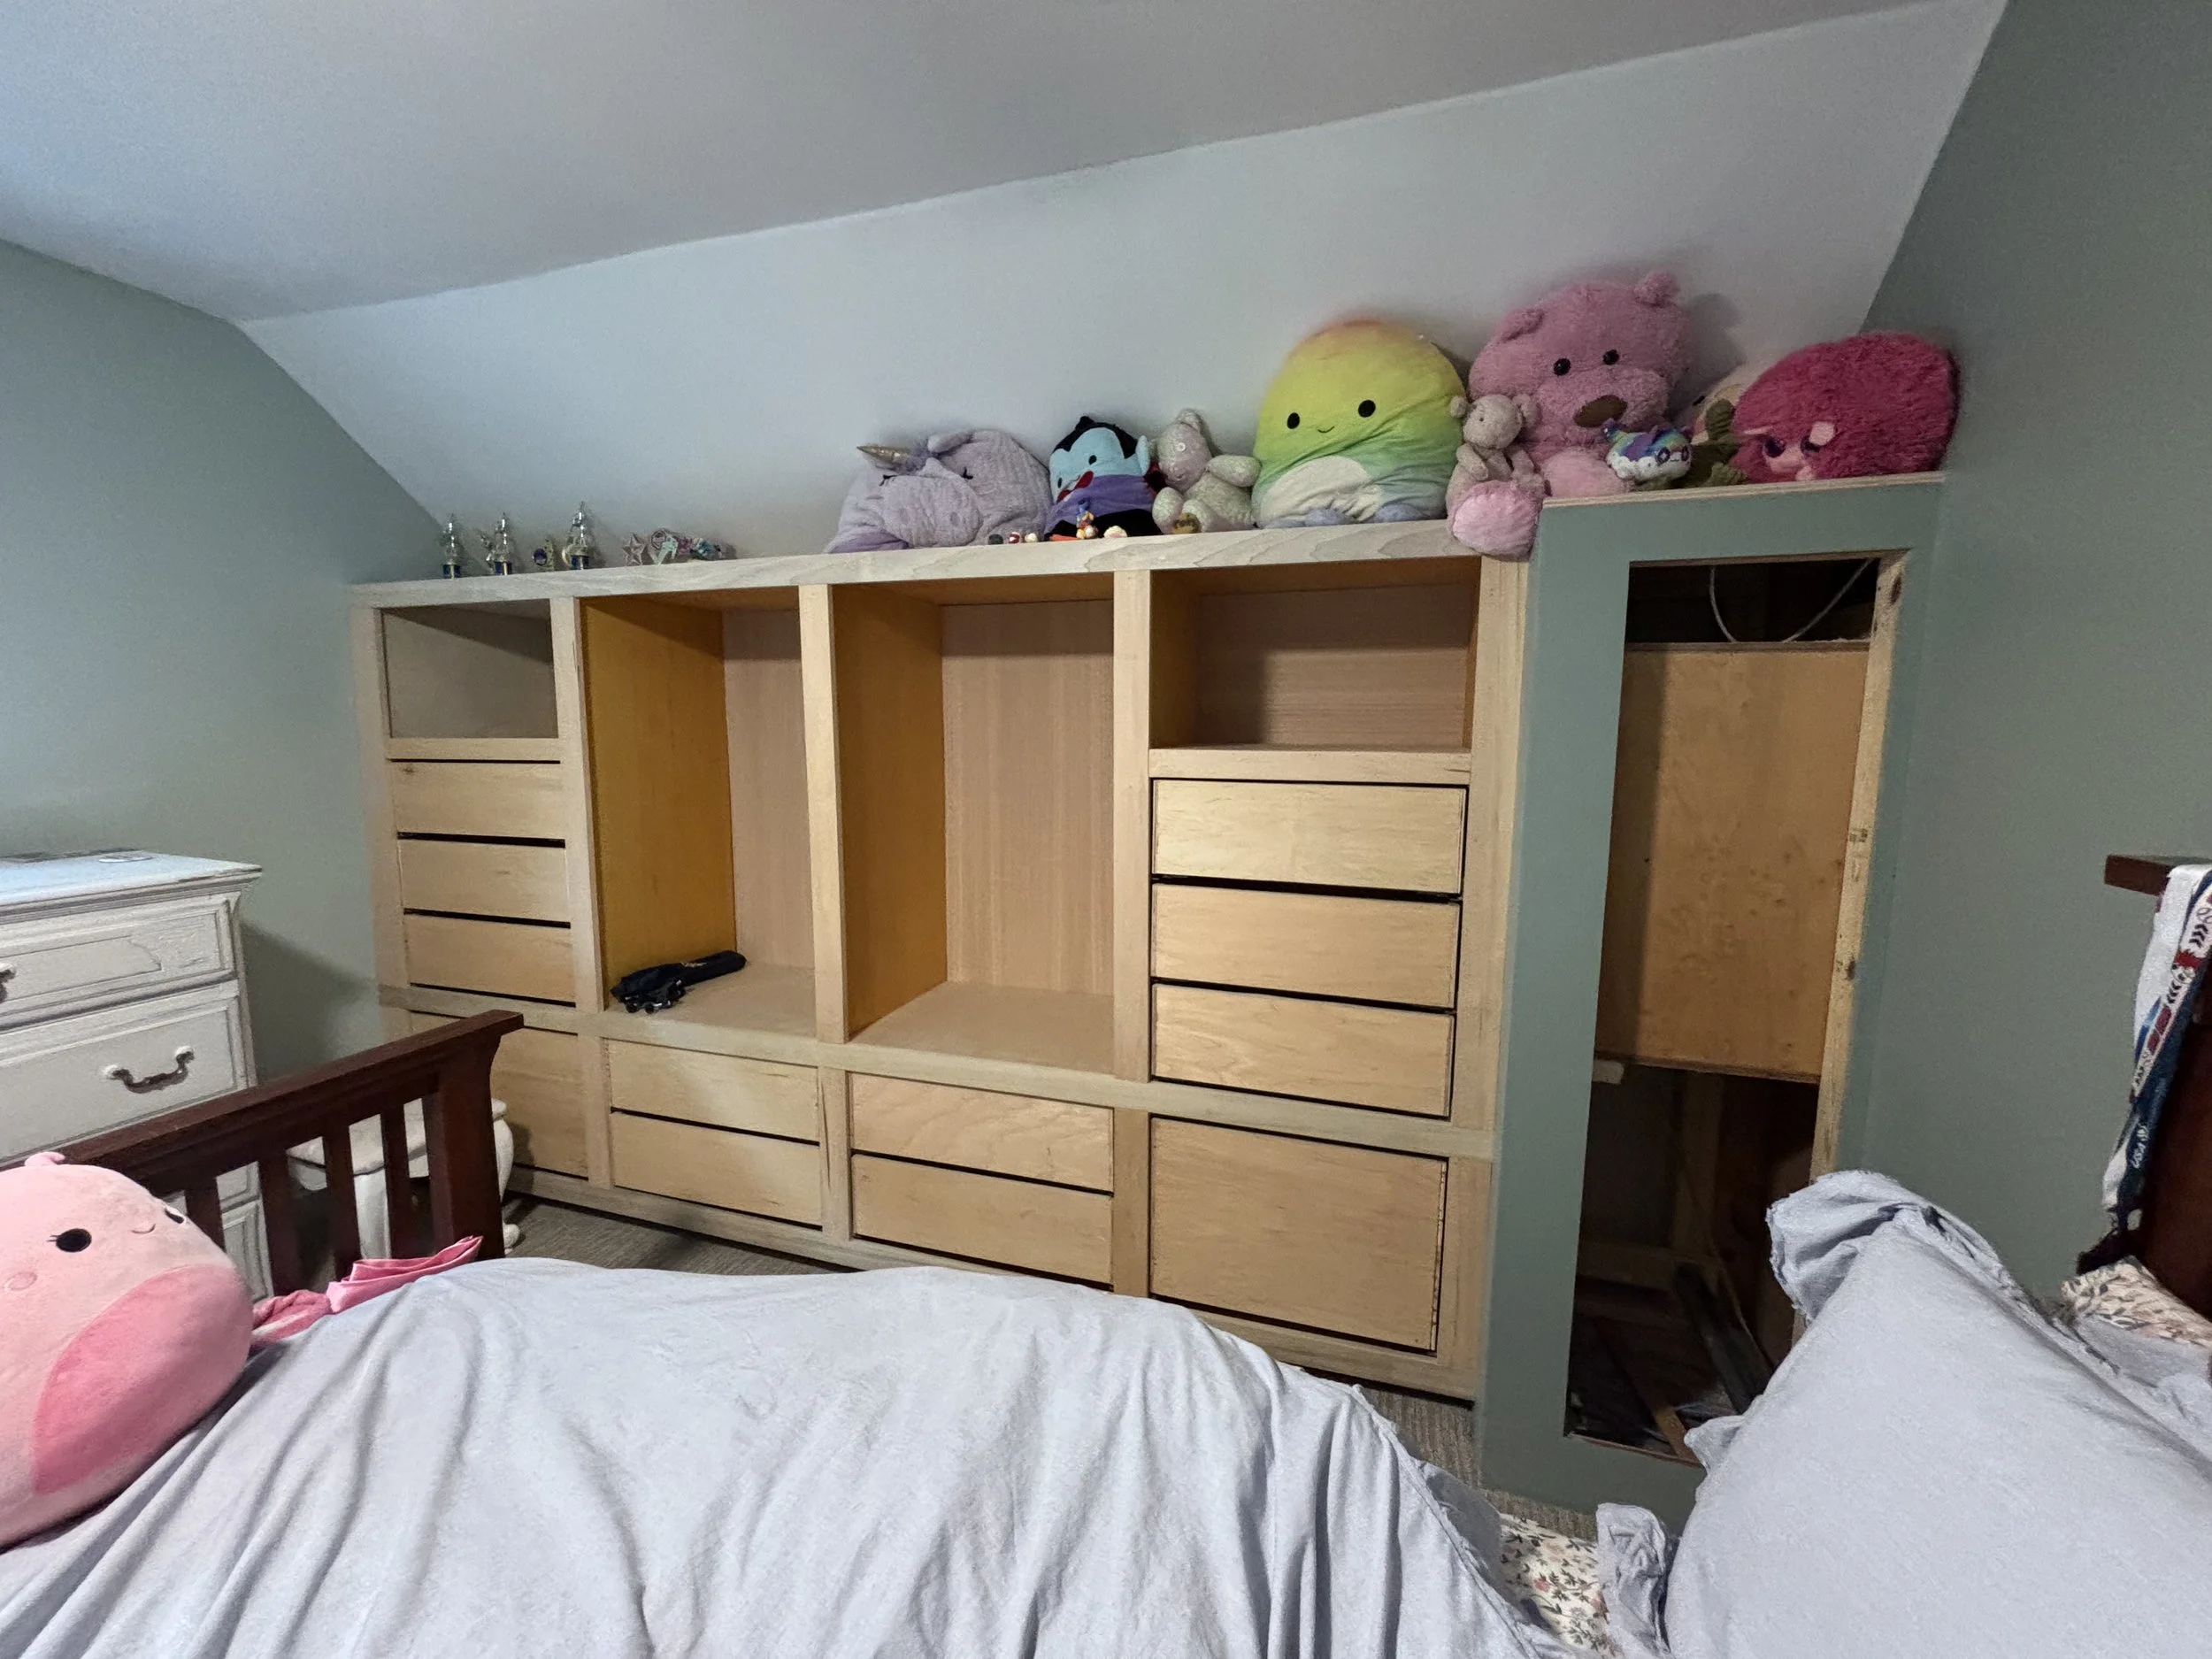
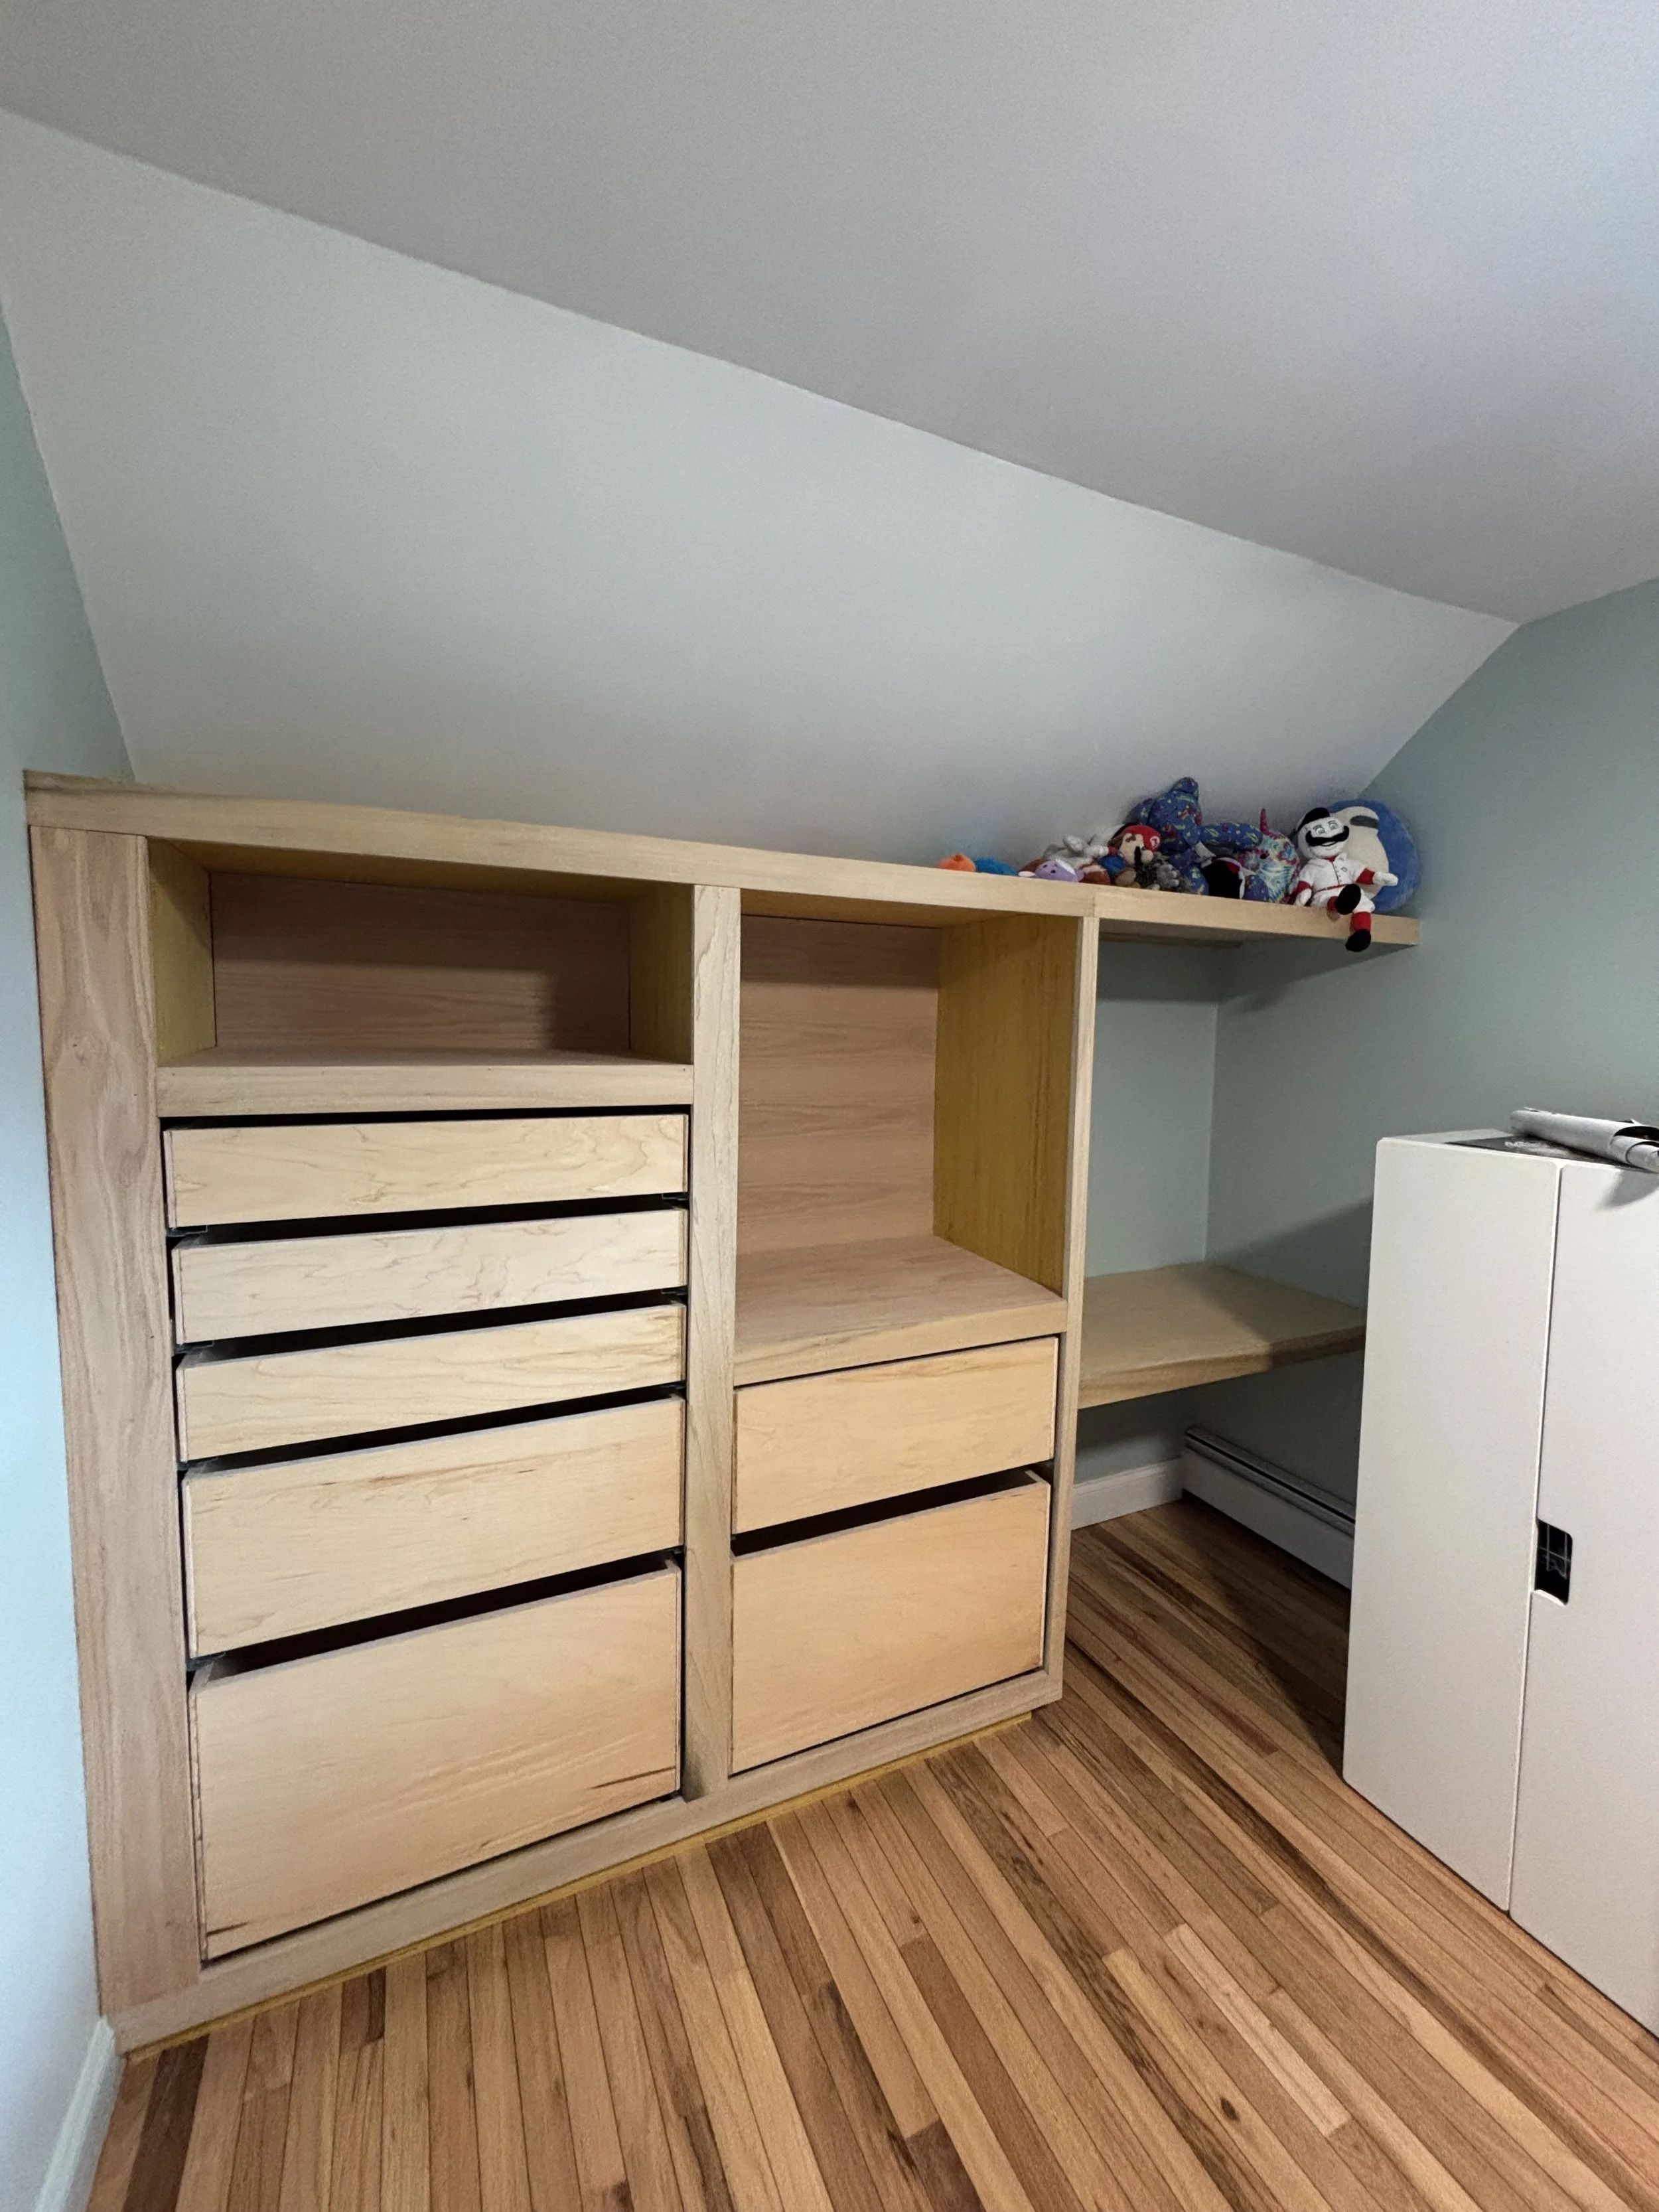
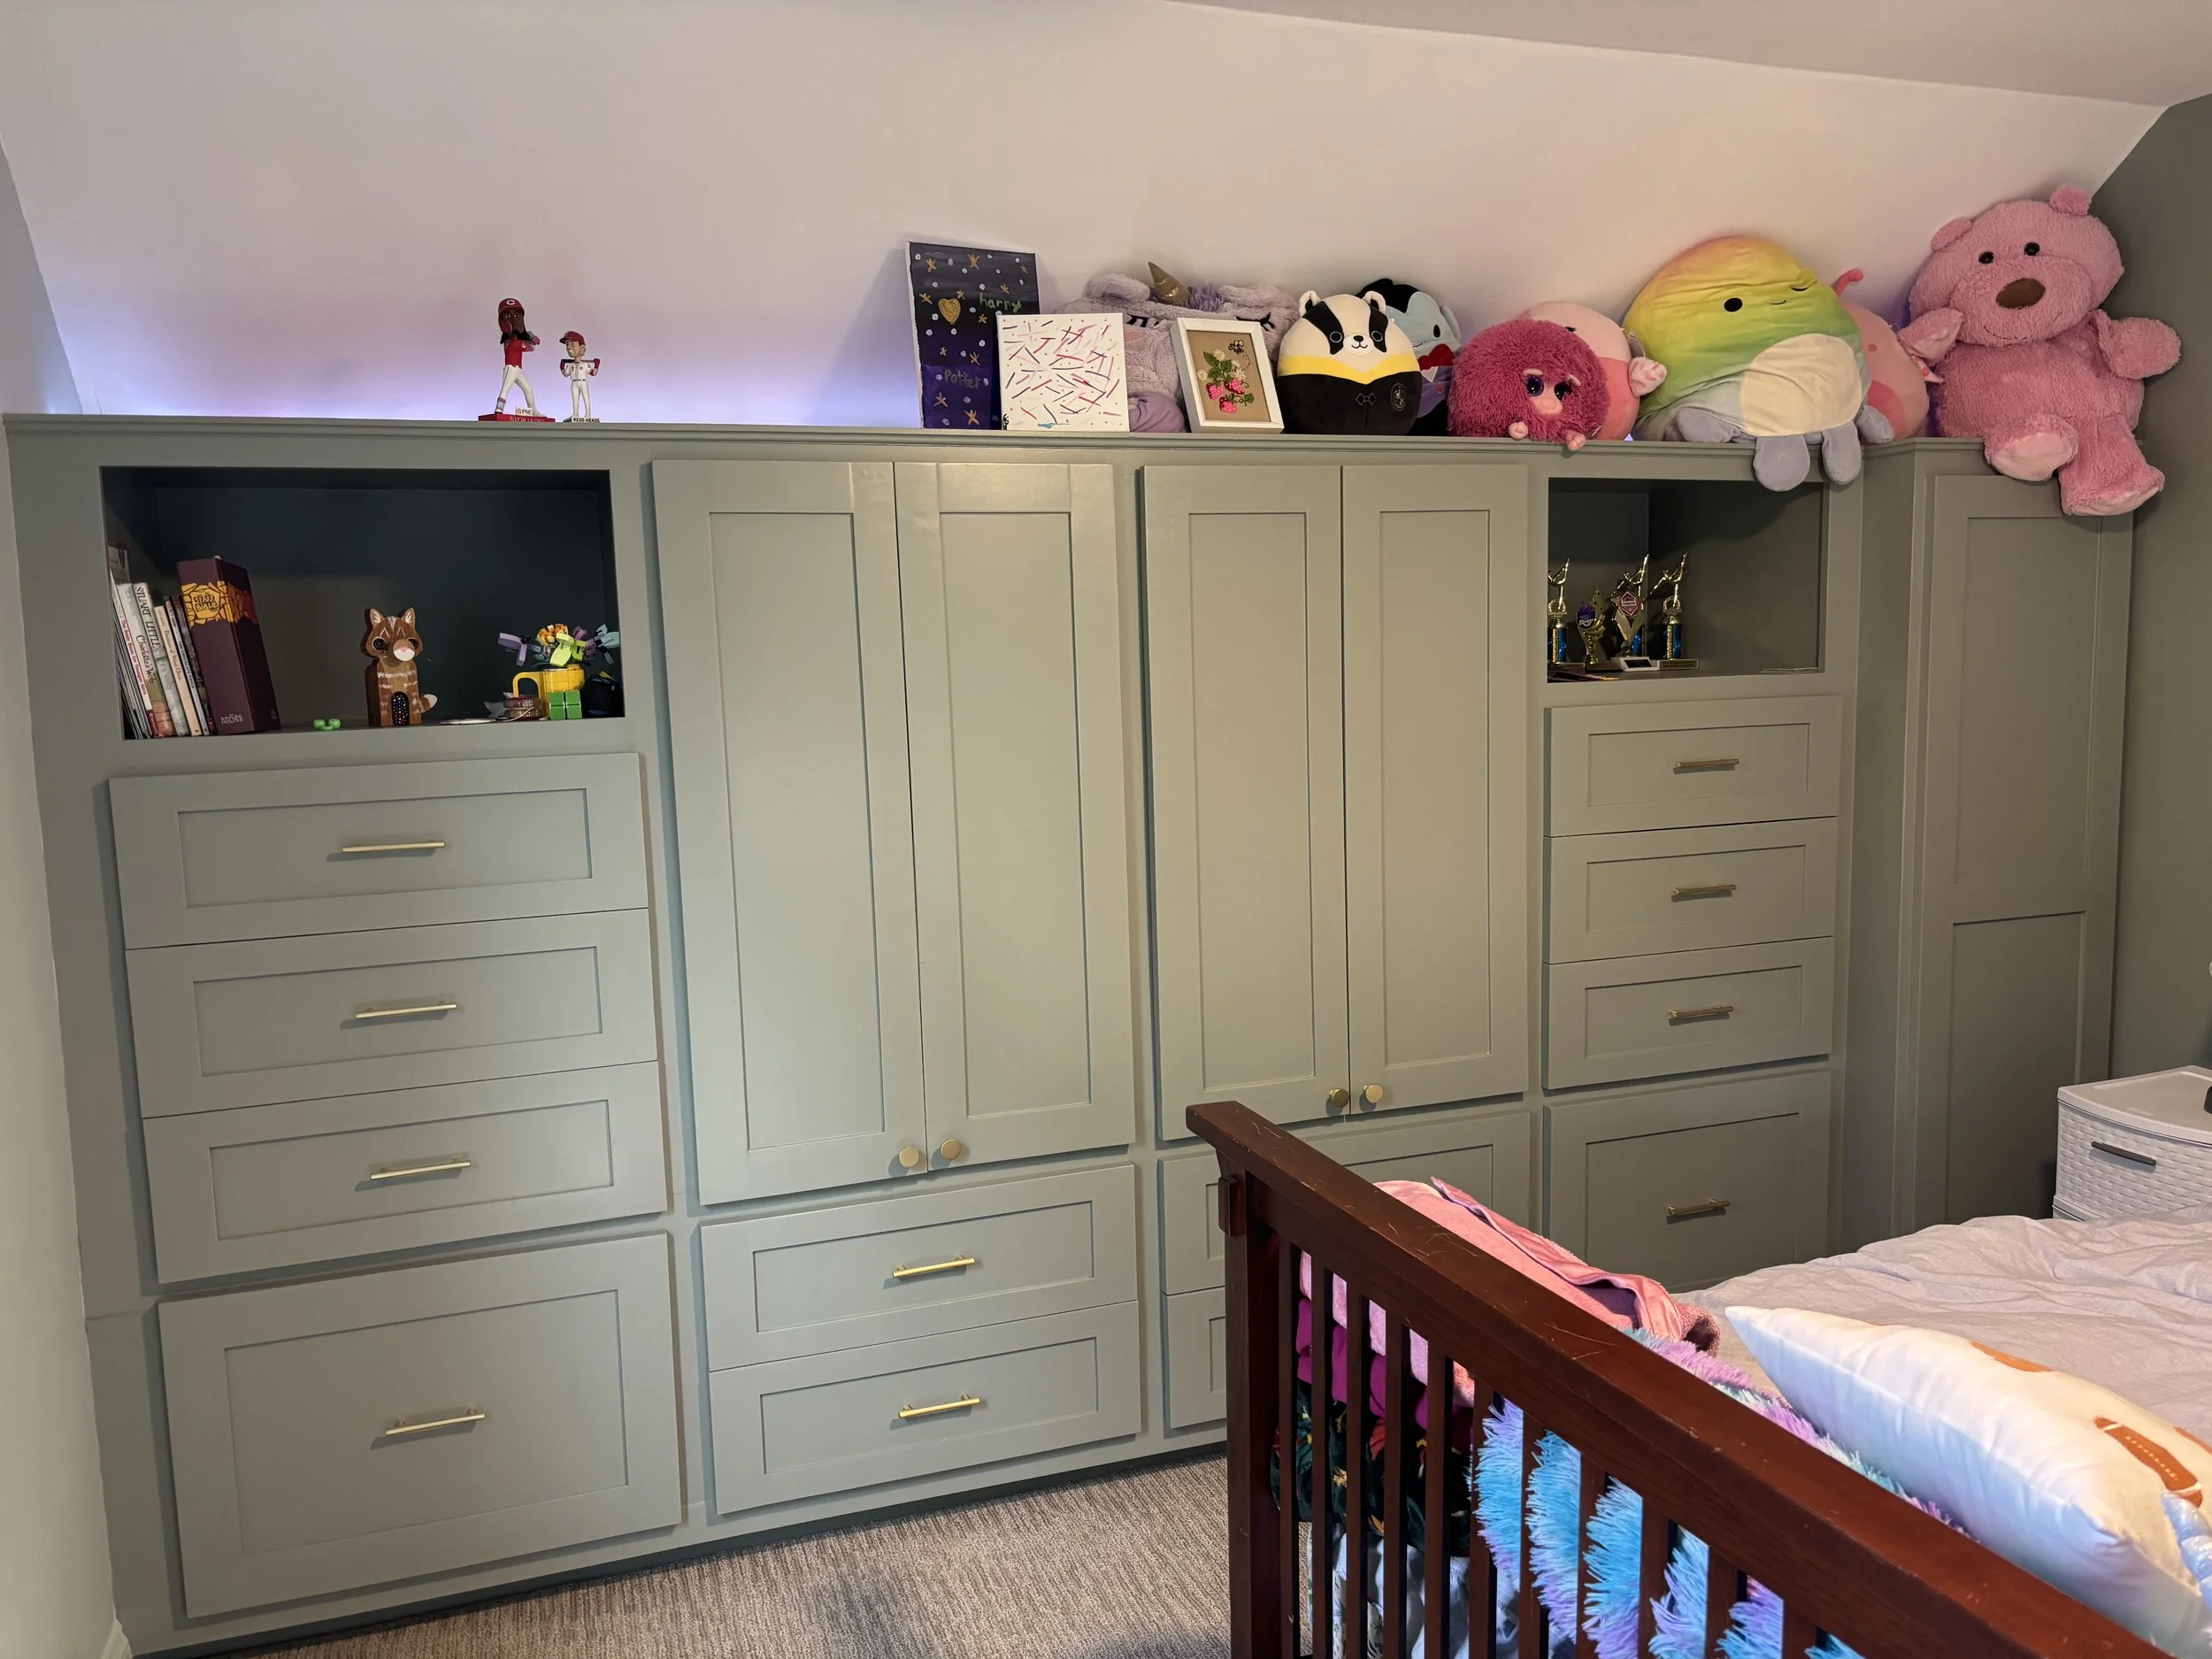
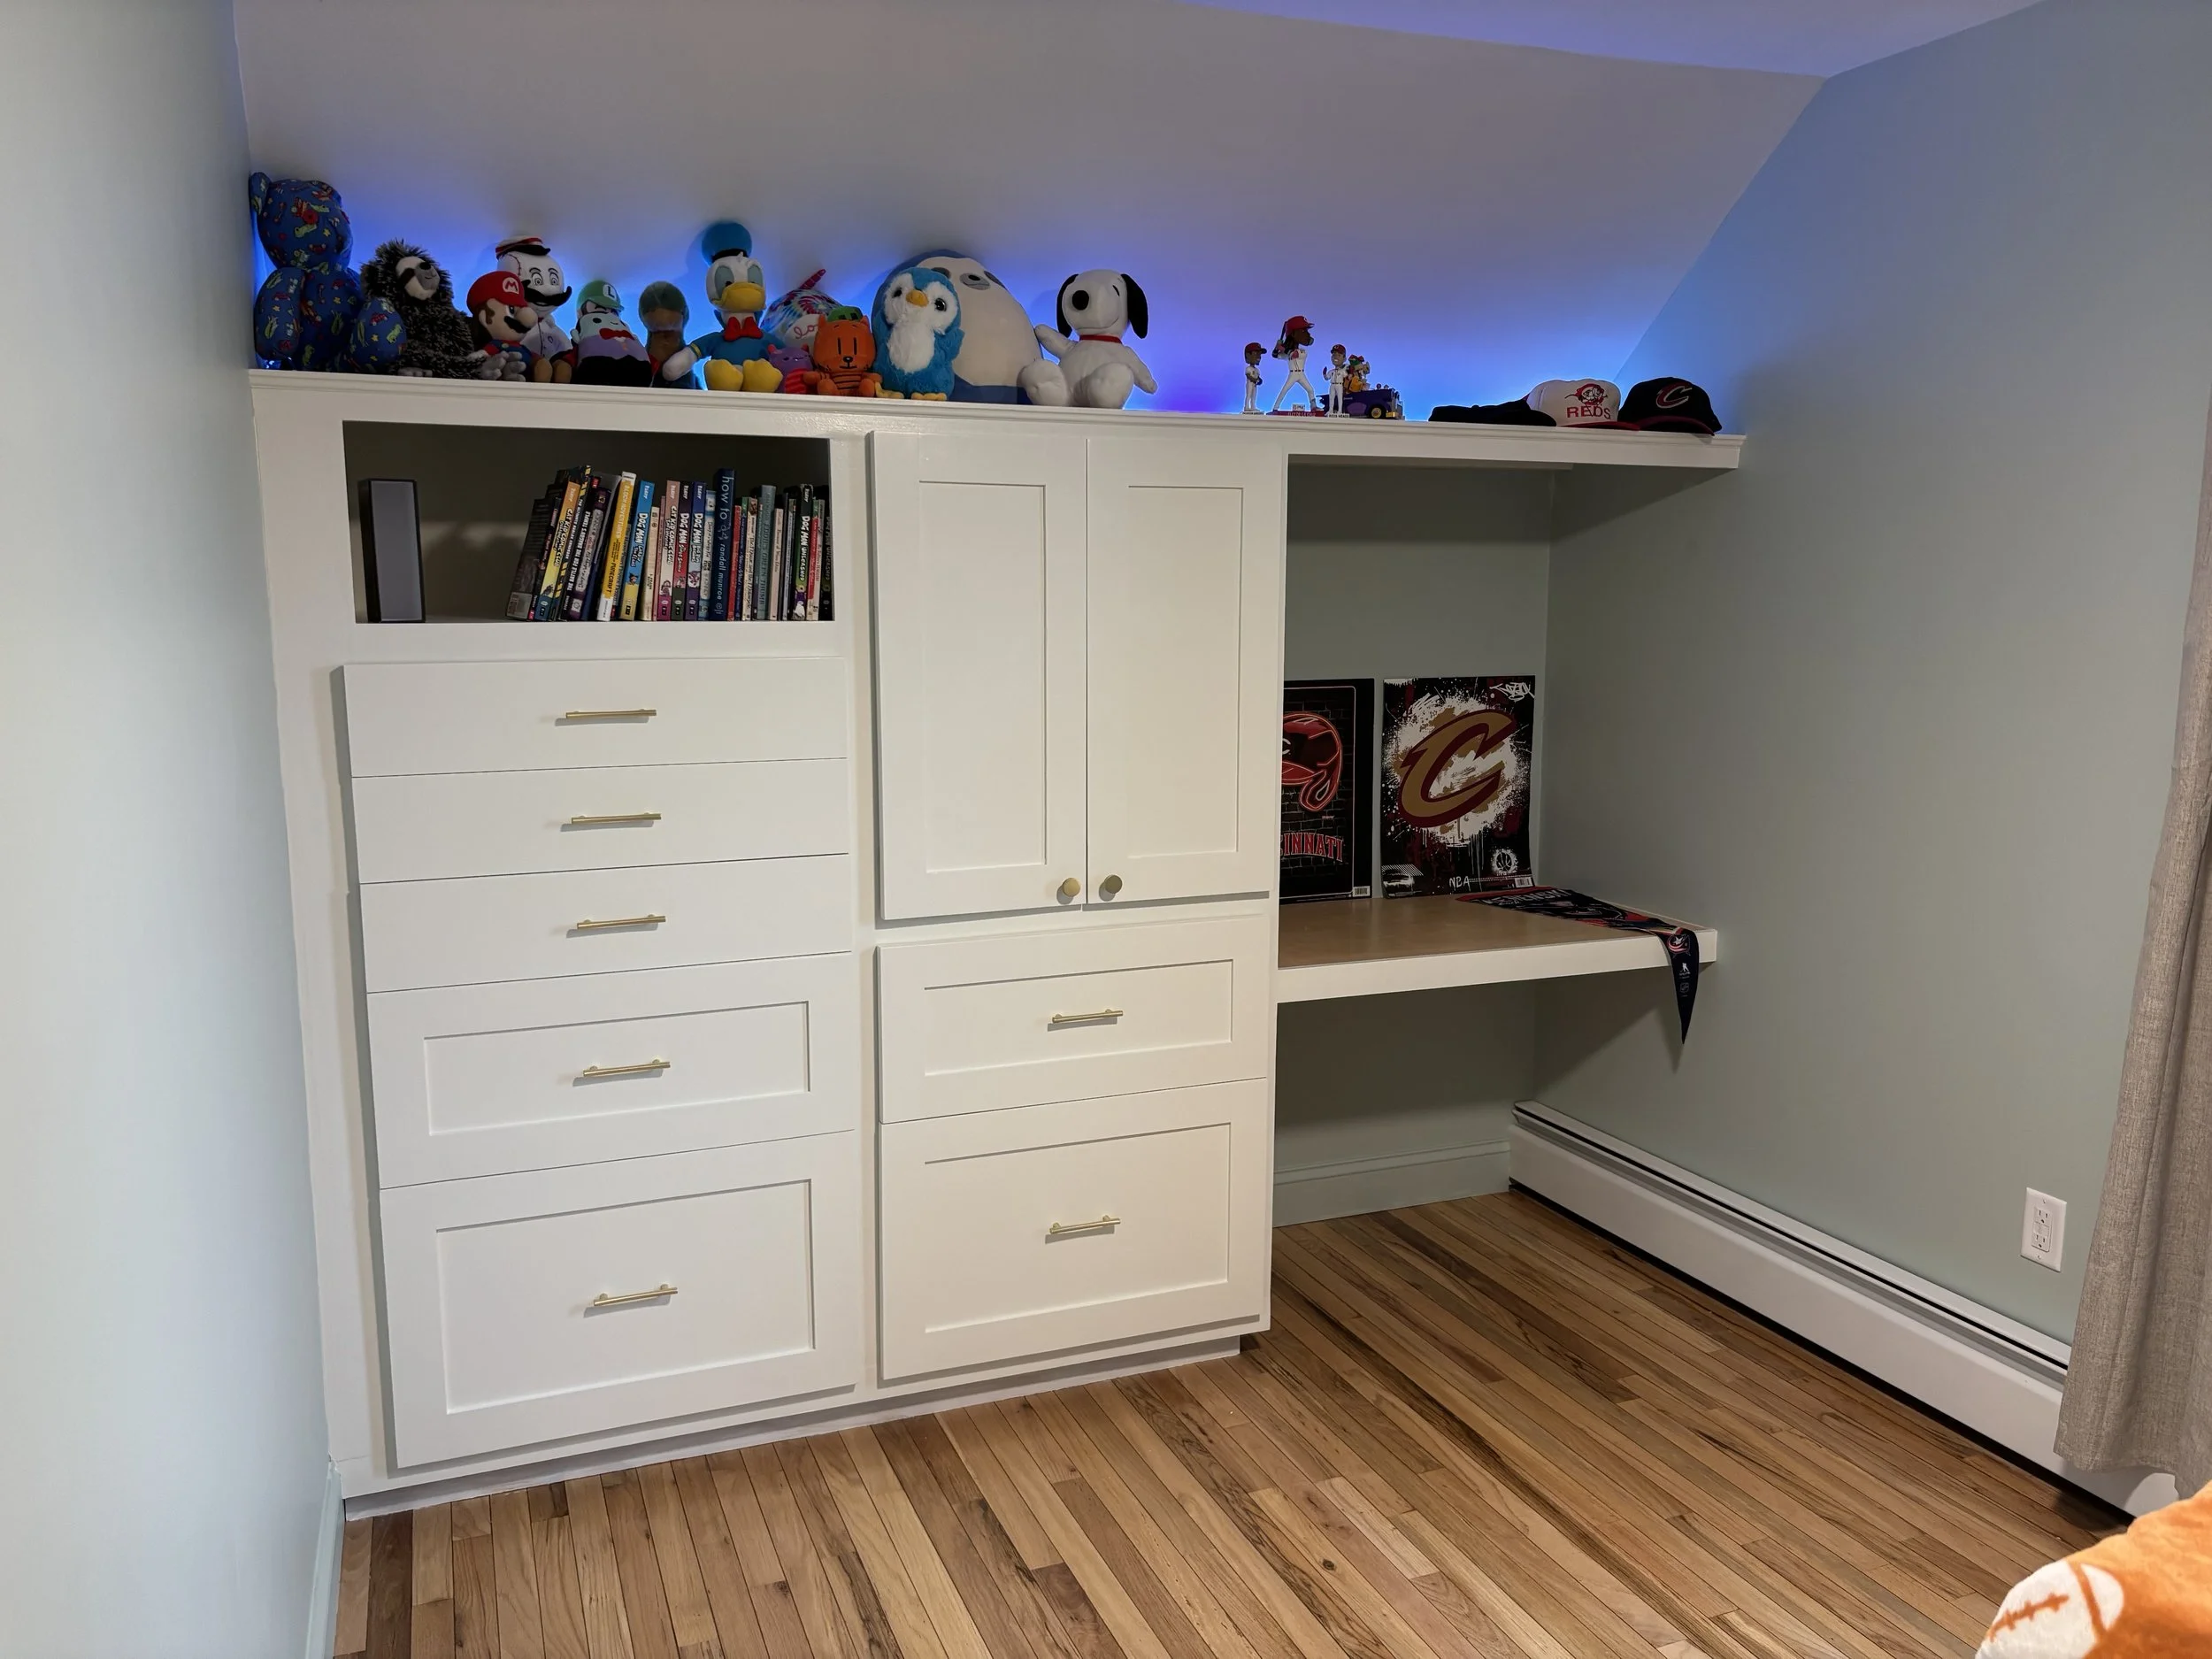
Great, the bathroom’s done. We can move in, right? Wrong. We haven’t touched the bedrooms, hallway, or stairs. Let’s touch them now. I needed to build a wall to separate the two rooms, and I needed to cut a hallway to the bathroom. The largest upstairs bedroom is now the smallest, but it’ll have some great features. It’s narrow, so a pocket door is in order. Also, there is not an obvious place for a closet, so a large built-in dresser with armoire and a desk will fit best. The wood floor in that room that were put down in the 60’s need to be refinished. The larger bedroom had its closet removed, so another built-in dresser with armoires also need to be made and installed.
My woodshop got a workout during this build. Everything was custom built to fit, with little touches here and there to give the kids exactly what they need. The carcasses and drawers were all made from 3/4 maple ply. The shaker-style drawer faces and doors were made of soft maple with MDF panel inserts. This took time and quite a bit of planning, but the end result speaks for itself.
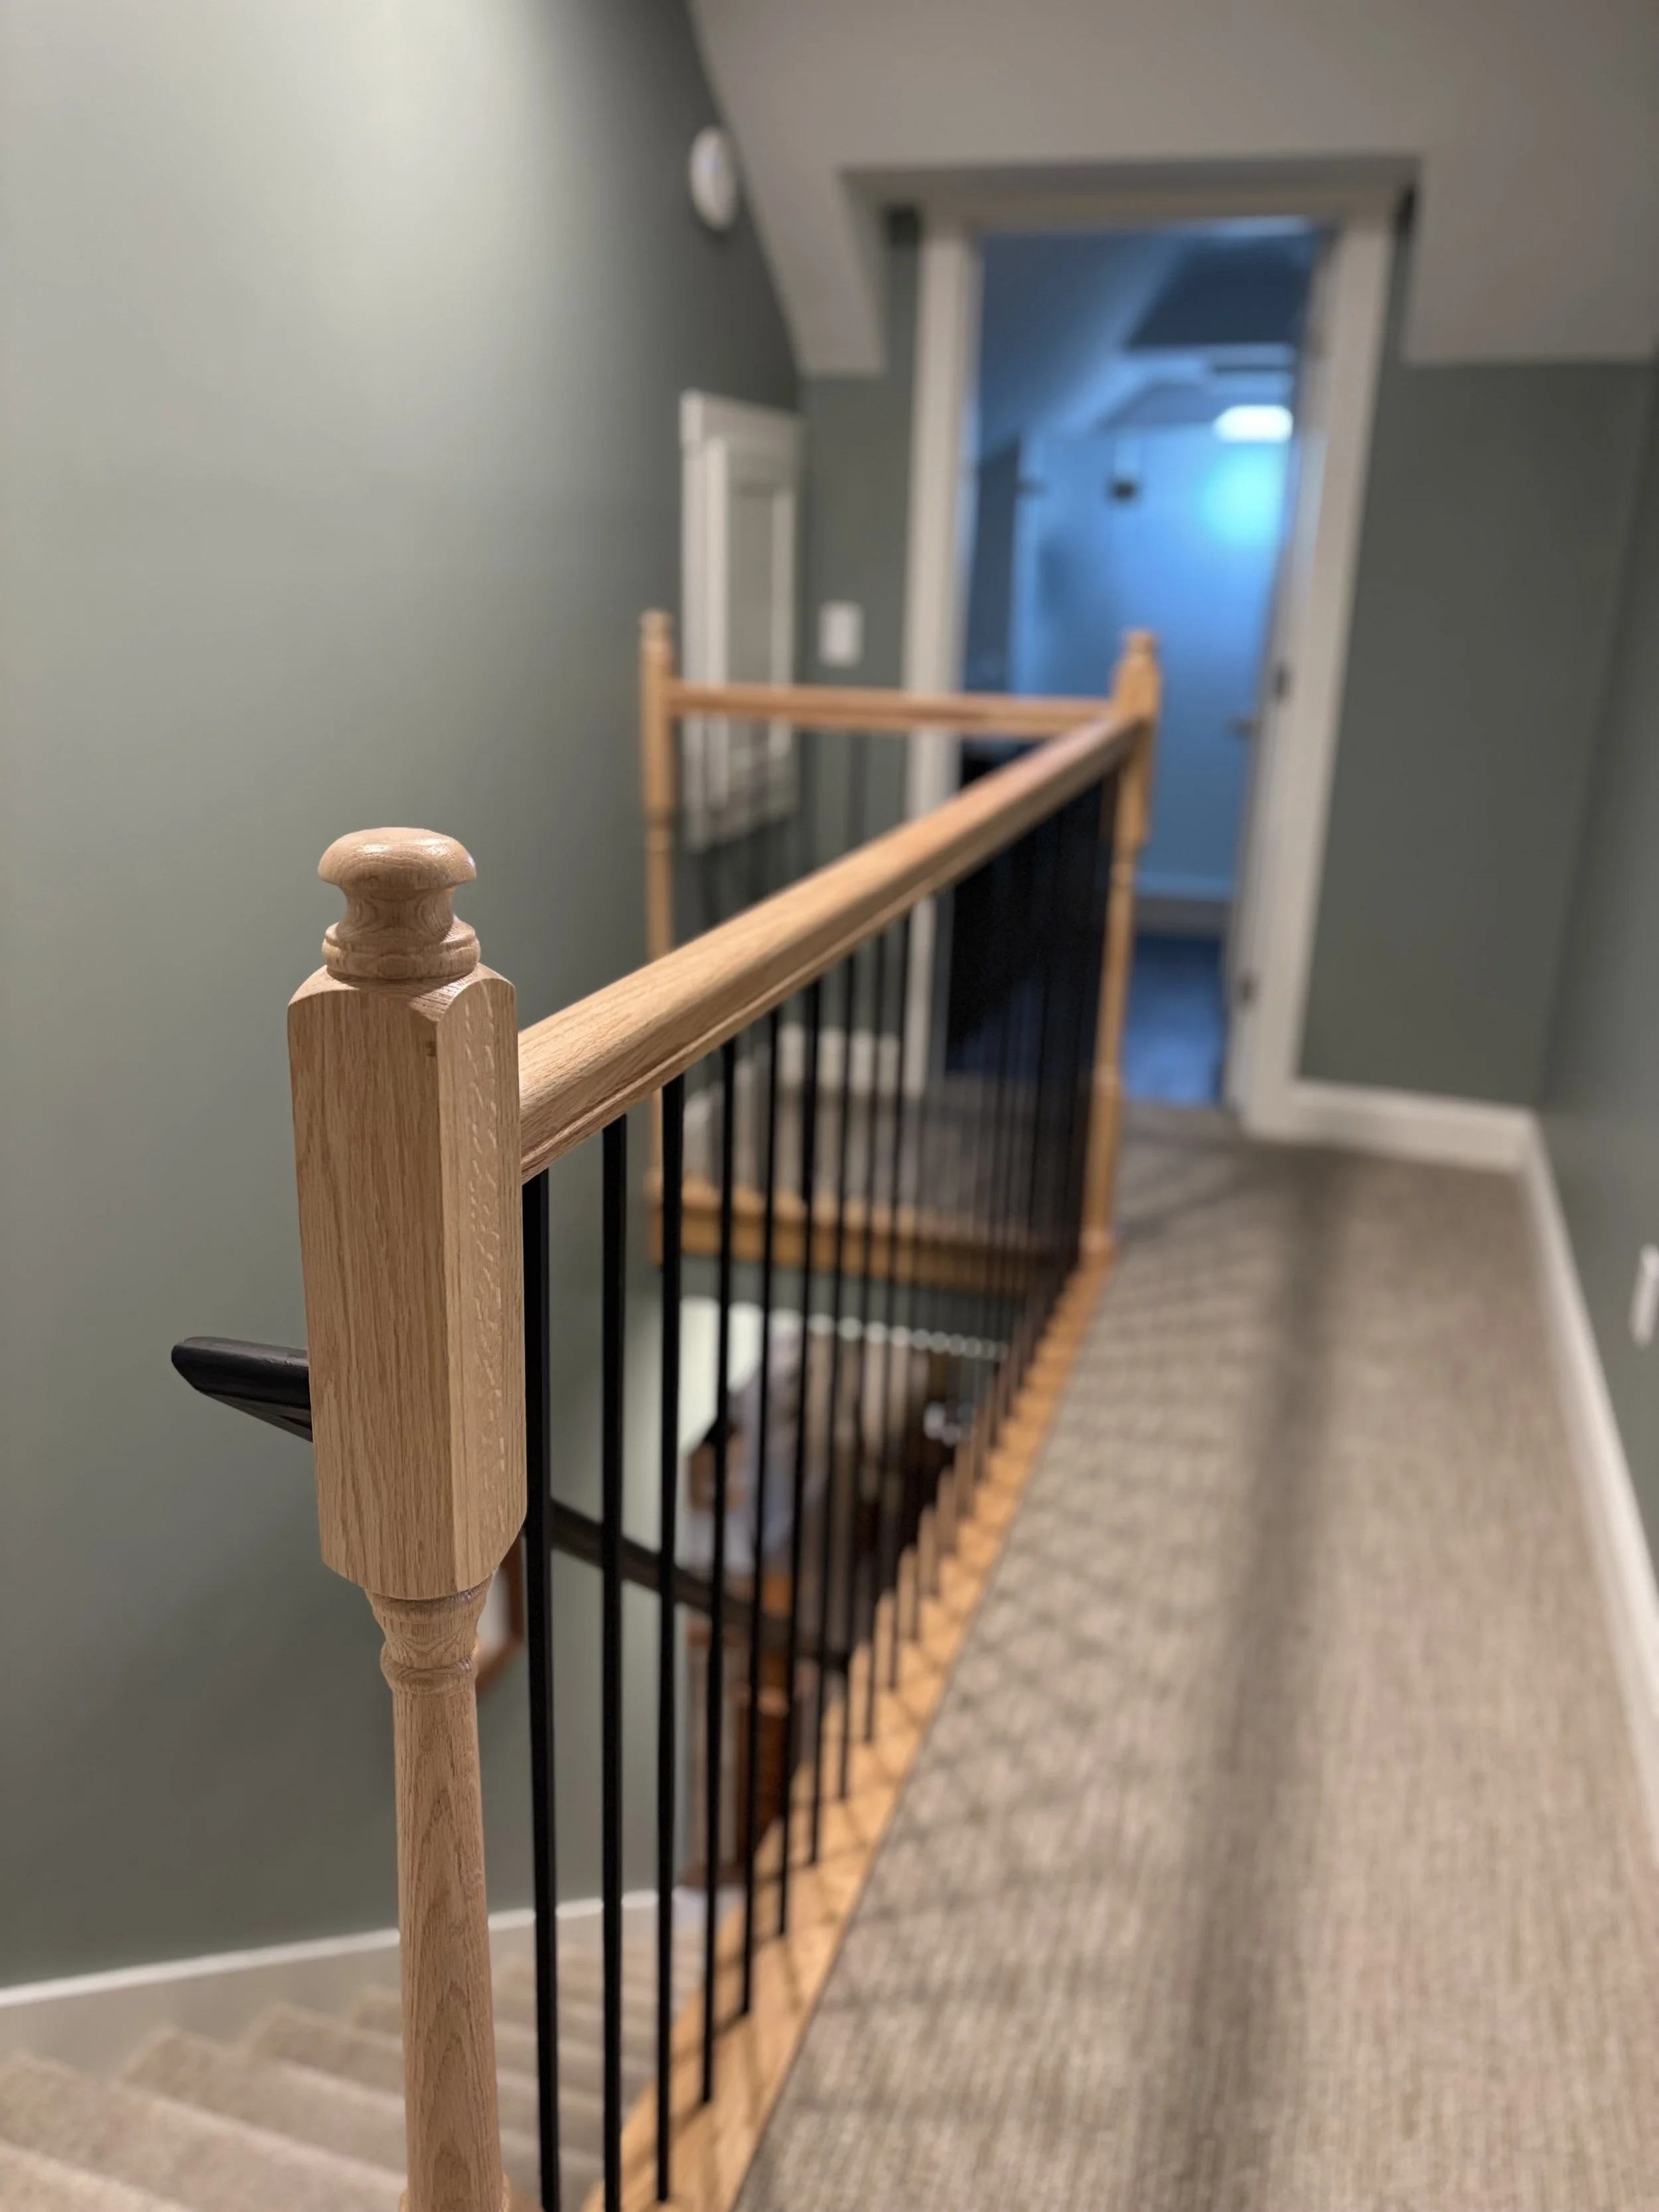
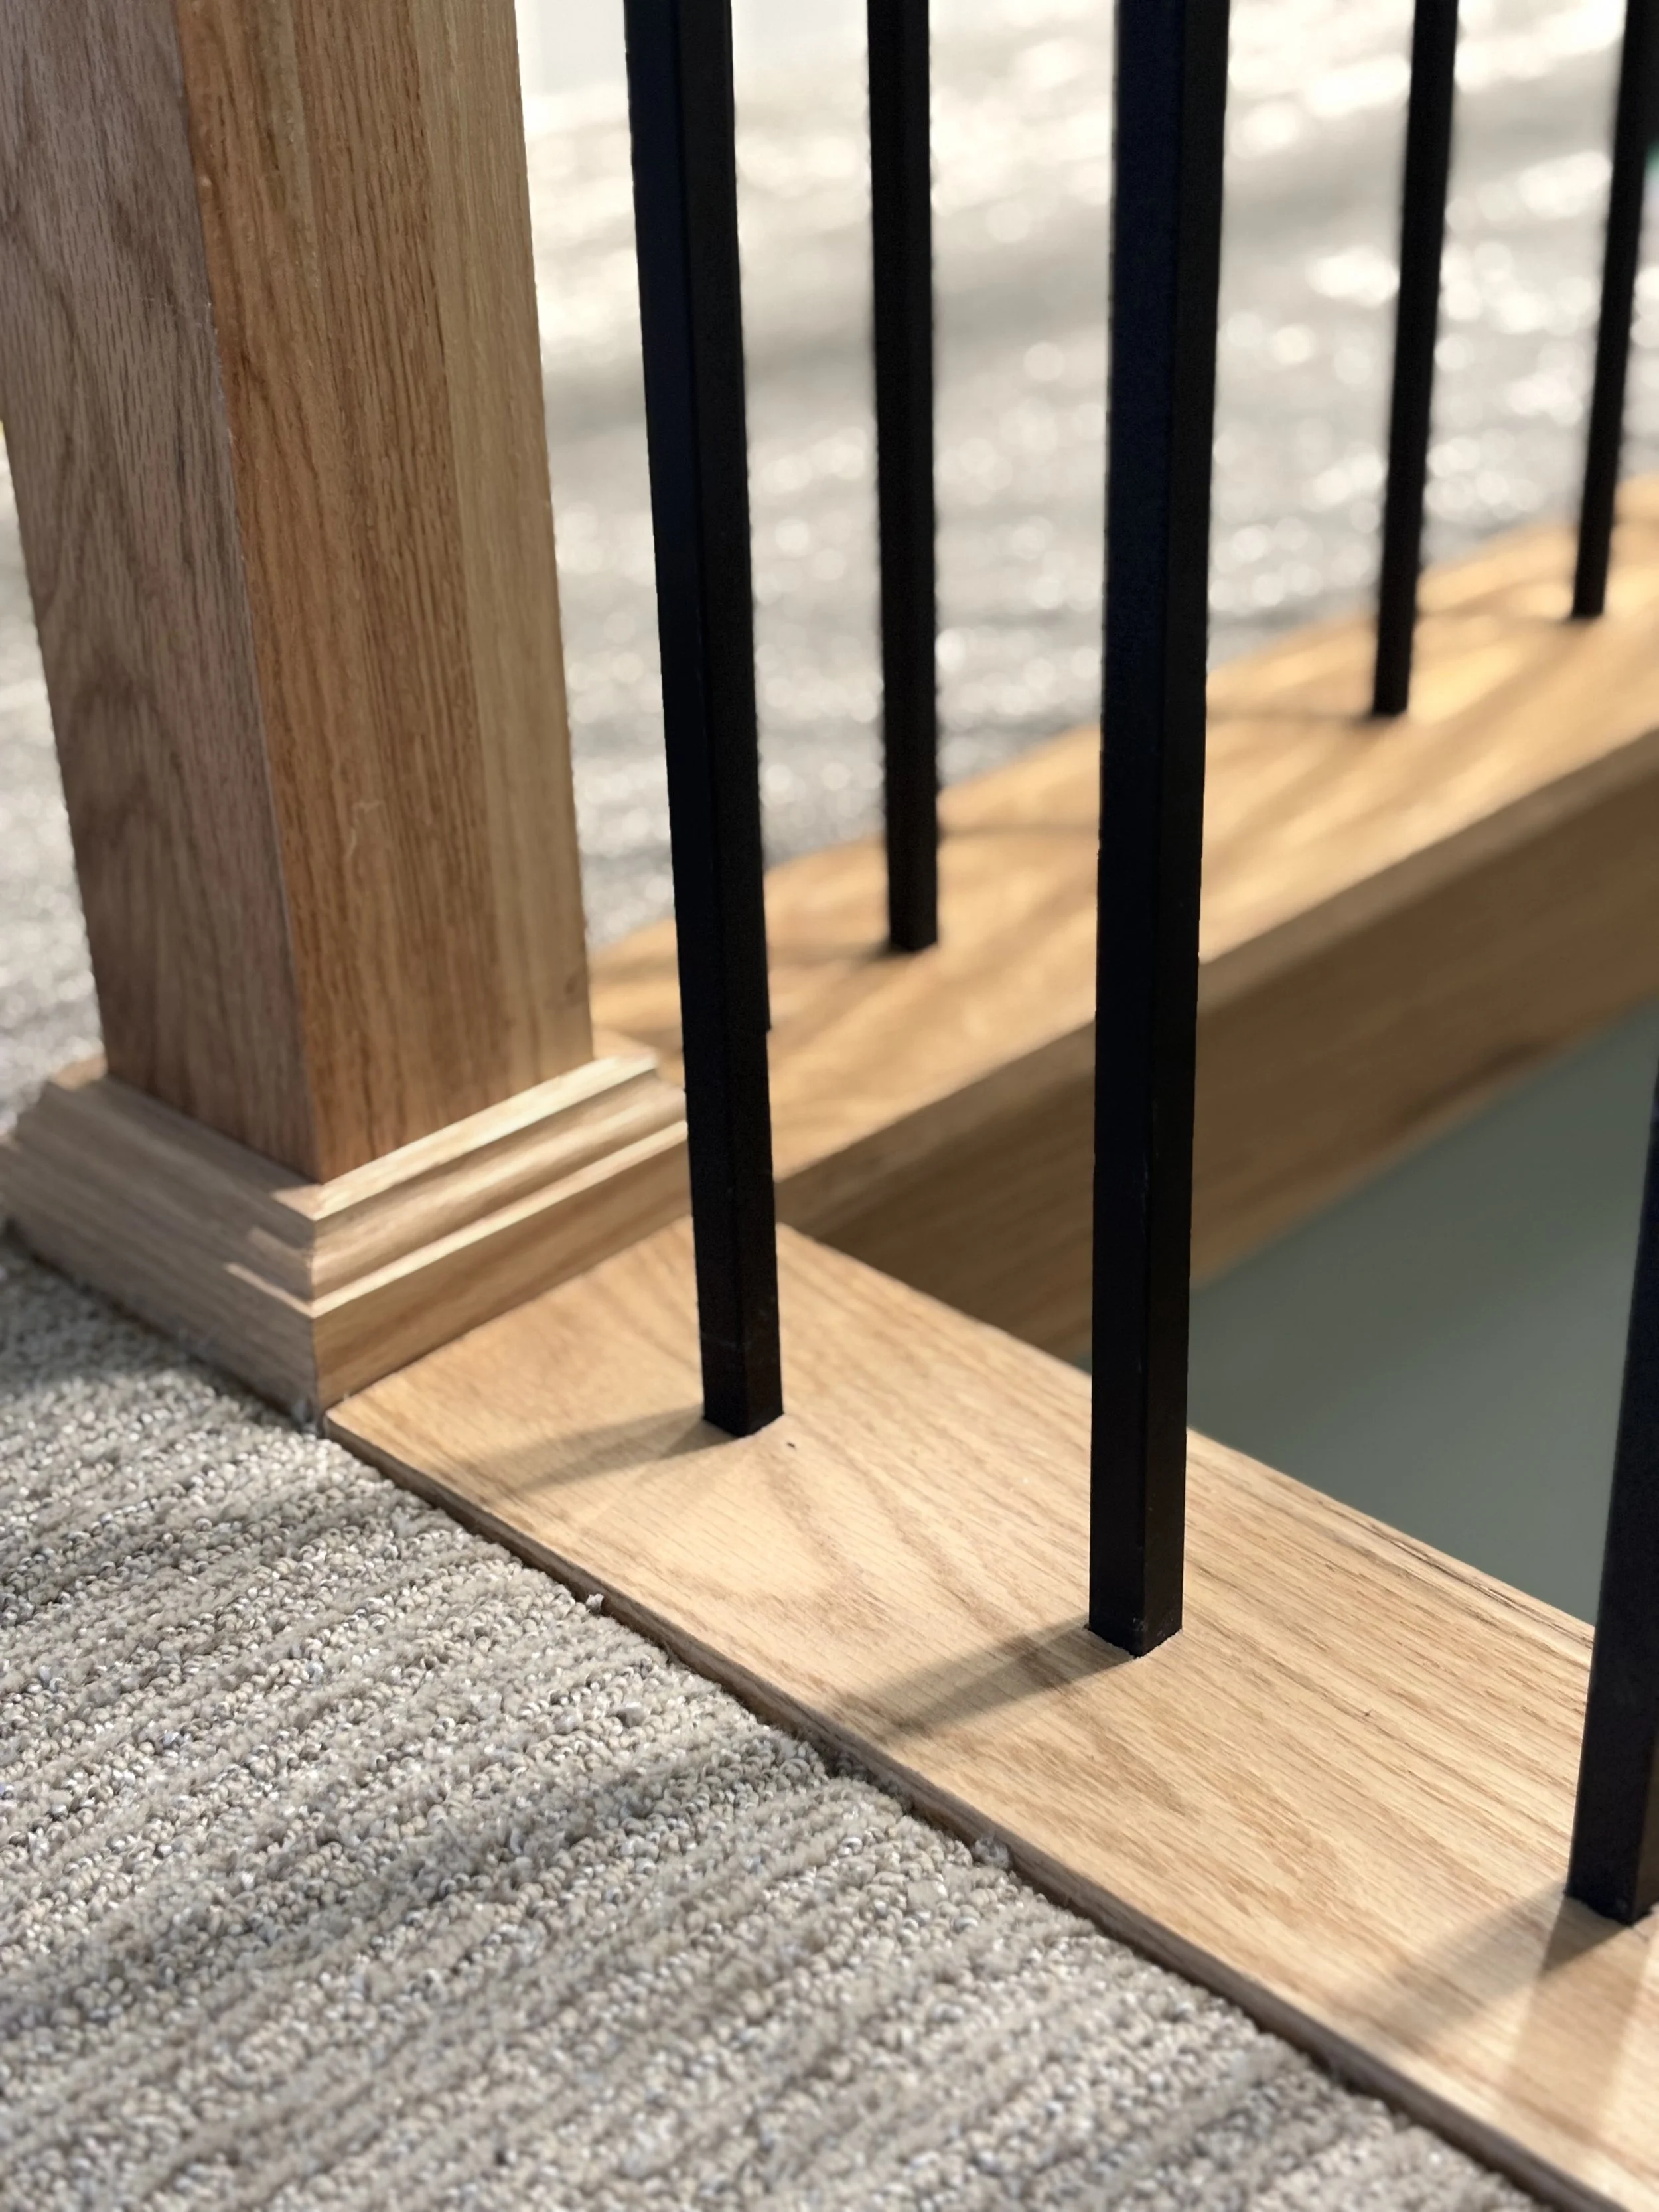
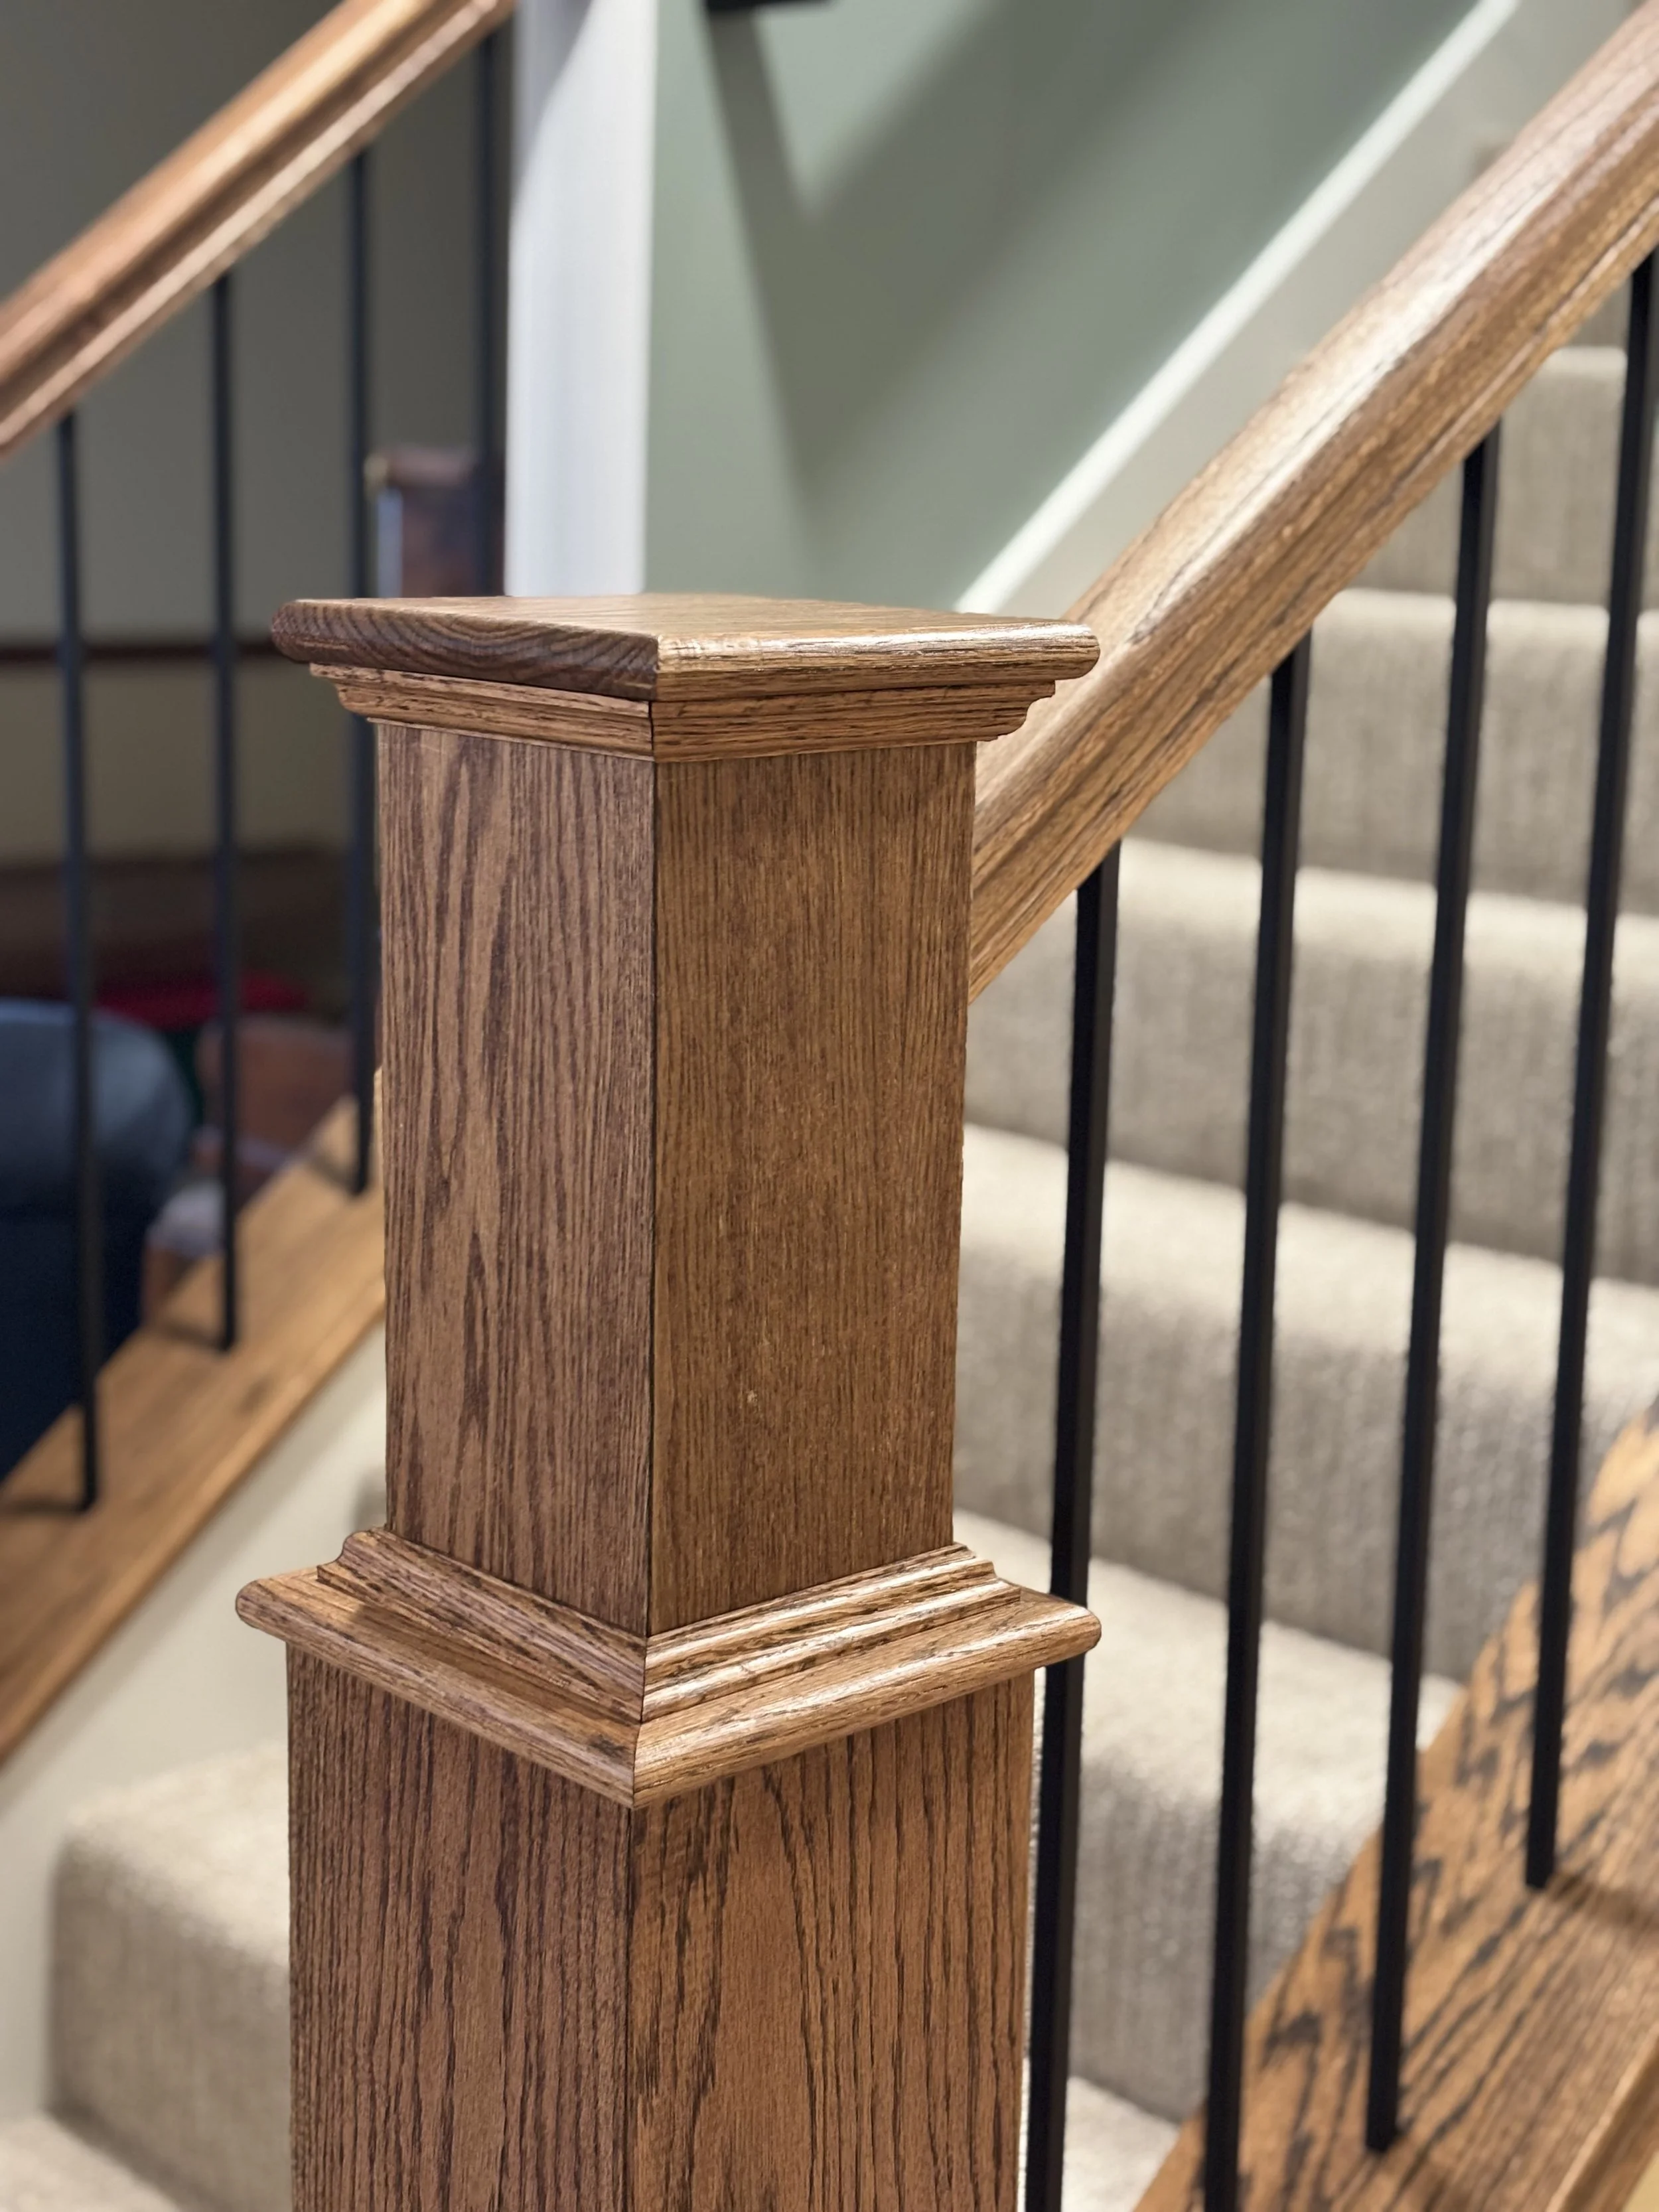
Neat. While I was placing the carcasses, I needed to get to the point in the hallway to get the carpet laid. First, I needed to adjust the stairs. See, when they were originally framed, the top step was about 2” higher than the rest of the stairs. In order to correct that, I needed to increase the height all the way down, all the while hoping that the bottom step wouldn’t be affected. Turns out, it wasn’t. So, I added fresh 2x12 treads to the stairs, cut out the original skirt board that was now too short, and set about cutting a new skirt board. For anyone that’s done this before, you’ll know it’s an easy thing to screw up. I did just that, but was able to get it close enough for carpet to hide my imperfect cuts. Moving on now to the banister rail, I wanted an oak runner on the floor, and it needed to be set and installed prior to carpet install. I also used oak newel posts and square iron balusters that needed to be mortised in. How do you drill a square hole? You first drill a round hole, then take a square mortising bit and either drill press it or, in my case, hammer it in to create the hole. Then you just need to drill a corresponding hole in the hand rail and voila. Easy, right? It’s best to measure four times and cut once, because these holes have to be exact or the balusters will not be plumb. Oh, and there were 24 iron balusters along the long run alone. Get it right, or pay the price.
We’re now ready for carpet! Move in day is getting really close. Here’s where all the pre-planning and hard work gets it’s just reward. The guys at Premier Flooring came in and knocked out the bedroom, hallway, and stairs in about 4 hours. Great job!
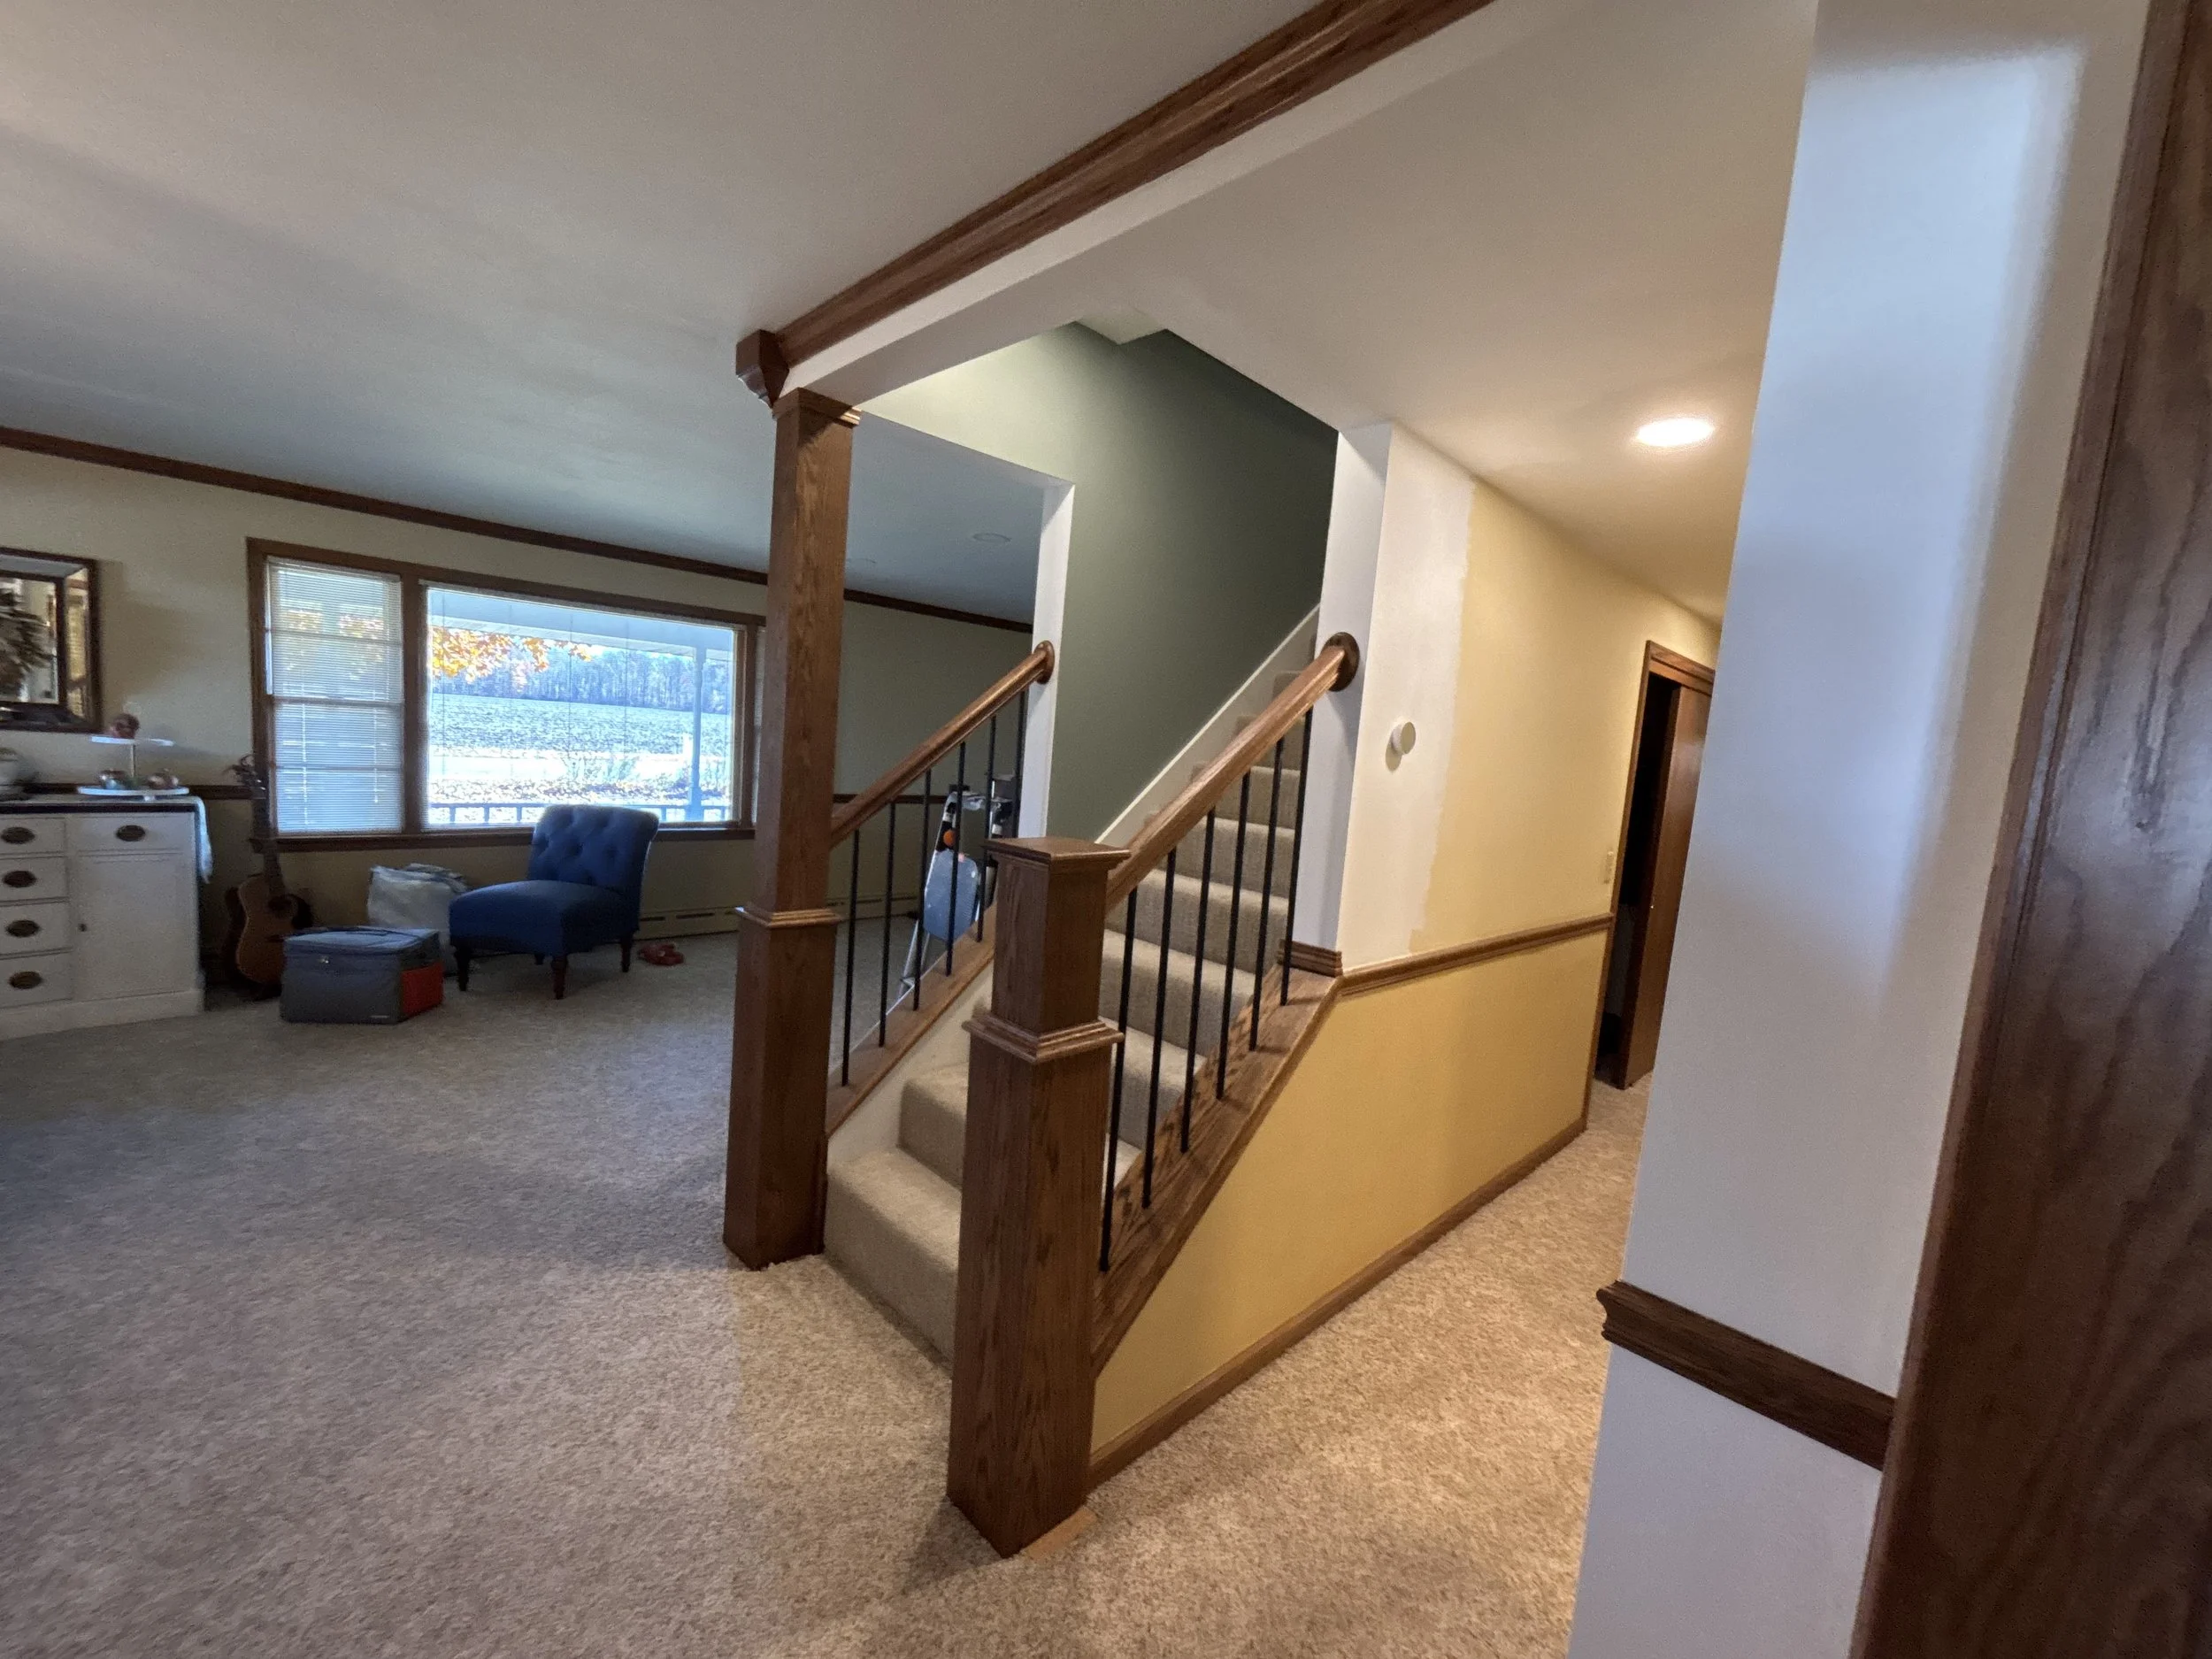
The final piece of this puzzle is now ready to be solved. At the bottom of the stairs was a door, and it was in the middle of the room. On one side was a hallway, and the other side was a sitting room. I started planning this entire project with the idea that I was going to open up the stairwell two studs back, or about 32” from the door. Therefore, all my plumbing, electrical, thermostat, skirt board, stairs, etc had to be in the right place to make this happen. The day finally came to take a sledge to it.

To my surprise and delight, I found that the framing of the door and the wall didn’t go up to the ceiling, which meant it was holding no real weight on the hallway wall. This wall is holding weight, but it’s more of a distribution of weight along the length of the upper floor joist. So, I could safely remove all that wonky framing, put in some blocking, and open this stairwell right up!
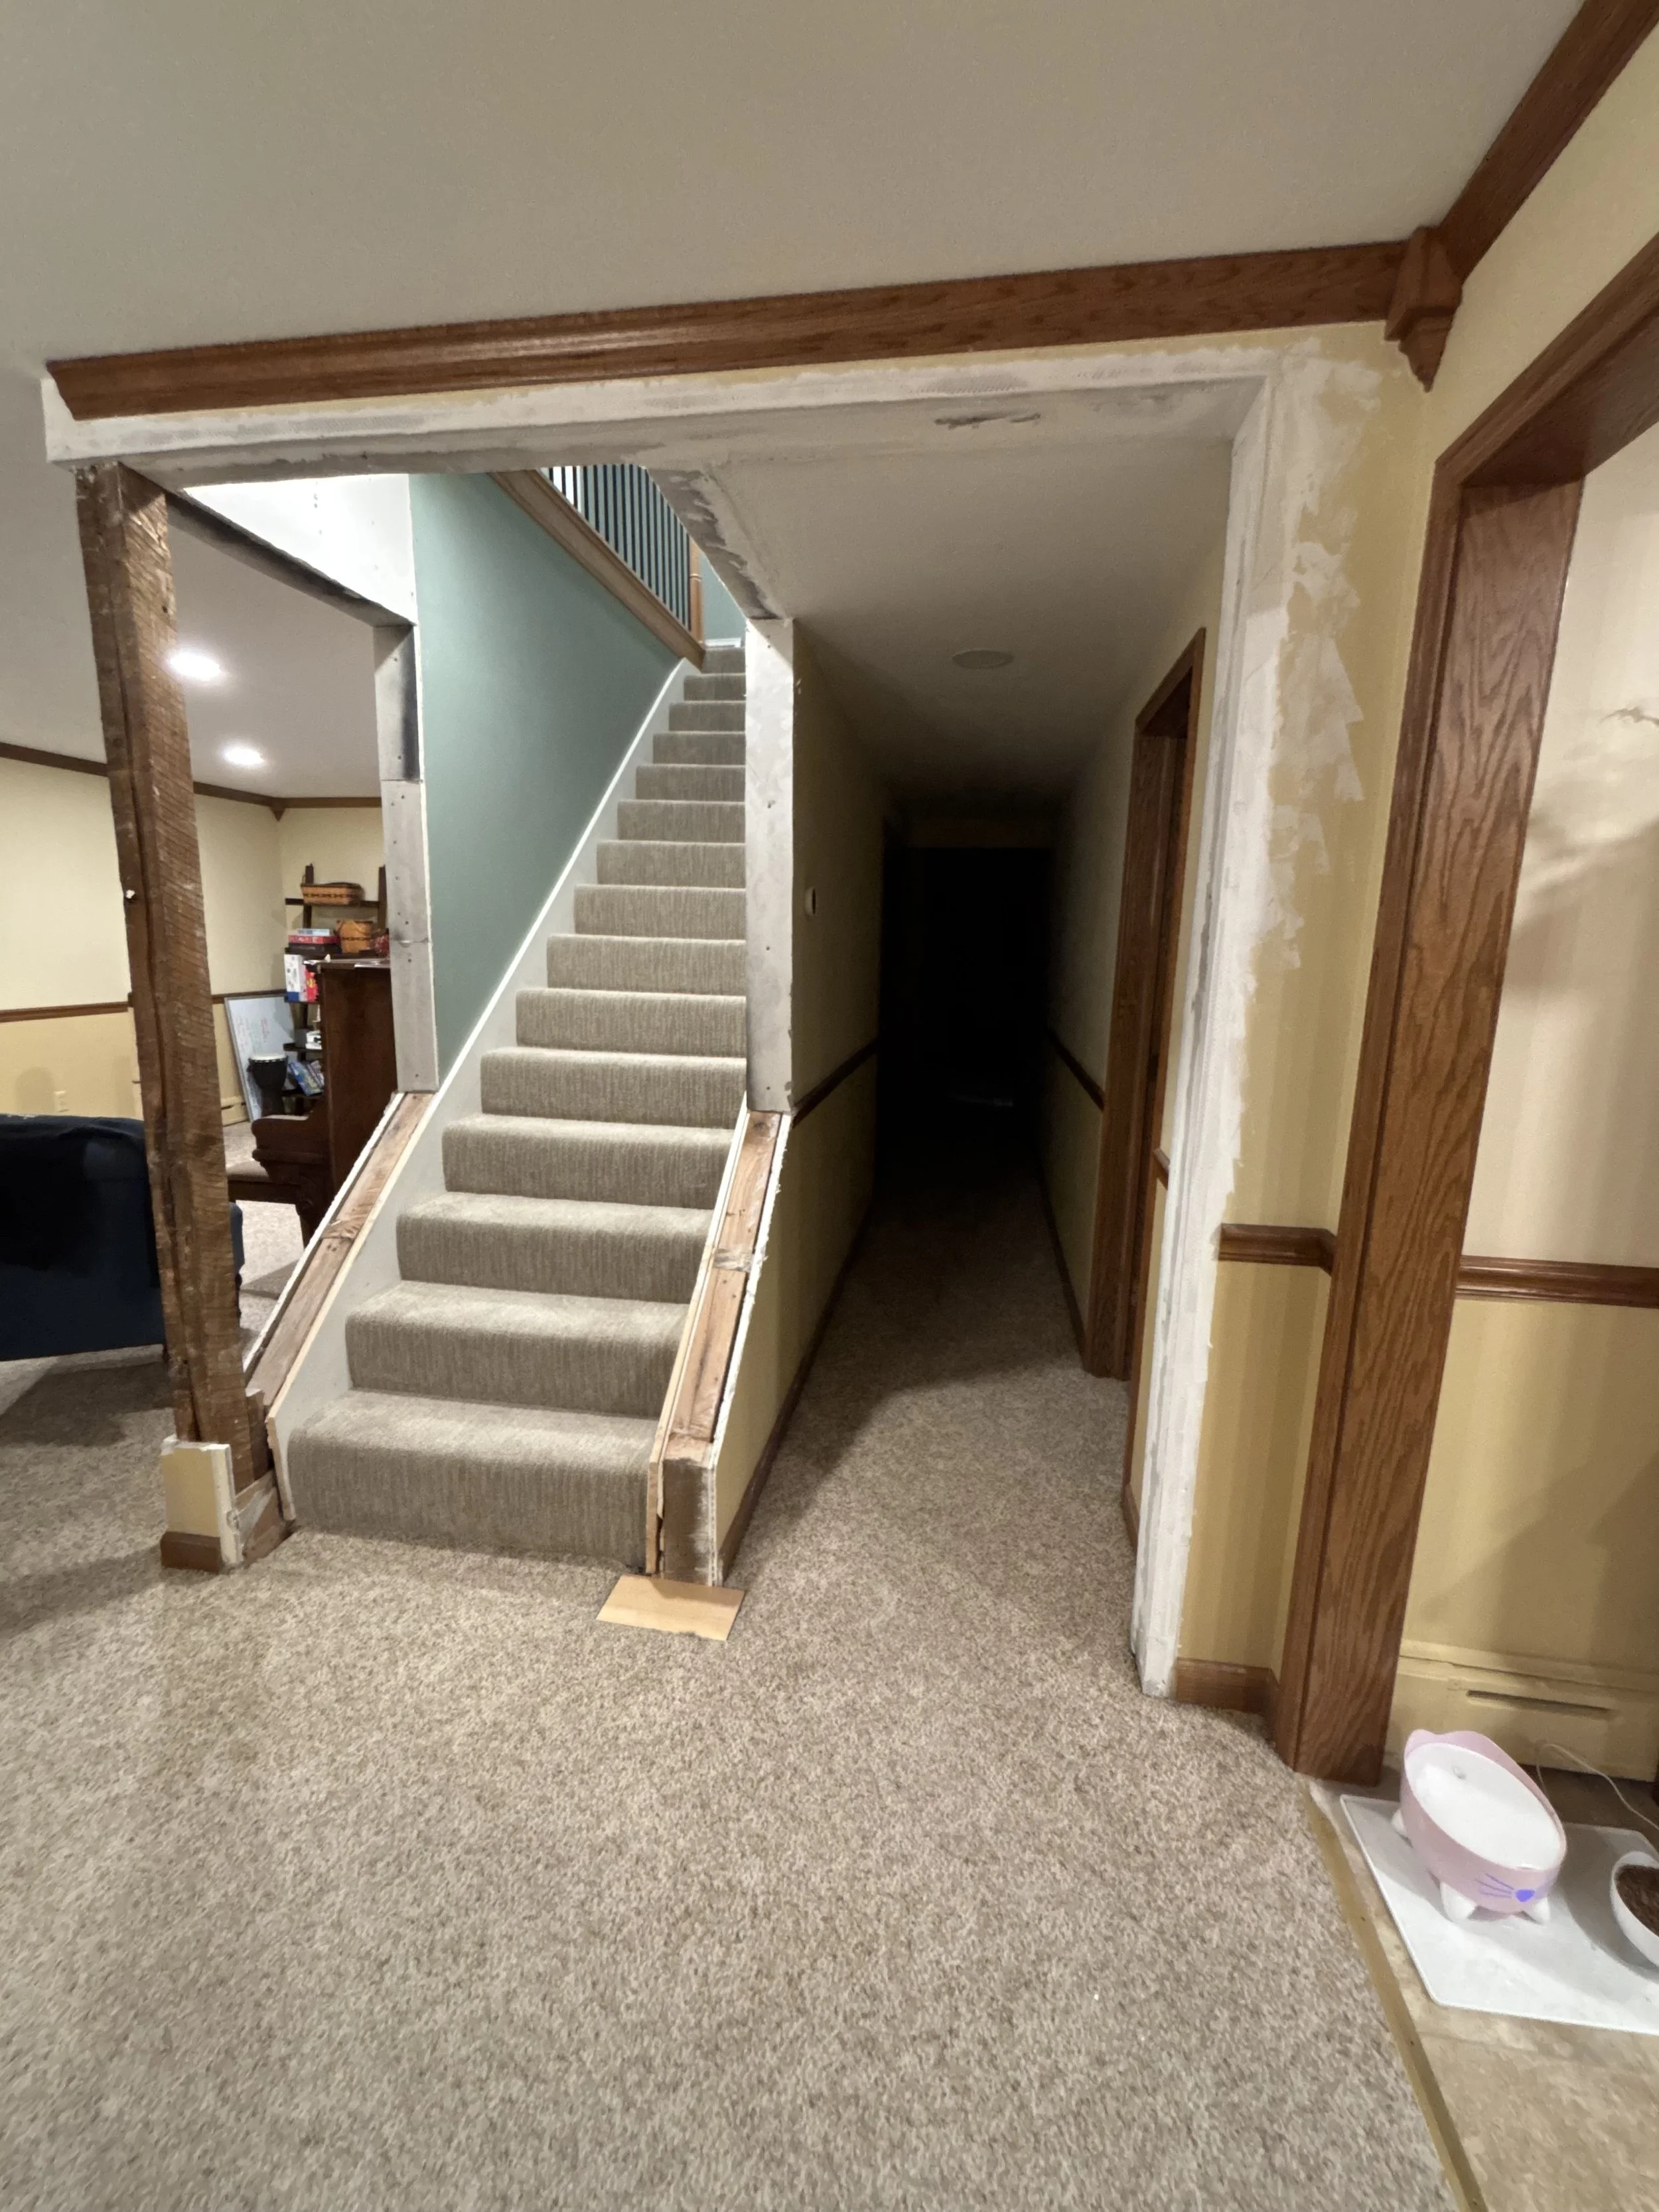
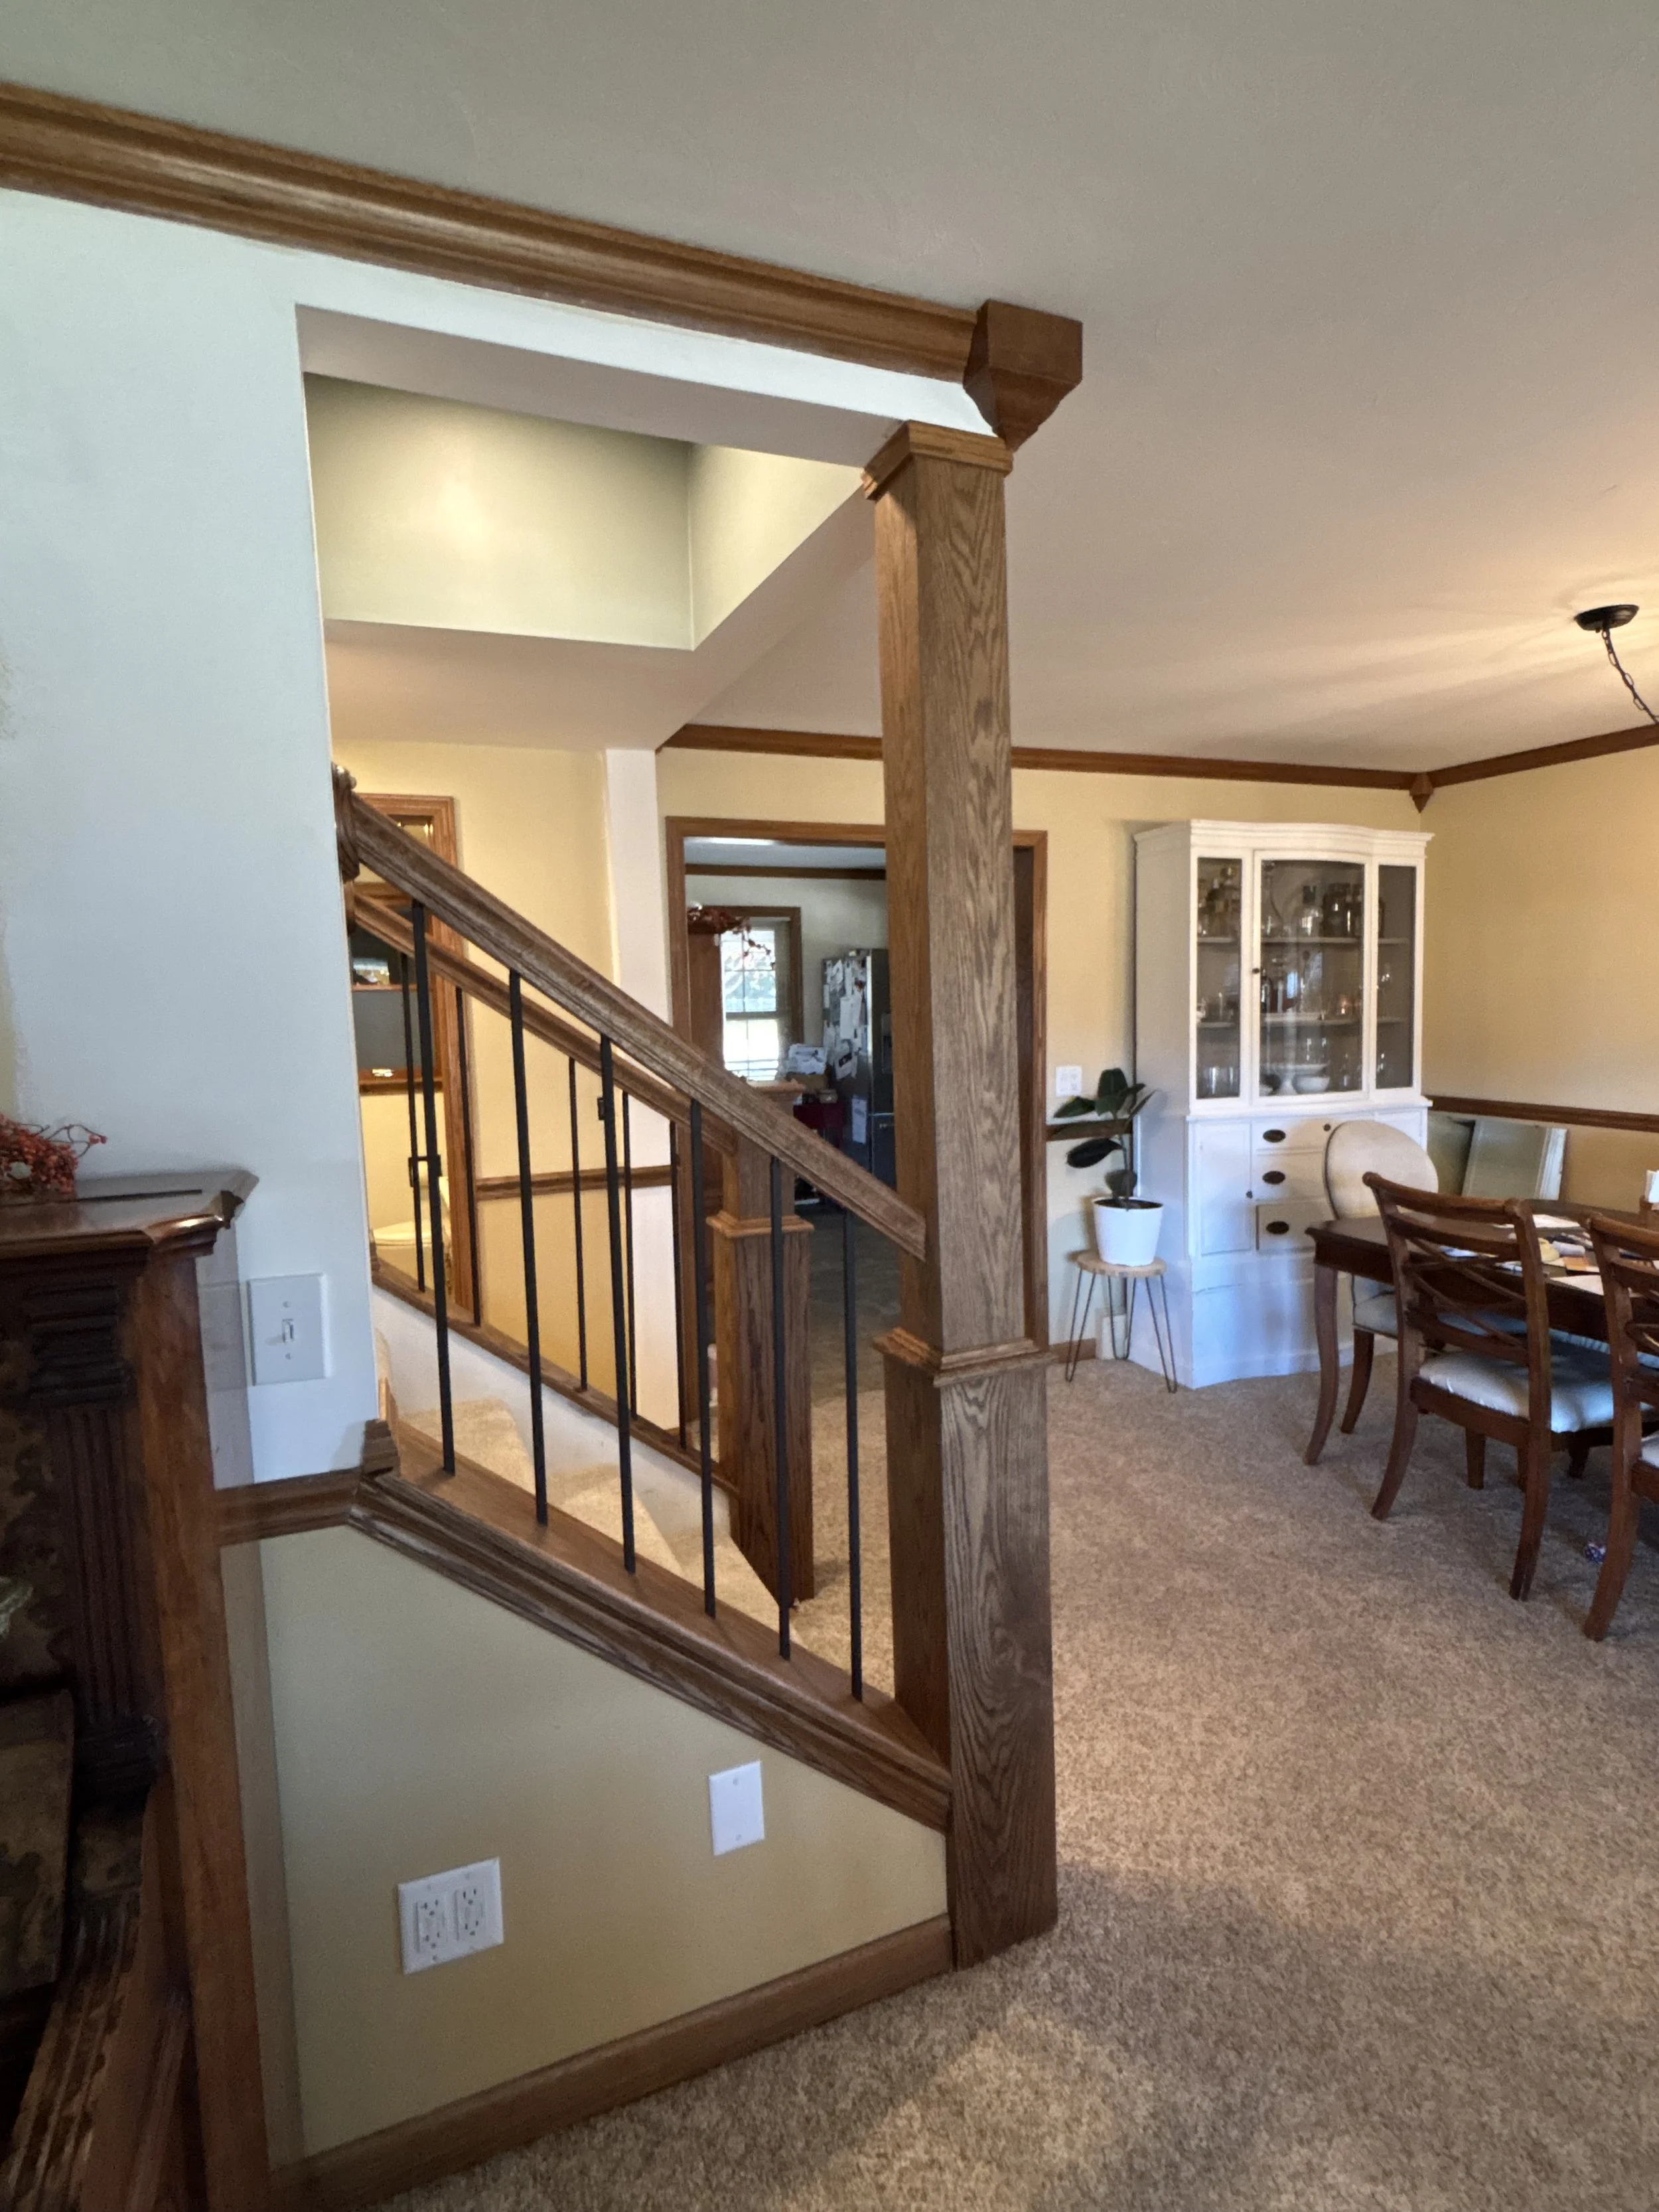
You’ll notice two ceiling heights here. The rest of the house has an 8’ ceiling, but the hallway and bathrooms are at around 7’6”. I was able to keep that 7’6” surrounding the opening, which allowed me also a way to maintain my oak crown moulding throughout, which does class it up quite a bit. After a bit of drywall, mudding, sanding, mudding, sanding, making a dusty mess, and a coat of primer, I was ready to tackle the rather intense job of finishing out the project. I wanted to maintain the darker oak look of the existing downstairs, and I wanted to maintain the chair rail. I needed to either remove the existing double 2x4 post or wrap it. I chose to wrap the post with 1/4” oak ply. Another neat thing about this house is that it’s out of plumb about 1.5 inches. It’s been standing strong since 1908, so I can’t complain about its build quality otherwise.
Regardless, I needed to shim out the 1/4” ply pretty dramatically to make this look respectable. Also, I wanted a matching newel on the opposite side. Since finished newels of that particular size and shape don’t exist pre-made, it was back to the woodshop. After testing different methods of attachment, I landed on using a locking miter joint that would keep my glue up clean, and my edges true. I then built matching 6x6 bottom surrounds to match the wall width. Remember, I have a skirt board terminating into these posts, and it’s a pretty thick wall to begin with. Also, The handrails will feature the same iron balusters as the upstairs, this time they will need to be drilling and square-mortised at a 33º angle. After much cajoling, I got it all put together. My favorite easter egg in this project was the use of grandpa’s old barn oak for the small pieces of trim.
With the stairwell now open, we called the job complete. It was intense and it took a long time, but we’re all the better for it. On to the next project! Could it be yours? I certainly hope so.